Thursday, October 30, 2014

Lauren's mermaid party and a free mermaid for you!

I'm so excited to share with you the party that I helped put on for my niece, along with huge help from Marlyn (Montreal Confections.) All of the goodies on the sweet table were made by Marlyn and were completely stunning.

Are you ready? It's gonna be a long post, full of yummy and crafty pictures...

lauren's mermaid party


This is my niece, Lauren. She just turned 4 and is currently obsessed with all things mermaid. Ariel, to be specific. The wig is killing me.

lauren's mermaid party


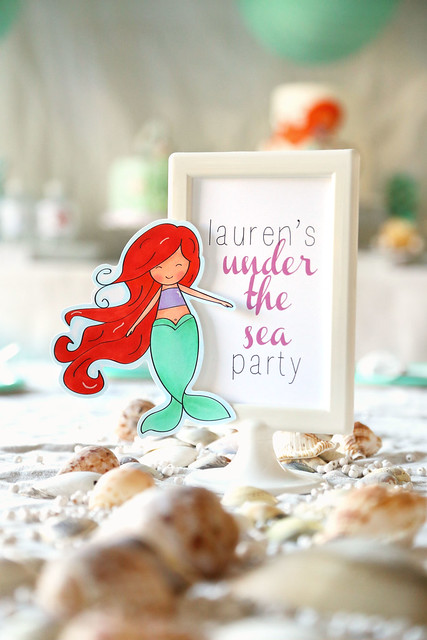
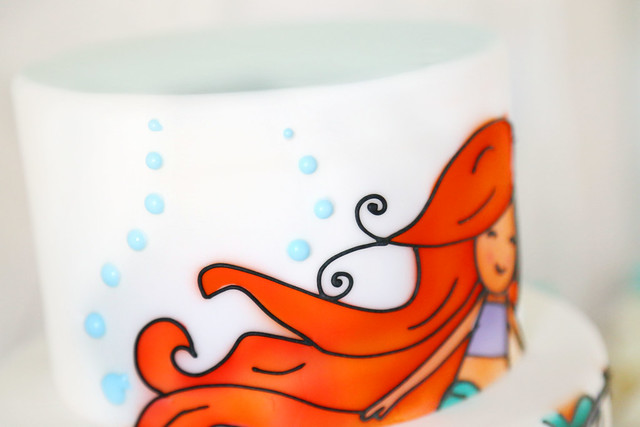
It's not exactly Ariel, but we created our own version.  I used Lawn Fawn's critters in the sea and the frame from sweater weather for the paper decorations. The mermaid? She's my own creation.  I illustrated her, and I think she fits right in with the critters! I love her to bits. If you love her too, you'll want to keep reading...

lauren's mermaid party

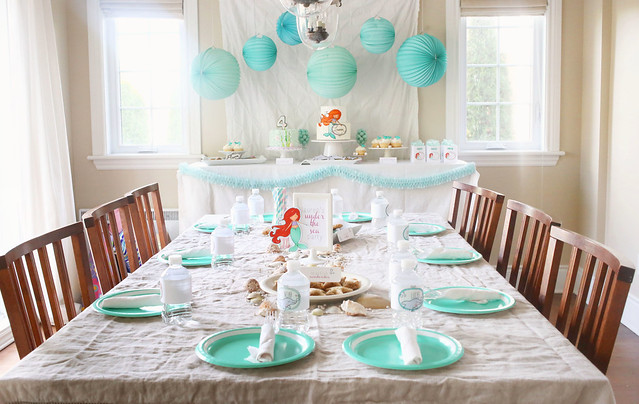
Here's what the entire party looked like, at a glance. I love the linen tablecloth that we used for the main table - we kept it wrinkly because I thought it looked like textured sand. Yes? ha.

lauren's mermaid party

The party table was bright and airy, and a little dreamy. It turned out exactly how I hoped it would! My sister bought the watery-colored hanging balls from Michaels, and I added a honeycomb garland (that I made from scratch, thank you very much). We kept it simple and fresh.

lauren's mermaid party


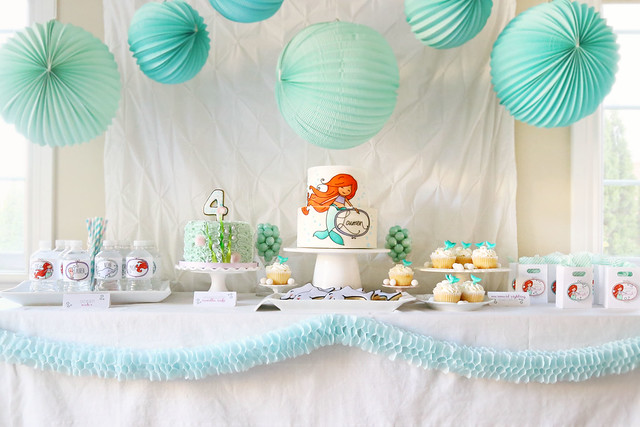
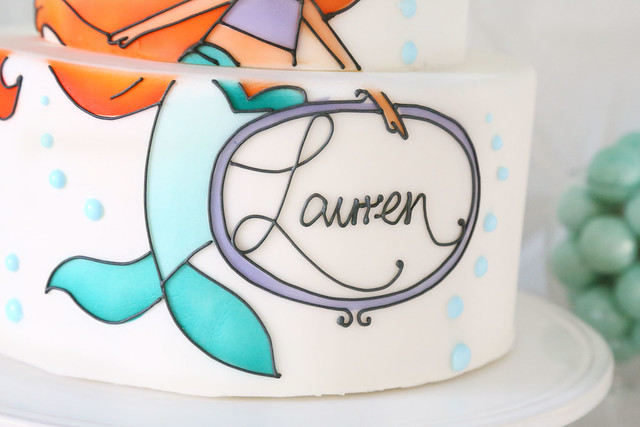
My favorite thing on the dessert table was this cake. I mean, that's my artwork.in cake form. It was all piped and airbrushed to perfection.

lauren's mermaid party

Marlyn has a tutorial video on youtube today. Even if you would never recreate these desserts, please go and watch the video! It's amazing to watch an artist at work - I love seeing behind the scenes stuff! CLICK!

lauren's mermaid party

I know my card-making friends will appreciate this: look! sugar enamel dots!

lauren's mermaid party


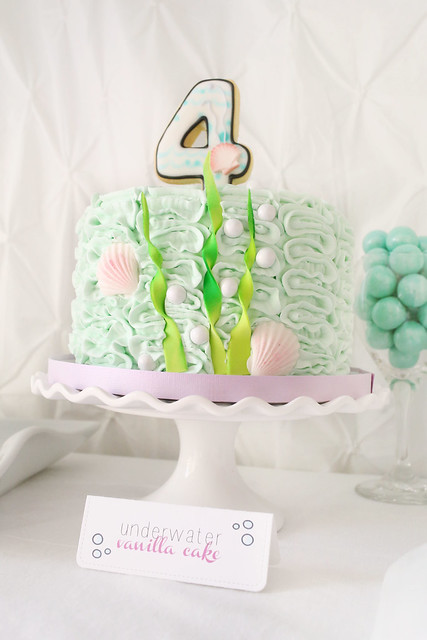
If one cake wasn't enough, Marlyn made a second cake. She knows how much I love her buttercream. hee.

lauren's mermaid party

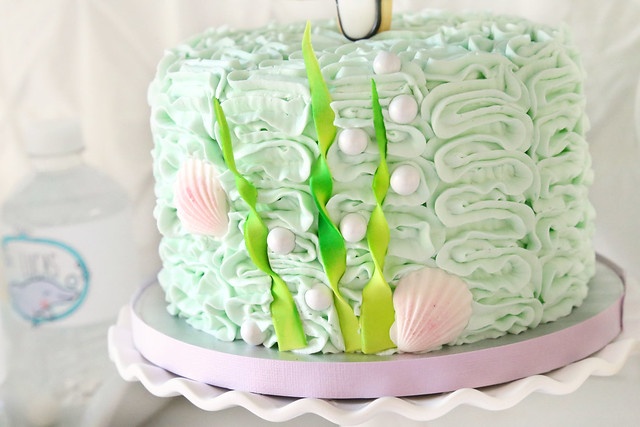
The shells and little pearls were the perfect simple touches.

lauren's mermaid party

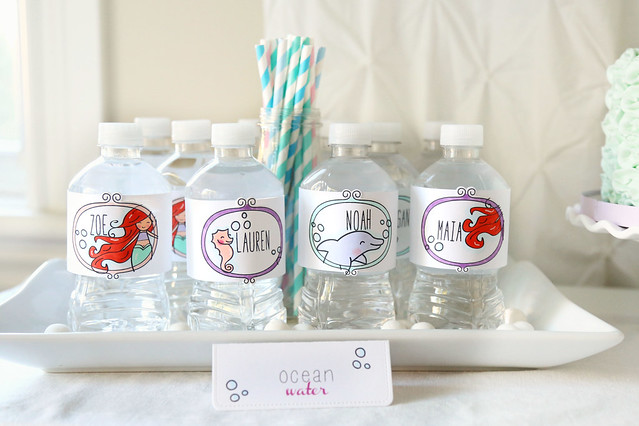
I created labels for the water bottles, and a few food markers using a mix of stamps and digital artwork.

lauren's mermaid party


Everything was kept light and white, with pops of color.

lauren's mermaid party

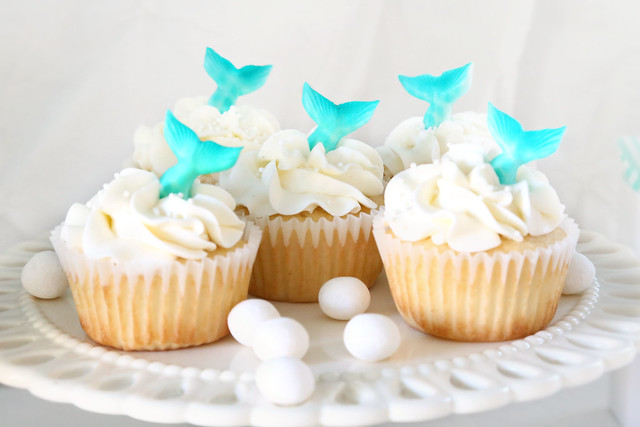
These cupcakes were labeled mermaid sightings and were so cute!

lauren's mermaid party

I love the sugar tails sticking out!

lauren's mermaid party

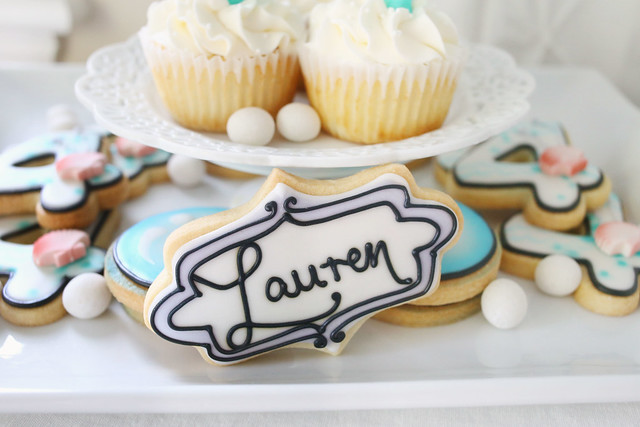
Of course, Marlyn made cookies. Like this one, just for Lauren, and the number 4 on top of the ruffled cake.

lauren's mermaid party

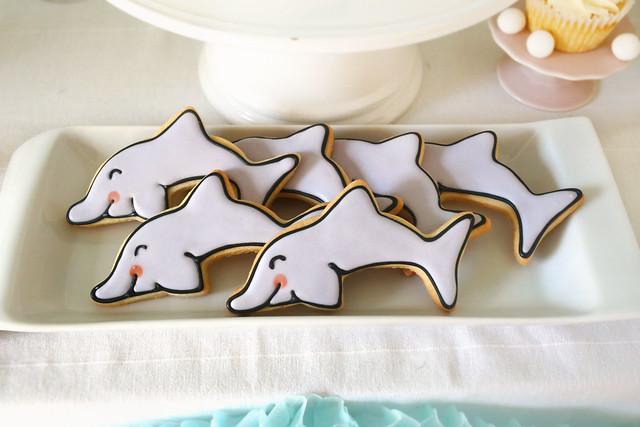
And the school of dolphins. hee. They make me smile! Marlyn hand-cut these to match the lawn fawn stamp!

lauren's mermaid party

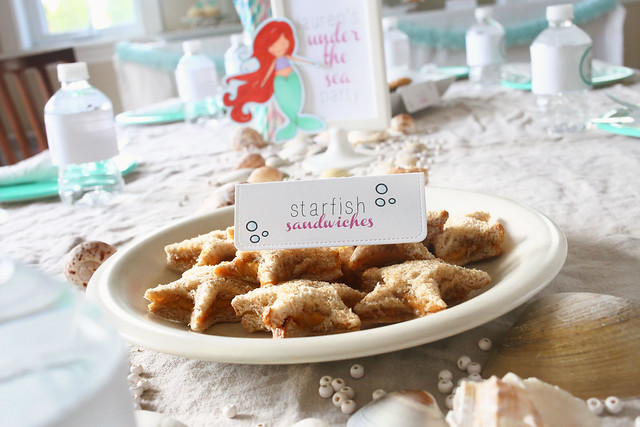
My sister added some special touches of her own, like these starfish sandwiches,

lauren's mermaid party

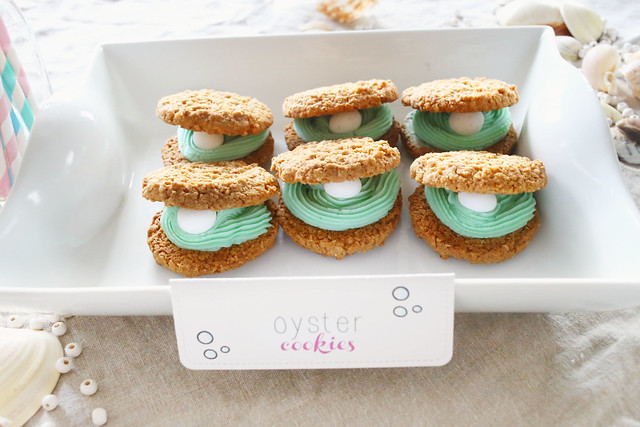
and these pearly oyster cookies. so cute!

lauren's mermaid party


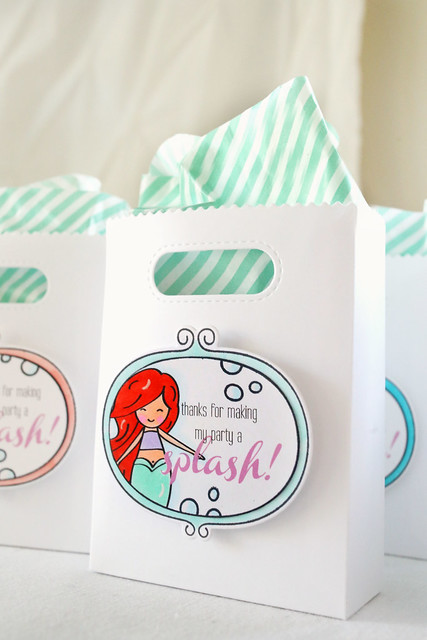
I made the take-home favor bag, and my sister stuffed them with goodies.

lauren's mermaid party

All in all, I'd say the birthday girl was pretty happy with what we created for her!

I hope you like it too! I have a special gift for you to take home too. If you like the mermaid that I illustrated to match the lawn fawn stamps, then download her and print her out for yourself!

I'm offering her to you in JPEG and PNG formats. Click on the link that suits you, and save to your computer. If you will use her with the lawn fawn critters, you'll need to shrink her down a bit!

Thanks for stopping by!

♥.

Wednesday, October 29, 2014

chill out! {mama elephant stamp highlights}

It's the last of the stamp highlights today, and we're showing off the fun, new alpha set: Block Party Letters.

This alphabet set is so fun to use! You can color just the shadow, or the opposite, or go bananas and give it a polka dot veneer like I did here:

chill out! {mama elephant stamp highlights}

The penguins are so cute - I had to bunch them all up together. When you are masking multiple elements, I suggest stamping it all out on a scrap paper first, so you could determine the stamping order. I stamped the 2 middle dudes here, leaving space between them for a 3rd guy to be scrunched in.  Then, the ones on the fringes, with their accessories.

chill out! {mama elephant stamp highlights}

They kill me. I love how easily they make a card come together - I mean, just a swipe of blue to highlight their white bodies, some blushy cheeks and orange beak and skates... er, yup. skates.

I colored the letters with pink and blue markers, and then dotted on some polka dots with a white gel pen. It all works perfectly with the pink and blue colors: on the letters, on the penguins. I'm a matchy-matchy kind of girl.

chill out! {mama elephant stamp highlights}


I mounted everything onto a giant tag, which I framed out by coloring a soft grey around the edges. And glossy accents for the balloon. That was a must, no?

I hope you like it! Check out the ME blog for even more inspiration!

♥.

Tuesday, October 28, 2014

let it snow {mama elephant stamp highlights}

Hi there, and welcome back to another day of Mama Elephant stamp highlights! Today, we're showing off the beautiful hand-lettered sentiment set, Season's Greetings.

let it snow {mama elephant stamp highlights}


I made a shaker card! I cut into the femme frames rectangle with the new instalove die - it created the perfect opening to showcase the greeting and sequin flurries.

let it snow {mama elephant stamp highlights}

I did some stamp tampering again, shrinking down the two largest carolers so that they looked more like my own trio of children.  And then I used the partial die-cut technique to cut them out together.  I know, I'm obsessed with doing this, but it looks amazing!

I added white polka dots to the middle girl's coat and skirt, and then carried the look to the card base, using Basic Borders.

let it snow {mama elephant stamp highlights}

The bow makes it feel like a Christmas present! It also helps balance out the carolers at the bottom.

I hope you like it! There's more to see on the Mama Elephant blog today - click!

♥.

Monday, October 27, 2014

sing it out {mama elephant stamp highlights}

Even though I've been showing it off for awhile now, today is the official alpine carolers highlight day over at Mama Elephant.

I've shown you:

some masking to get the kids to cozy up together,

how to create a bald-headed hubby,

how to customize the height of the carolers,

how to create a giant figgy pudding cupcake for a tiny caroler,

and that's just to name a few.

Today, I thought we should simplify things. I'm showing you how I originally intended the stamp set to be used:

sing it out {mama elephant stamp highlights}

No crazy masking - just stamping and die-cutting in the simplest way. A family, holding hands and singing their way into your hearts.

sing it out {mama elephant stamp highlights}

Sometimes, it's enough to just show off the images and put together a fun card.  I stuck to a light brown, grey, black, red and white color combo - in the coloring of the images and in the background papers.

sing it out {mama elephant stamp highlights}


The carolers, the quote from Elf, the polka dot paper... this card just makes me happy.

I hope you like it too. Check out more from the rest of the design team on the ME blog today!

♥.

Friday, October 24, 2014

custom carolers {mama elephant stamp highlights}

Hey there!

We're back for another day of Mama Elephant stamp highlights, and we're showing off the new Boutique Borders.

I couldn't help but pair the striped image strip with my cutie carolers:

custom carolers {mama elephant stamp highlights}


Remember I told you that it would be easy to customize the look of the carolers?  The ones on either side have been tampered with. hee.

custom carolers {mama elephant stamp highlights}

I used the ones in blue for these tags, and you can see the difference in the photo above.  All it takes is a little careful inking. Wipe off the ink below the skirt (or shirt in the boy's case) before stamping down once, and then ink only part of the legs and match it up. I love that it's so easy to do with clear stamps!

custom carolers {mama elephant stamp highlights}


When you are die-cutting the smaller carolers, you'll want to make sure to not cut it all the way through in one pass. Use the partial die-cut technique to send it through and cut each end separately.

custom carolers {mama elephant stamp highlights}

Once I stamped and die-cut the carolers, I popped them up onto a tag base - I love this shape, with its scalloped border. I swiped the scallops with a brown marker to make them pop, and did the same to the edges of the sentiment banner with a blue marker. It adds interest and polish to the final tag with hardly any effort at all.

custom carolers {mama elephant stamp highlights}

The sentiment is from bloomsies, and fits perfectly onto the banner found in the tags a lot set.

I hope you like what I've created! In case you missed it, I also turned the "daddy" caroler into a spitting image of my own hubby, hee hee - click!

♥.

Thursday, October 23, 2014

merry and bright {mama elephant stamp highlights}

Hi there, and welcome back to another day of Mama Elephant stamp highlights. We're showing off the hand-lettered, big-lettered Christmas sentiment set, Peace on Earth.

It is beautiful, and steals the show on every project:

merry and bright {mama elephant stamp highlights}

I made another giant tag, because I love them so much. Everyone is getting a giant tag for Christmas this year. I used the new scalloped border to create an all-over fringe on the tag base. If you look closely, you can see that the scallops work their way down the tag, but up from the bottom as well. I hid a strip of patterned paper into the space where they would meet. I wanted the outside edges to have a clean, straight look.

merry and bright {mama elephant stamp highlights}

I stamped and fussy-cut the giant sentiment, so that it would pop right off the tag.

I hope you like it!

There's more to see on the Mama Elephant blog this morning - click!

♥.

Wednesday, October 22, 2014

of penguins and carolers {mama elephant stamp highlights}

This is my second post of the day. If you're looking for lawn fawn gingerbread tags, scroll down or click *here.*

It's time for Mama Elephant stamp highlights! We're showing off 2 sets today, arctic penguins and jolly & merry. The sets were meant to work together, with images in the one and sentiments in the other.

I made 2 cards for you today. First off, a sweet little lonely penguin.

20140925_20

The ice blocks in the set are really small, and I wanted to have a huge one that would fill the entire card width. Some selective inking and voila!

Here's an idea of what I did, although I didn't end up using this for my final card:


If you stamp the penguin first, and then build the bigger ice-block around him it works so much better. You don't need the lines to join up over the masked penguin.

I hope the picture makes sense to you! It's really easy to customize almost any stamp this way.

penguins & carolers {mama elephant stamp highlights}

Once I had him on his larger ice block, I used the partial die-cutting technique to cut them out together, and set him adrift on the ocean. Two different copic markers are all it took to make a sea and sky, and I used a white gel pen to doodle in some waves.

20140925_25

The sentiment is from jolly & merry, and so cute!

Speaking of jolly & merry, I just love the larger script words found in that set:

20140925_12

I created a giant tag shaped card, and used the starburst cover as a backdrop to my scene.  The alpine carolers are holding a string of Christmas lights.

20140925_17

Aren't they cute? A lot of masking and inking to get the entire tag covered in a night sky color, with a yellow glow for the sparkling lights.

I heat-embossed "merry" and let it spill up onto the images. It's nice and thin, so it doesn't overwhelm the carolers.

I hope you like both projects! There's more to see on the Mama Elephant blog today!

♥.

gingerbread tags {lawn fawn's october inspiration week}

Hi there! It's another day of lawn fawn inspiration:

gingerbread tags {lawn fawn's october inspiration week}

I don't know about you, but I'm getting lazy. If a set doesn't come with matching dies, I don't use it as much.

gingerbread tags {lawn fawn's october inspiration week}

Thank goodness there are now dies for Sweet Christmas. I have been wanting to make gingerbread house tags for such a long time, but never wanted to hand-cut them all.

gingerbread tags {lawn fawn's october inspiration week}


If you wanted to make them yourself, you can get 10 tags out of 1 sheet of kraft cardstock. That's pretty awesome.  I watercolored in some red after having heat-embossed them all, but they looked just as cute without that splash of color.

I went the extra set of adding a second house to the back, so that they can be used for folded tags, or teeny tiny little cards.  I like having options.

gingerbread tags {lawn fawn's october inspiration week}
Hope you like it! There's more to see on the lawn fawn blog this morning - click.

I'll be back in a few hours with new Mama Elephant projects - see you soon!

♥.

Tuesday, October 21, 2014

skating with joy {lawn fawn october inspiration week}

Welcome back to another day of lawn fawn's october inspiration week! We're all skating around with winter penguin and the scripty joy die.

I combined both on the same card for you today:

skating with joy {lawn fawn october inspiration week}


I did some fancy die-cutting, so that the scripty joy could have a longer tail end that connects with the penguin's skates. It's all one piece, people! And it wasn't that hard to do. I've been bitten by the partial die-cut bug. If you want a great lesson, check out Pamela's video *here.*

skating with joy {lawn fawn october inspiration week}

What I did: I die-cut "joy" first, but stopped the die-cutting right after the "y." I didn't follow through to the end. Then, I drew pencil lines of where I wanted the script to go, and stamped the penguin right there at the end. The fussy part was die-cutting the penguin. I sent it through the machine a few times, at different angles, to cut everything but around his left skate. Whatever the machine couldn't get to, I cut out with scissors.

When the entire thing was cut out, I propped it up on foam squares. You know, to show off my careful work to the full! And, for added drama, I placed it all onto a siren-red backdrop.

I hope you like it!  Check out what the other design team members made using winter penguin and the scripty joy die - click!

♥.

Sunday, October 19, 2014

peace and joy wreath {lawn fawn october inspiration week}

Hi there! and welcome back to another day of lawn fawn inspiration. Today, we're showing off new alphabets! Finley's ABCs and Violet's ABCs.

Here's what I created:

peace and joy wreath {lawn fawn october inspiration week}


I put the Violet's letters into the frame from Sweater Weather. They fit perfectly! And I love the fancy "and" included in this alphabet set. So pretty.

peace and joy wreath {lawn fawn october inspiration week}

I stamped an entire wreath using Deck the Hall branches onto the card base. Then, I stamped out half a wreath onto a separate piece of cardstock and cut it out using the partial die-cut technique. That way, I got all of the nice die-cut edges without the bulk of layering individual branches.

I hope you like it!

♥.

Saturday, October 18, 2014

lawn fawn october inspiration week: a sweatered moose.

Hi there! It's time to kick off lawn fawn's october inspiration week! You can enter their big giveaway *here.*

Today, the design team is showing off critters in the arctic.

lawn fawn october inspiration week: a sweatered moose.

I couldn't help but draw him a little sweater, and doodle the same pattern onto his hat.

A little tip, when you are masking more than 1 thing, like I did here with both the hat and the cardinal. Think about your stamping order. Here, I stamped the hat onto a piece of white cardstock, masked it and then stamped the moose. I knew where I wanted the cardinal to rest, though, so I wiped off some of the ink from the moose's left antler before stamping down. The only thing that isn't seamless is the fact that you can see the moose's back through the cardinal's feet (feet? gah.)

I wanted this card to feel as warm as possible, so I used a falling snow stencil and some embossing paste around the focal image, and roughed up the edges of the patterned paper. The texture created lends that cozy feel I was after.

I hope you like it!

♥.