It's the start of lawn fawn's March inspiration week! Today, we're showing off happy trails and starry backdrops.
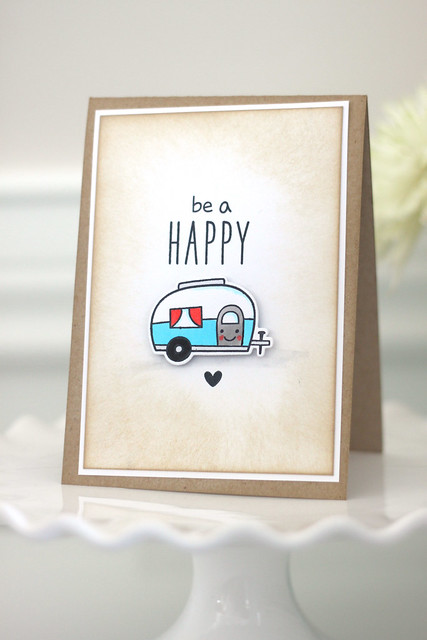
I made a pretty simple card, but it makes me smile.
I pieced together "be" and "a" from different words in the "on the mend" set. I made sure that they were the same font and size.
The smiley face is so cute! I had my choice of facial expressions from *this set.*
I hope you like it! There's much more to see on the lawn fawn blog today.
♥.
Showing posts with label happy trails. Show all posts
Friday, March 14, 2014
Saturday, February 15, 2014
happy trails {lawn fawn inspiration week}
Welcome back to another day of lawn fawn's inspiration week! Today, we're featuring the speech bubble border and the new "hello" die.

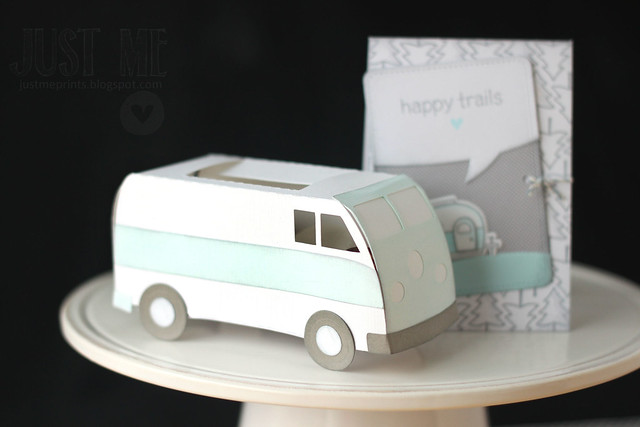
I like matchy-matchy gift sets, so I found a silhouette file for a camper candy box and put it together with a camper card.
I stamped out the trees from happy trails to fill the card base, shading each one ever-so-slightly. The main panel (the journaling card die) features the speech bubble die in 2 ways: as a speech bubble at the top, and as the hill-y bottom.
Check out the lawn fawn blog for more inspiration!
ps, if you decide to make this camper candy box, be warned: it is such a flimsy design. I had to build a proper bottom for it myself, for it to even work as a candy box. pfffft.

I like matchy-matchy gift sets, so I found a silhouette file for a camper candy box and put it together with a camper card.
I stamped out the trees from happy trails to fill the card base, shading each one ever-so-slightly. The main panel (the journaling card die) features the speech bubble die in 2 ways: as a speech bubble at the top, and as the hill-y bottom.
Check out the lawn fawn blog for more inspiration!
ps, if you decide to make this camper candy box, be warned: it is such a flimsy design. I had to build a proper bottom for it myself, for it to even work as a candy box. pfffft.
Tuesday, February 12, 2013
a water-colored smile.
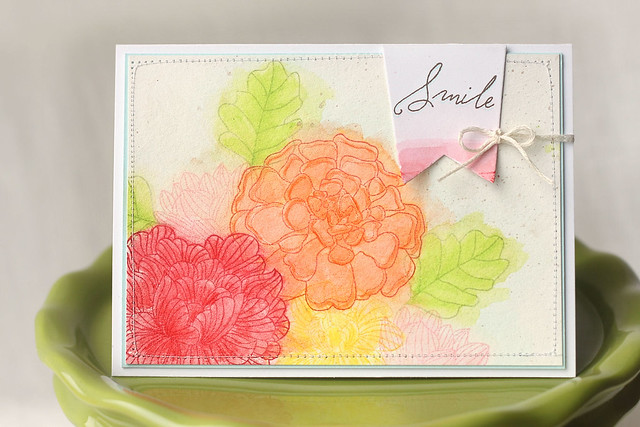
The PTI festivities are in full swing, and I'm only now joining in (in truth, there are a million household chores I should be doing, but meh - you know how it goes...) This challenge caught my eye, because water-coloring can take as much or as little time as you want to give it and still look good.
For this card, I stamped each bloom with a dye ink that matched the water-color pencil crayon that I would be using. I didn't want any harsh-colored borders around my images. I purposefully bled the colors out of the lines, for that messy water-color look.
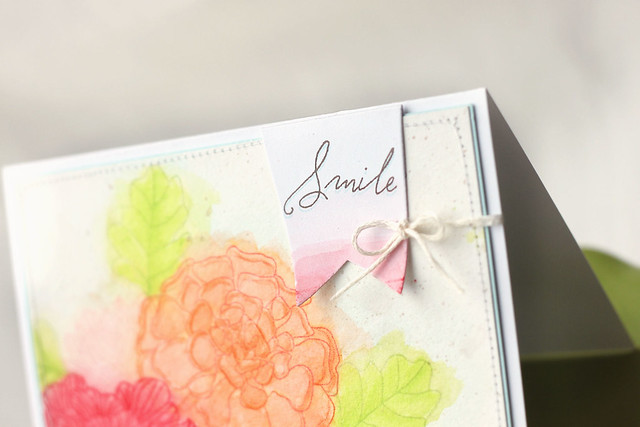
Once the colors went on there (and really, I was very heavy-handed with the brush, so it took no time at all), I splattered some light brown ink over the card (in case you weren't sure if I really wanted it to look messy or not *wink*) For the sentiment, I die-cut a CSS favor flag and water-colored the bottom only, and then stamped the sentiment (from "happy trails".) I stamped it in brown ink, and then ghosted the image in a pale blue ink.
In passing, sorry for the sloppy sewing - I think I need to replace the needle ;)
Thanks for stopping by! If you haven't already, visit my big giveaway post - you can only enter until midnight tonight!
Monday, June 4, 2012
Gallery Idol, round 2.
FOR GALLERY IDOL CONTEST VOTING, CLICK *HERE*
eeeeeeeeeek!
Words cannot even express how thrilled and honored I am to be participating in the Gallery Idol competition. After the initial "heart attack moment," when I realized that I made it to the 2nd round, I got started playing around with the idea that struck me within the first 10 minutes of reading this week's theme.
The theme is "you color my world."
Sofia (my 7 year old daughter) immediately suggested a smiley-faced rainbow. I also had flashes of crayons spelling out different words, die-cuts with rainbow colors peeking through the negative spaces - but yo - this is GALLERY IDOL. I had to bring it... my style. *grins*
Here is my very own "girl on fire":
I remember seeing a breathtaking poster with a black silhouette-d lady, where her hair flowed upwards in swirls and flowers... I really wish pinterest had been around at the time! Since our theme was COLOR, I kept the silhouette, the background script, and the ink splotches all very monochrome and let the colors sing and fly upwards on the card. This lady is in l-o-v-e (and probably walking around humming "you make me feel like a natural woman" to herself, hee hee.)
Wanna know which stamps I used and how I created my little lady?
I first stamped my silhouette in SU's crumb cake ink. See the cameo stamp? (from Paper Smooches' "pretty momma" set) - I inked her up, then gently wiped off the frame around and the back part of her head. Too bad, so sad, lady - it all had to go *wink*
Next, I added flourishes (from PTI's "fancy flourishes" set) in a rainbow of colors - red, yellow, orange, green, and blue!
uh, she didn't make the end cut... I gave her quite the poof on the bottom, didn't I?
For a final touch, a little bling-y butterfly (from SU's "elementary elegance" set - which I found to PERFECTLY coordinate with the smallest butterfly from the "beautiful wings" embosslit - did you SU demos already know that? hee. You probably already did.)
I really, really hope that you like my project... and if you did, I would be forever grateful if you would go vote for me!
Click *here* to visit the top 20's gallery and cast your very important vote! I will also have a voting widget on my blog's sidebar that will stay up for as long as I'm in the competition - use it! haha.
Have a fantastic day, all, and thanks for coming by!
Tuesday, March 6, 2012
no-bunny, no-eggy easter cards...
When a nice lady from church says: "I heard you make nice cards. Will you make my a few Easter ones to give out to my friends?" you say yes, and ask questions later. Now, it makes total sense that she wouldn't want Easter cards with bunnies or easter eggs on them, but that's all I seem to own. Oh dear.
I found this card of Ashley's and thought it would translate to a nice Easter card:
Thanks for peeking!
I found this card of Ashley's and thought it would translate to a nice Easter card:
I'm still working through the "my mind's eye" christmas papers that I've got - I'm determined to use them all before next Christmas :) The sheet music background worked perfectly for this card.
And Betsy made a beautiful card in the latest Papercrafts magazine that I couldn't help but CASE. I computer-generated the greeting, and used "distressed stripes" to create the multi-colored sun-rays...
I'm also entering this card into the latest Papertrey Princess challenge: to use the negative of a die-cut. I'm technically using the positive and negatives together, so I hope it still counts!
Thanks for peeking!
Tuesday, February 14, 2012
PTI anniversary, day 10: paper airplanes.
I made a quick 2nd interactive card for today's challenge. I mimicked their new spiral die and came up with this:
I stamped "distressed stripes" in 3 SU ink colors: pale plum, daffodil delight, and pool party. The colors are repeated in the paper airplane, the swirl, and the sentiment (all from "happy trails"). The card front is almost completely flat (except for the paper-pieced airplane), but when you open it up:
It's a party, yo.
Monday, February 13, 2012
PTI anniversary, day 9 + MIM
Butterflies and botanicals.
Such an easy pairing.
I added this week's MIM technique into the mix for some extra fun....
I cut a mat stack 5 shape, using the technique demonstrated by Jennifer, mixed some drops of a re-inker and some shimmer spray and applied it to the coaster using a brayer. I then stamped the woodgrain pattern overtop. It really looks more "woodsy" using this technique!
I then die-cut 3 butterflies and stamped both sides with the butterfly image (from "happy trails".) I folded 2 butterflies and adhered them to look like they are in flight - love it!
The card-base was stamped with images from "harvest berries," and I die-cut the largest set of leaves, leaving them overhanging at the top. (TIP: I cut the card base slightly skinnier than a regular A2 card size, to accommodate the leaves for easy mailing!)
Thanks for looking!
Such an easy pairing.
I added this week's MIM technique into the mix for some extra fun....
I cut a mat stack 5 shape, using the technique demonstrated by Jennifer, mixed some drops of a re-inker and some shimmer spray and applied it to the coaster using a brayer. I then stamped the woodgrain pattern overtop. It really looks more "woodsy" using this technique!
I then die-cut 3 butterflies and stamped both sides with the butterfly image (from "happy trails".) I folded 2 butterflies and adhered them to look like they are in flight - love it!
The card-base was stamped with images from "harvest berries," and I die-cut the largest set of leaves, leaving them overhanging at the top. (TIP: I cut the card base slightly skinnier than a regular A2 card size, to accommodate the leaves for easy mailing!)
Thanks for looking!
Thursday, February 9, 2012
PTI anniversary, day 5 + "things my kids said" thursdays
***there's still time to enter my gift-certificate giveaway! Click -here-***
I thought I'd reverse the order today - kids stuff first, card second ;) Time for my 2nd thursday installment - my 20-month-old Maia woke up with CRAZY hair the other day (I'd love to say it was an unusual sight, but no), and 2 tufts stood straight up on either side of her head. Sofia, (she's 6), took one look at her, and yelled: "it's like a helicopter!" I whispered a quick something into Maia's ear, and she gave a hearty "go, GADGET!" hee hee. The things we teach our kids. We were all in stitches - it was the most pleasant hurry-up-and-get-to-the-bus morning of the week :) Don't forget to share your own kid-funniness in the comments section - I love hearing them!
Now, back to business/play time: today is Pinterest inspiration over at PTI. Love it. I pinned the print (above) this morning, and got busy.
My full-disclosure for today is that this is the 3rd take on the same card. Some inking-problems, a few layout issues, but I'm happy to say I think I worked them out :) I embossed my card base with an SU folder first. THEN I SET IT ASIDE (no red ink on this one, lol!). Next, I stamped my aqua mist mat with polka dots in versamark ink. The "you" was selectively inked from a "think big favorites" sentiment, and then flanked on either side with part of a picket fence die-cut. The sentiment banner was created as per last week's MIM tutorial - I love the look! I stamped the back-side of the banner with an image from the "mat stack 4" set.
I stamped the bird (from "happy trails") in aqua mist ink and then, with a sponge dauber, inked up his little belly in red ink.
Thanks for looking!
Monday, January 16, 2012
hi.
I hate having things lying around, incomplete. I was cleaning up my craft area (can't call it a craft room, since it's just a little corner of our basement office/tv room/craft room/exercise room/sewing room) and I found a few greats elements that were begging to be turned into a card.
I had a leftover strip of diy patterned paper (made with PTI's "rosie posie", with a little "grunge me" hummingbird thrown into the mix), a chipboard frame, and a huge button on the table.
I sponged some peach ink onto my chipboard, added another bird-in-flight (from PTI's "happy trails"), threaded the button, and called it a card.
Sometimes my best cards are after-thoughts. I really love this one!
How do you create? Do your favorite cards take days to create, or come together more quickly?
Wednesday, January 11, 2012
CAS card class.
Can you tell I'm feeling much better? 2nd post of the day!
I started an online card class on Monday, and I'm playing catch-up. I've just had time to watch the day 1 video and was inspired to create my version of Kristina's card:
I stamped the same vintage wallpaper background on a sheet of white paper in a yellow ink, and the die-cut 3 tiny hearts (from PTI's heart prints dies). They were popped up on foam squares.
Thanks for looking!
I started an online card class on Monday, and I'm playing catch-up. I've just had time to watch the day 1 video and was inspired to create my version of Kristina's card:
I started with a textured piece of SU's sahara sand cardstock. Once scored, I placed a die-cut of a mat-stack 1 shape in the middle (cut out of masking paper so it sticks down completely!) I then stamped the entire card-front with Marketstreet's vintage wallpaper background in a light grey ink. When I removed the mask, I was able to stamp the frame from PTI's mat stack 1 set right into the opening. I like how there is some space between the frame and where the design starts, but if I didn't like that, I simply had to cut out my mat stack 1 image (instead of using the die-cut, which is slightly bigger.) I think I like my way better because it saves cutting time :)
I sponged around the entire card-front in the same light grey ink, and then stamped the greeting (from Happy Trails) into the focal frame. The swirl and ink blot are images from the same set.
I stamped the same vintage wallpaper background on a sheet of white paper in a yellow ink, and the die-cut 3 tiny hearts (from PTI's heart prints dies). They were popped up on foam squares.
Thanks for looking!
Subscribe to:
Posts (Atom)