Showing posts with label in bloom. Show all posts

Tuesday, February 12, 2013

a water-colored smile.

water-colored smile

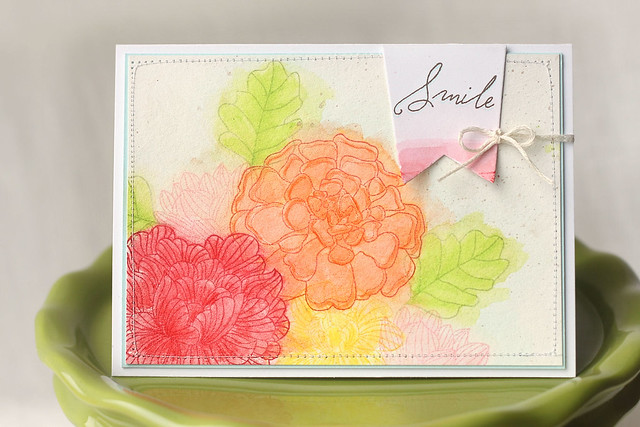
The PTI festivities are in full swing, and I'm only now joining in (in truth, there are a million household chores I should be doing, but meh - you know how it goes...)  This challenge caught my eye, because water-coloring can take as much or as little time as you want to give it and still look good.

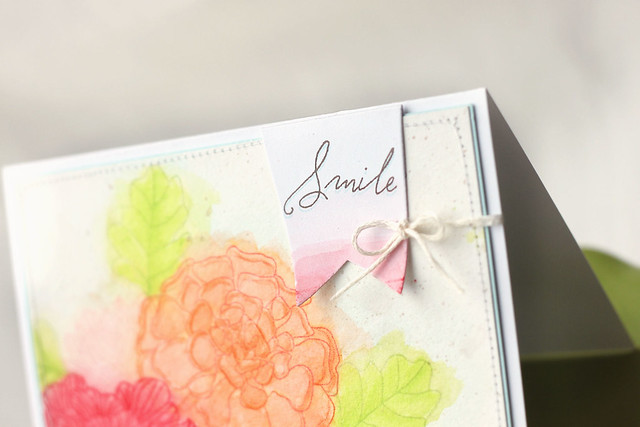
For this card, I stamped each bloom with a dye ink that matched the water-color pencil crayon that I would be using.  I didn't want any harsh-colored borders around my images.  I purposefully bled the colors out of the lines, for that messy water-color look.
water-colored smile

Once the colors went on there (and really, I was very heavy-handed with the brush, so it took no time at all), I splattered some light brown ink over the card (in case you weren't sure if I really wanted it to look messy or not *wink*)  For the sentiment, I die-cut a CSS favor flag and water-colored the bottom only, and then stamped the sentiment (from "happy trails".)  I stamped it in brown ink, and then ghosted the image in a pale blue ink.

In passing, sorry for the sloppy sewing - I think I need to replace the needle ;)

Thanks for stopping by!  If you haven't already, visit my big giveaway post - you can only enter until midnight tonight!

Friday, January 25, 2013

based in black {PTI blog hop}

I squeezed in a little time for this month's PTI blog hop.  The inspiration photos were just too.... er... inspiring.  *grins*

based in black.

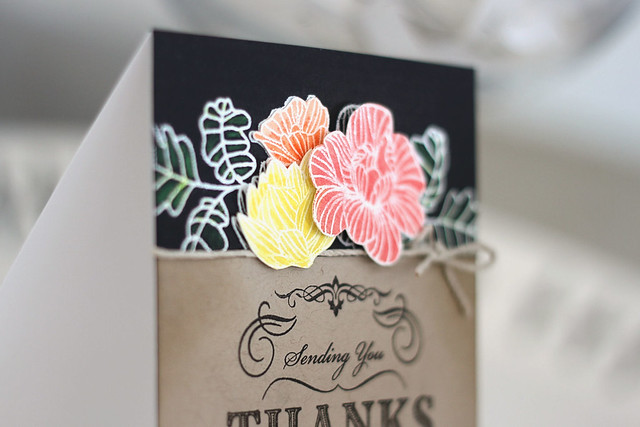
I started out with a black cardstock panel, and heat embossed florals from "in bloom."  I colored the leaves with a green inktense colored pencil - they're amazing, the way they pop on dark-colored paper!  I heat-embossed the blooms again on watercolor paper, and watercolored them with different inktense pencils.  They were cut out, and layered with different heights of foam squares.

based in black.

The large thank you sentiment is so beautiful, and fancy enough to stand alone on the kraft panel.  I was especially inspired by the tag on the top right:


That's it for me!  Happy hopping, and thank you for popping over here!

Friday, May 25, 2012

May PTI blog hop

Yesterday, I showed you the set of cards I made for Thomas' teachers on his last day of preschool.

But his main teacher deserved a little special attention.  I was inspired by the PTI blog hop photo:


When I saw that fancy place setting, I immediately thought of the fancy treat that might be served on one of those plates.  Actually, I thought the cupcake card would make a cute place-card, with the person's name written on the hanging tag instead of "merci"... but that's for another day :)  I needed a french thank you card right now.

In addition to the card, I made a gift-card holder using the Clear and Simple Stamps "mini tri-fold 1" die.  (It's larger than the PTI lunchbox note and the giftcard holder, in case you're wondering.)  I thought it would be fun to decorate it to match the main card.  The cupcake wrapper, the same swirl of frosting - we're seeing a cupcake here, right?

(When we delivered the present yesterday, there was a gift-card in there, I promise...just showing my level of procrastination again here... hee!)

Here's the set.  For both, I stamped the cupcake wrappers with PTI's gingham background in black, and stamped flowers from "in bloom" onto some scraps of lime green paper (I know it's SU papers, and I think the color is kiwi kiss.)  The "frosting" was embossed with an SU folder and sprayed with a studio calico shine mist.

I wanted the flowers at the top to look like whimsical, edible flowers, so I cut in between the petals and curled the blooms a bit.  That made all the difference in giving the card some movement.

Hope you like my set - and I hope Thomas' teacher was a bit wowed too :)

Thanks for hopping over here - have a great weekend!

Friday, March 30, 2012

ColourQ #130

I whipped up a quick card for this week's colour Q.  (Quick, because I'm in the middle of sewing 7 stuffed, fleece monsters, and making monster party invitations... I can't wait to start sharing all the party stuff!)

If the card looks familiar, it's because I just finished making baptism invites with a similar pattern, but the brighter colors freshen it up a bit...

Here's is the challenge inspiration... so pretty for Easter:


and my card:

I used the colors listed, but the closest thing to tempting turquoise that I have is SU's pool party.  I'm wishing I had that stronger blue to pack in a good punch!

I stamped a floral pattern onto my focal panel, then die-cut a PTI "fillable frame" and stamped the coordinating image onto my card base.  I mounted the floral panel onto the base with foam squares.

Have a great weekend, all!

Monday, March 19, 2012

Using leftovers+PTI princess challenge.


Sometimes, happy things happen.  Like, the baptism invites you were in the middle of creating gave you enough extra pieces to create a(nother) card set by request....  

And, in spring colors too!  So I'm entering it into our latest PTI princess challenge :)  Let's peek inside, shall we?  (ps, today's pics are courtesy of Tanya.... these are the kinds of photos I want to take when I grow up.)


This is what happens when you place a beautiful little rosette onto 10 card-fronts... no box would hold these fatsos, so into a bag they went :)


I love the pitter-patter of rain behind the gift bag.  le sigh.


For this card, I used a hero arts grid-pattern background, and a mix of PTI stamps to create the floral pattern in pinks and peaches.  The little rosettes were cut out of sunny yellow cardstock.  


Thanks for peeking!

Friday, March 2, 2012

Digital+stamped invites.

I have the happy dilemma of having crafted too much this week!  Sooo, I'm just sitting here wondering what to share with you today, and what to keep on the burner 'til Monday... and just  now, in this instant, the samples I made for a baby baptism are winning out :)

The couple asked for something feminine, floral, and with a spring-time feel.  Obviously, besides the little girl's name, all information is incorrect (ok, I think the church is real also, since I thieved it from a previous invitation I'd made for someone else... I seem to have tapped into this particular market...ha!)


I formatted the text, and simply stamped some florals from PTI's "friendship jar: summer fillers" set at the top, and the line strip from Hero Arts' "my happy" at the bottom.  A huge pearl gave it the necessary bling (we greeks, we need some bling on a card!)


This was her favorite :)  The text is a soft grey, with her daughter's name in pink.  I used a few PTI sets to stamp the pink and peach florals: "in bloom," "rosie posie," "YOTF: marigolds," and "turning a new leaf."  


This one was my personal favorite.  I used a peach, pale plum, light blue, light green color combination and lots of different sets.  I even threw in a few snails from "way to go, kiddo!" - I love it *big grin*

Thanks for peeking, and have a great weekend!

ps, I must have taken 100 pictures of these 3 cards, and I am still not impressed with the outcome... sigh.  I should have tried photographing them flat, I think...

Tuesday, February 7, 2012

MIM #52: double-sided stamped die-cuts.

hi peeps!

I'm playing along with this week's MIM challenge - stamping on the reverse side of a die-cut, and folding it over to show the "other-side" stamping.


I used "in bloom" to stamp a border along the right side of the card, masking the leaves and blooms as I went along.  After I cut it out, I used a black marker to trace along the edge, to help it look more finished (sigh.  my markering skills look more than a little sloppy in the pictures, but more forgivable in real life.)

For the MIM technique, I stamped the same flower and leaves onto white paper, colored them, and cut them out (note to self: purchase dies.)  The leaf isn't symmetrical, but I made it work by only stamping part of the leaf on the backside, and only curling that small part of the paper.


Even though the border isn't perfectly cut out, I still like the look - I'll be trying this again!


Thanks for peeking!  And please, please, please come back tomorrow - it will be my 1 year blogiversary, and there will be a few giveaways! 

Wednesday, January 4, 2012

houndstooth & damask card set.

I was totally blown away by *this card* on Ashley's blog.  And since I needed to whip up a quick card set for a last-minute gift, I cased her design, rather than start from scratch creating my own.  Sometimes it's just like that.


The set came together so quickly, except for cutting out all of the flowers by hand.  That'll teach me to not buy the matching dies *wink.*


Thanks for peeking!

Tuesday, November 1, 2011

MIM #39 - multi-stamp-background

Using different stamps, in different sizes, you can create your own background papers.

I custom-made the floral background paper, using the following steps:

step 1: stamp rows of the circle border (from "tag its #2")
step 2: stamp the flower inside each circle (from "in bloom")
step 3: fill in the gaps with the tiny circle image (from "fly away") - I just noticed that I missed to stamp one area!  Can you spot it?  ha ha.  I'll go back and stamp the live card :)


I did create an extra step, which was to stamp over the whole thing with the hero arts envelope pattern background stamp.  I feel like the subtle pattern helps to unify everything...

The colors I used (crumb cake, baja breeze, and very vanilla - all SU) fit in with this week's Play date cafe challenge.  I'm sliding my card under the door, so to speak.  I think there are only a few more hours of play on that one.


Thanks for looking!

Tuesday, October 4, 2011

MIM - washi tape

I l-o-v-e learning new techniques!  And I especially love when the technique is simple and fun, and something I would have never thought of on my own.

I made my own washi tape!  Click over to Nichole's blog if you're curious - and make your own washi tape!  It's addictively fun.


I used PTI's grid lines cardstock and held my doily in place with the homemade washi tape.  Thanks to a silhouette-owning-crafty-friend, I had a few speech bubbles on hand.  It was stamped with a "think big favorites" sentiment, and framed out with "in bloom" images.  I also added a faux-stitched border all around and mounted it with foam squares.

I'm also sending a shout-out to my PTI princess friends with this card!  Our current challenge was to use red on our card.  I made a red gingham washi tape strip, and stamped out the florals in the same deep red.

Thanks for looking!