Monday, March 11, 2013

Shoot for the stars...

Sometimes, not having to think about embellishments or patterned paper is so fun.  I love taking out stamps and ink and just playing around with them!  My fingers are black and blue, but by some miracle, my card front stayed clean.


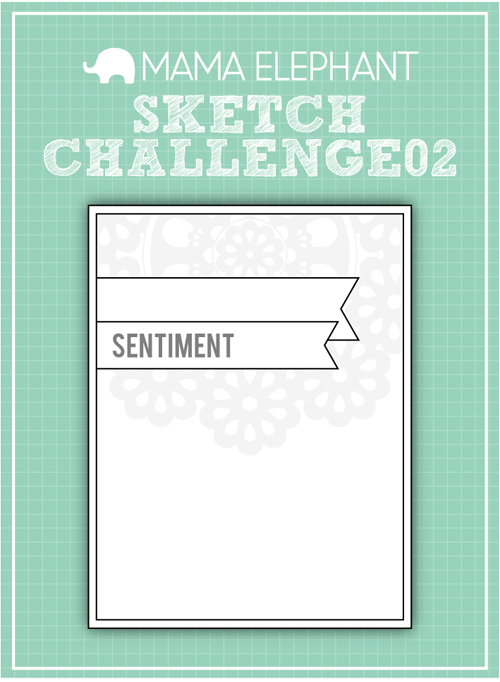
I used the Mama Elephant sketch challenge for this card:

shoot for the stars

Can you still see the sketch in my card?  I stamped the target, hanging off the top edge, in place of the half-doily.  And the two banners translated into two arrows (the extras are just for fun, hee hee)

I used "cosmic stars" and "on target" (and the swirly lines from "no peeking") to create this little encouraging card, which I slipped into Sofia's backpack this morning.  A little something to brighten her day on the first day back to school after spring break.

shoot for the stars

Thanks for stopping by!  Maia and I have a lot of cleaning up to do today, now that we have the house all to ourselves *wink*

Sunday, March 10, 2013

Easter blog hop

I love making new blogging friends.  I met Hani (of Haniela's) through Marlyn (of Montreal Confections - she is the talented artist behind my 10th anniversary cake and cookies.)  I love that dessert artists and paper-crafters can inspire each other!  Today, I'm joining Hani's easter-inspired blog hop with a set of stenciled muslin treat bags:

stenciled easter treat bags


The how-to is very simple:

stenciled easter treat bag

1.  Cut a bunny shape out of freezer paper (I used a steel die, by Papertrey Ink, but you could make do with a googled bunny shape and a pair of scissors).

2.  Iron your template, shiny side down, onto your desired fabric.  I stenciling onto muslin bags, but wouldn't this look so sweet on a baby's onesie?  or a little canvas tote?

3.  While you're at it, make a batch of them *grin*

4.  Grab your favorite fabric paint, and a sponge brush (ignore the fact that I'm a little ghetto, using the tupperware lid as my artist palette *grins*)

5.  Paint a few coats with ease - the freezer paper creates a bond so as long as you don't puddle your paint (thin coats are best), you'll get perfect results every time.

You can put Easter treats inside, just as is, or how about turning this into an Easter advent calendar?

stenciled easter treat bags

I strung them up with other fabric scraps in between.... the little pom-pom tails are the sweetest touch, especially when you see them in a row:

stenciled easter treat bags

stenciled easter treat bags

However you choose to do it, it is a sweet little project!

stenciled easter treat bags

Thanks for hopping my way!  Here's a shot of all the Easter inspiration that we have for you today.  Scroll down for the links.  (and ps, is anyone else cracking up over the fact that I'm presenting the only non-edible project? hee.)


Easter Treat Pouches by Elena - Just Me (you are here!)
I, Robot Egg Cookie by Hani - Haniela's


Saturday, March 9, 2013

welcome home, baby Lily.

A few online friends are blog hopping to congratulate Laurel on her new baby girl!  Sweet Lily was born a bit early, so even though Laurel has had this card in her hands for awhile, we all decided to wait and post our cards when Lily was back home with her family.

new baby girl

Truth:  I sent Laurel the card (hi Laurel) but I forgot to package up the chocolates.  So, a few days later, I ate them.  I am a terrible friend.... but they were delicious... I owe you some goodies, Laurel *wink*

new baby girl

I used lawn fawn's "plus one" baby carriage to create my focal image, and added the little bow from "pa-rum-pa-pum-pum" to girly it up even more.  A few wood veneer hearts, some button wheels, and a length of ruffled ribbon finished off this simple but textural baby girl card.

new baby girl

The chocolate wrapping was simple to create, but so cute!  I could easily see these little packages for a shower gift (maybe with something other than chocolate, but I love me some chocolate...)  I used the bear from "pa-rum-pa-pum-pum" and added the same bow onto her head.  The A-B-C images are by Paper Smooches, and the tag shape and matching outline image are by Clear and Simple Stamps.

Laurel, your baby girl is so beautiful (and already looks so much like her big brother!)  I hope this little hop has brightened your day!  Give Lily an extra snuggle from me :)

Here's a complete list of friends waiting to congratulate you:

Annette Audrey Chrissie Christy Elena (you're here!)Erica Jean Jenn S.Jennifer McDJoe Shien ShienKarin Kelly MarieLalo Melissa S. ♥ Tamara Vera Yainea

Friday, March 8, 2013

sweet notes of thanks {CSS new release}

We're showing off a few companion sets, a few great new dies - all for this month's "favorites" release.


I've created a little 3x3 inch notecard set, using the new cake domes stamp set, and packaged it in the new party favors 8 box.

thanks for being so sweet.

The new party favor box is very chic.  It works perfectly for a set of 3x3 cards, or a few treats, and the way it opens up is just plain sexy:

thanks for being so sweet.

I punched a 2.5 inch circle into the box before I adhered everything, so that the recipient could get a peek at what's inside...

thanks for being so sweet.

See how it works?  Love it.

thanks for being so sweet.

Each card is identical: I stamped the donuts from the apothecary:sweets set onto a piece of cardstock, masked it, then stamped in the new cake stand, and added the sentiment, dome, and tiny bow from the new cake domes set.

For an extra bit of frill, I added a piece of the new eyelet border, but I tucked half of it behind the focal mat.

I hope you like my little gift.  And happy birthday to Renee!  Renee is Nicki's mom, and together they run Clear and Simple Stamps.  So Renee, hope it's a good one - make sure Nicki spoils you a bit *wink*

Cheers!

Check out the other designers for more new product:  Laura Audrey Lori Jennifer CSS

Wednesday, March 6, 2013

you brighten my day

I haven't made time for entering challenges lately, but I really wanted to play around with the current tuesday trigger, over at moxie fab world.


From this delicious embroidered pattern, to this card:

you brighten my day


Now.  I lurve this card so much, but the photo of it, not so much.  We have been on March break this week, and my goal is to spend every waking minute with the kidlets, not setting up for photos....I snapped this one quickly on our dining room table.

I grabbed several elements from the inspiration photo:

- the fabric texture, which I translated into my impressed white mat with its roughed-up edges.
- the color scheme, incorporated into my botanicals and banner
- the random grid stitching, (and for this one you'll have to trust me) which I showed on my white mat, in the form of randomly-stamped tiny hexagons.  They're not showing up in the picture too well....grrrr.... but they're there.

you brighten my day

If you squint, you can see them in this photo *grins*

I used all lawn fawn stamps for this card: blissful botanicals, bannerific, the tiny flower from summertime charm, and the hexagons from interlocking backdrops.  I have to give a shout out to the new dies.  They are awe-some!  I lurve the fact that I can stamp and then die cut a perfect white border afterwards.  If you own lawn fawn stamps, you need to own the dies too!

you brighten my day

There's still time for you to play along with the moxie fab challenge!  I love seeing what inspires different crafters, all from the same photo.

ps, colored-in banners are my new fave.

Tuesday, March 5, 2013

For the love of green.

Green is not my color of choice for crafting, usually.  I'm stepping out of my comfort zone for CSS group post day, to bring you a little leprechaun magic:

for the love of green.


I used CSS glamazon green cardstock, the apothecary set, and the little shamrock sugar cookies to fill 'er up.  (true story: when I try my hand at a simpler card, I usually reach for a fleckled paper - at least there's some interest there, in my mind - instead of plain white cardstock.... hee.)

I cut into my focal mat with the apothecary jar die, and then propped it up in the same spot.  My favorite touch?  The gold luster dust I used on my stamped sugar cookies (you know, the stuff you use to glimmer up real sugar cookies!)

for the love of green.

More green on the blogs today:  Audrey Lori Tracy CSS blog

Thanks for stopping by, and have a great day!

Monday, March 4, 2013

tons of birthday fun!

Good monday morning!

It's the first day of March break over here, which obviously means that the kids woke up at 5:40am (instead of having to be dragged out of bed at 6:30am for school) - oy!

We're kicking off a new lawnscaping challenge this morning - all about adding texture to your project.  Here's my take:

tons of birthday fun

Did you happen to see *this video* made by my friend Karin?  She was the inspiration behind my ink-textured focal panel.  I used her technique to create my sky and grass, all the while keeping a white border around my label.  Love it!

tons of birthday fun

I used the same technique as I did *here* to create a custom sentiment via my computer.  I'm working on a little tutorial for those of you who asked - I haven't forgotten!  We've all just been spending time being disgusting and congested... as soon as I get my voice back (it's manly-sexy at the moment) I will be posting something for you :)

tons of birthday fun

The big hit of texture on my card is in the liquid-appliquéd clouds.  I love how fluffy they got!

It's your turn to link up to our challenge:


This current challenge is being sponsored by Simon Says Stamp:

Simon Says Stamp