Showing posts with label plus one. Show all posts

Wednesday, August 6, 2014

A little dazzle/lawn fawn week!

The lawn fawn team is working with metal sheets by a little dazzle all week.  They look like foil, but with a great weight to them. They look fantastic when cut out with our lawn fawn dies!

a little dazzle/lawn fawn week


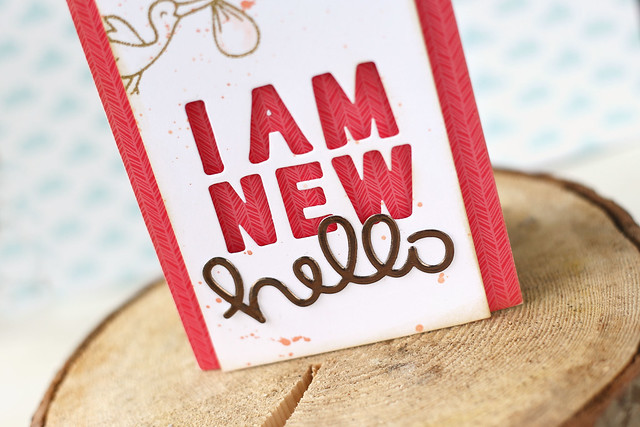
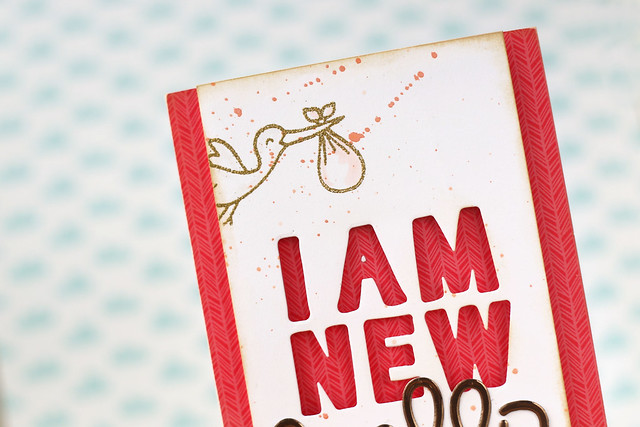
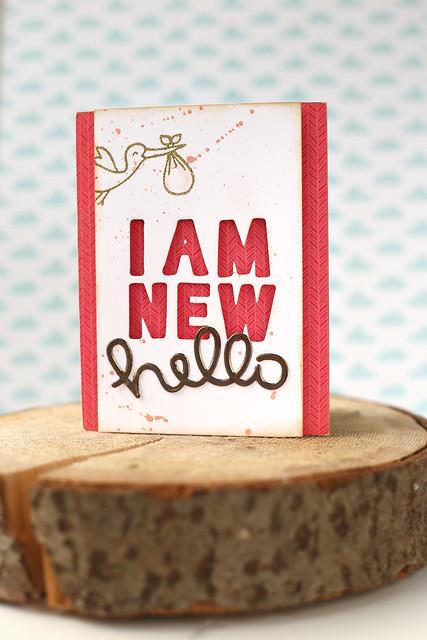
I thought it would be fun to pair a gold hello with a gold stork and do something a little more graphic than I'm used to making.

a little dazzle/lawn fawn week

Doesn't that shine look amazing? I love a gold hello, especially paired with Quinn's capitals lettering...

a little dazzle/lawn fawn week

The paper I used to cover the card base is new, and available for purchase wherever lawn fawn is sold as of the end of August. It's part of their "snow day" christmas collection of papers.

I hope you like my card! Be sure to visit the lawn fawn blog all week for more razzle dazzle!

Monday, July 8, 2013

for the bébé.

When you have a beautiful embellishment, like this May Arts ribbon, it's best to keep everything else simple and let it shine:

for the bébé.


I love how I could easily sculpt the ribbon and mold it into a pretty shape.

for the bébé.

and the tag features a little sneak of something to come, along with a favorite oldie...

for the bébé.

I hope you like it!

♥.


Saturday, March 9, 2013

welcome home, baby Lily.

A few online friends are blog hopping to congratulate Laurel on her new baby girl!  Sweet Lily was born a bit early, so even though Laurel has had this card in her hands for awhile, we all decided to wait and post our cards when Lily was back home with her family.

new baby girl

Truth:  I sent Laurel the card (hi Laurel) but I forgot to package up the chocolates.  So, a few days later, I ate them.  I am a terrible friend.... but they were delicious... I owe you some goodies, Laurel *wink*

new baby girl

I used lawn fawn's "plus one" baby carriage to create my focal image, and added the little bow from "pa-rum-pa-pum-pum" to girly it up even more.  A few wood veneer hearts, some button wheels, and a length of ruffled ribbon finished off this simple but textural baby girl card.

new baby girl

The chocolate wrapping was simple to create, but so cute!  I could easily see these little packages for a shower gift (maybe with something other than chocolate, but I love me some chocolate...)  I used the bear from "pa-rum-pa-pum-pum" and added the same bow onto her head.  The A-B-C images are by Paper Smooches, and the tag shape and matching outline image are by Clear and Simple Stamps.

Laurel, your baby girl is so beautiful (and already looks so much like her big brother!)  I hope this little hop has brightened your day!  Give Lily an extra snuggle from me :)

Here's a complete list of friends waiting to congratulate you:

Annette ♥ Audrey ♥ Chrissie ♥ Christy ♥ Elena (you're here!) ♥ Erica ♥ Jean ♥ Jenn S. ♥ Jennifer McD ♥ Joe Shien Shien ♥ Karin ♥ Kelly Marie ♥ Lalo ♥ Melissa S. ♥ Tamara ♥ Vera ♥ Yainea

Monday, July 16, 2012

lawnscaping challenge #38: inspiration photo


Time for another lawnscaping challenge!  


This week's sponsor is Lawn Fawn:


Take this photo:


....and create something inspired by it.  I honed in on the vintage merry-go-round in the 2nd row and created this card:


I colored the merry-go-round (from "admit one") to match the photo (and do you see the tiny stars I added?  they're from "plus one"), and cut it out, before propping it up onto a strip of yellow polka-dot paper.

Near the bottom, I used a circle punch to create an opening, and stamped the star (also from "admit one") onto the card-base.  I colored it in, outlined it, and slapped it with a layer of glossy accents.


For a finishing touch, I created a little paint-spatter across the card.  I think this may be my new favorite way of doing it:  I grabbed an old SU water-color crayon, and a wet paintbrush, and flicked the ink across the card.  I promise you this will not be the last time you see me do this :)

I hope you are inspired to create your own card!

Monday, January 2, 2012

lawn fawn - CHA contest

Happy Monday, all!

I whipped up a little something for lawn fawn's CHA challenge - a chance to be featured in their new catalogue, and the winning card displayed in their CHA booth!  So exciting!


I used "Plus One" as the focal point for this card.  My little sis is having a baby girl, so this card can afford to get tucked away for a few months if it doesn't win :)


Since we couldn't use any patterned paper, I made a little strip of my own.  I stamped the mobile from the same set, and layered the grid pattern from "schoolhouse backdrops" over top.  The pink strip running through the white die-cut shape was stamped with another image from "schoolhouse backdrops" before I stamped the sentiment on top.


For extra interest and texture on the top of the card, I used my score-board to create a diamond pattern.


I colored my over and cupcake image with copics.  I hope you like my entry!  I have another one to share tomorrow :)

Tuesday, September 27, 2011

Sprouting babies...


Even though our little family is complete, I still get giddy with excitement whenever a new pregnancy is announced... and when the babe-to-be is your little sister's?  We're all over-the-moon.  

Sweeter still, that this pregnancy was prayed for by so many... I spotted a few wet eyes when the announcement was made... (unlike when the hubs and I announced our first pregnancy - the reaction we got was "you're expecting what?" and "is it confirmed?" - a priceless gem from each set of parents who were just not ready to become grandparents, I think!)


To celebrate this life-changing announcement, I've made a card with lawn fawn's cuter-than-anything "plus one" set.  I mean, c'mon... it's a smiley-faced oven :)

To begin, I masked the outside of the polaroid image, and stamped a grid-pattern on the inside.  I also layered the hero arts' "life of the party dots" background stamp in there and then rubbed some antique linen over everything.  The oven and "bun" images were paper-pieced (I stamped them on patterned paper, cut them out, and glue it all together).  The only coloring I did was inside the oven and on the knobs.

The mat with all the hearts started out as a piece of white cardstock.  I stamped the same grid-pattern over the whole area, and then layered different images from "plus one" scattered all over.  If you look closely, you might be able to pick out the stork, or the mobile images!  There's a baby carriage and a rattle, too (I should be giving out points or something for whoever could spot them all, ha ha!)  I also stamped PTI's background basics: hearts over the entire mat, and layered blue and brown distress inks over-top so that it better blended with my main image.


Thanks for looking!


supplies
stamps: (lawn fawn) plus one, say cheese, (PTI) background basics: hearts, (hero arts) life of the party dots, (SU) good grid
ink: memento black, (distress inks) tumbled glass, stormy sky, antique linen, vintage photo
paper: grid lines cardstock (PTI), early espresso, crumb cake, whisper white, misc. patterned paper (all SU)
misc: jumbo brown button, brown and white twine (etsy)

Wednesday, September 21, 2011

gettin' texty.

Yeah, I didn't come up with the post title, but now I'm wishing I had.  (Anyone else humming "gettin' jiggy wit it"?  probably not...ha ha.)


It's the latest lawnscaping challenge!  I love using a text background on my cards, so this one came together pretty easily :)


How have I texted thee?  Let me count the ways:

1.  Versamarked, on the grey card-base (using PTI's text style II)
2.  In "tumbled glass" distress ink, on the white mat (behind the smiling umbrella from lawn fawn's "Plus One")
3.  Broadway bound, in the custom sentiment (now you're singing something completely different, right?)


How can you not put on a happy face with all of those smiling faces staring back at you?  Impossible!


ps.  I masked the umbrella before stamping the text background and hero arts envelope pattern background stamp over top.  The umbrella and raindrops were colored in with copic markers.

thanks for looking!