
Hi there!
I'm making it a blog goal for 2016 that I include photo tutorials with my posts a little more often. I always like seeing step-outs on other blogs, but I never think to have my camera handy while I'm crossing-my-fingers-hoping that my projects turn out. (As an aside, I am not made for making videos. We can talk about it another time, if you like.)
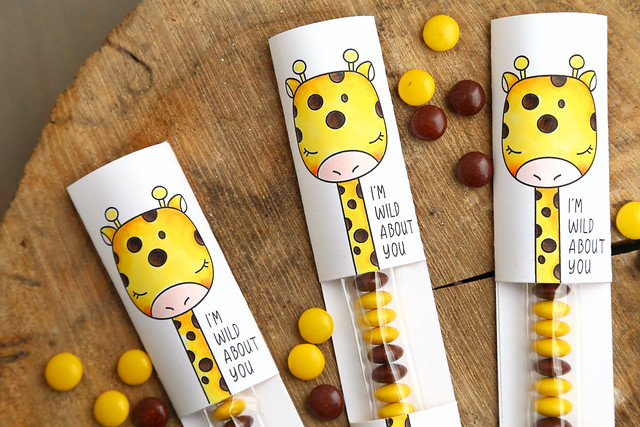
I created a few long-necked giraffe valentines using the giraffe digi stamp from my shop, by just folding white paper and cutting out a window to show the chocolates. Let me show you how.
The first step is to format the giraffe.
I used the png to enlarge the giraffe a little bit and stretch him out. You can't play with the jpegs as much. I then copy/pasted him directly underneath and erased his second head, leaving a 2 inch gap between the head and the rest of his neck. You can tell that I stretched out the bottom neck to make it even longer (the circles are more like ovals, but it still looks ok.)
Just a note: my digi stamps don't come colored! I printed it out in black and white and used copic markers to color him in. I often get asked which yellow colors I use. Here, I used Y02 as a base color, and Y17, Y18 to add the darker shading.
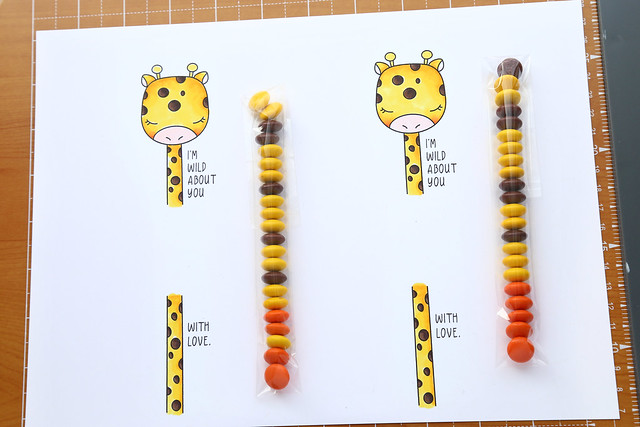
I filled 1x8 inch treat bags with an M&M mix, but I made sure that the orange ones wouldn't be seen in the window. They aren't the right color! I've had these treat bags forever, and I can't remember exactly where I purchased them.
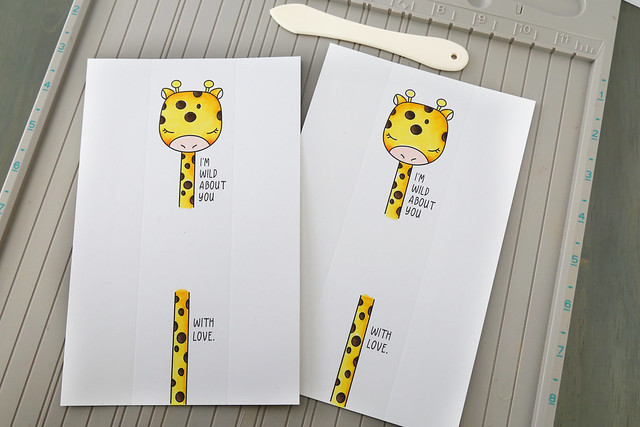
Once everything was formatted, I cut the sheet of card-stock in half and scored on either side of the giraffe. He sits inside a 2-inch wide space. This is important for the next step:

I used a steel die to cut out the window for my project. The die was 2x2inches, which is why I wanted 2 inches between the score lines. Also why I left a 2 inch gap between the giraffe's head and the rest of his body. If you're handy with an exacto knife, you don't even have to think about all of this. Just cut your window whatever size you like!
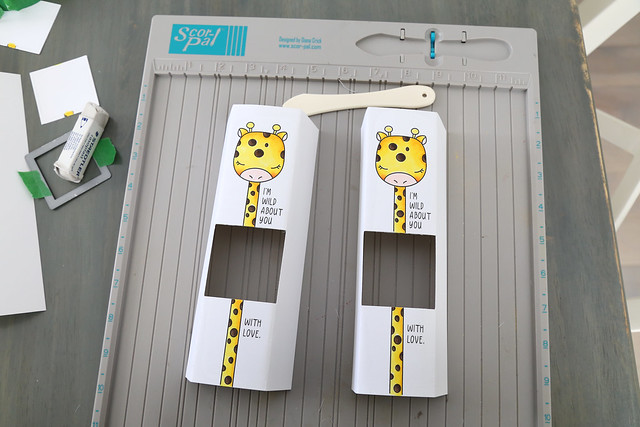
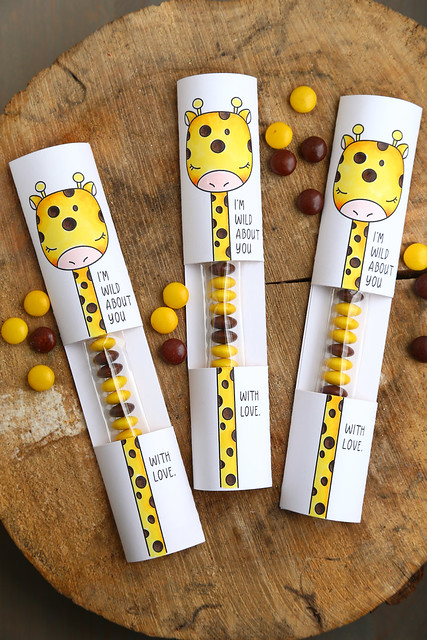
All it takes to assemble at this point, is to fold on the score-lines,
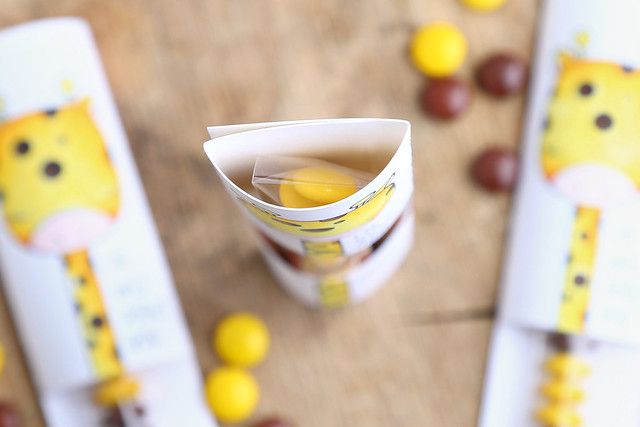
tape the candy bag to the inside (so that it lines up with the giraffe's neck and stays put) and fold in the 2 sides. It's seriously that easy!
The most time-consuming part was coloring the giraffes, but that's only because I wanted to make them pretty for you. These would make cute class valentines! In that case, it would be my 5 year old with pencil crayons. ha.
Thanks for stopping by!
♥.
I'm making it a blog goal for 2016 that I include photo tutorials with my posts a little more often. I always like seeing step-outs on other blogs, but I never think to have my camera handy while I'm crossing-my-fingers-hoping that my projects turn out. (As an aside, I am not made for making videos. We can talk about it another time, if you like.)
I created a few long-necked giraffe valentines using the giraffe digi stamp from my shop, by just folding white paper and cutting out a window to show the chocolates. Let me show you how.
The first step is to format the giraffe.
I used the png to enlarge the giraffe a little bit and stretch him out. You can't play with the jpegs as much. I then copy/pasted him directly underneath and erased his second head, leaving a 2 inch gap between the head and the rest of his neck. You can tell that I stretched out the bottom neck to make it even longer (the circles are more like ovals, but it still looks ok.)
Just a note: my digi stamps don't come colored! I printed it out in black and white and used copic markers to color him in. I often get asked which yellow colors I use. Here, I used Y02 as a base color, and Y17, Y18 to add the darker shading.
I filled 1x8 inch treat bags with an M&M mix, but I made sure that the orange ones wouldn't be seen in the window. They aren't the right color! I've had these treat bags forever, and I can't remember exactly where I purchased them.
Once everything was formatted, I cut the sheet of card-stock in half and scored on either side of the giraffe. He sits inside a 2-inch wide space. This is important for the next step:
I used a steel die to cut out the window for my project. The die was 2x2inches, which is why I wanted 2 inches between the score lines. Also why I left a 2 inch gap between the giraffe's head and the rest of his body. If you're handy with an exacto knife, you don't even have to think about all of this. Just cut your window whatever size you like!
All it takes to assemble at this point, is to fold on the score-lines,
tape the candy bag to the inside (so that it lines up with the giraffe's neck and stays put) and fold in the 2 sides. It's seriously that easy!
The most time-consuming part was coloring the giraffes, but that's only because I wanted to make them pretty for you. These would make cute class valentines! In that case, it would be my 5 year old with pencil crayons. ha.
Thanks for stopping by!
♥.
Absolutely ADORABLE!!!!
ReplyDeleteCristina
thehouseoftheblackbirds.blogspot.it
What a cute idea!!!! I love the result! So sweet!
ReplyDeleteThese are super cute & so clever! Love it!
ReplyDeleteSuper!!!! Thank U!
ReplyDeleteThis is such a fun idea...Love it!!!
ReplyDeleteSo cute and such a fun gift!
ReplyDeleteSuper cute! What a fun way to package treats! Thanks for the tutorial.
ReplyDeleteElena, these are so adorable and totally clever!! Thank you for the tutorial and the creative inspiration!!!
ReplyDeleteThese are so darling! Thank you for showing and explaining all the details.
ReplyDeleteThese are so cute and clever! Love the photo tutorial!
ReplyDeleteoh this is a winner!
ReplyDeleteJust awesome!
ReplyDelete