Showing posts with label valentine's day. Show all posts

Wednesday, February 3, 2016

XOXO, easy valentine's day decor!

Hi!

XOXO, easy valentine's day decor!

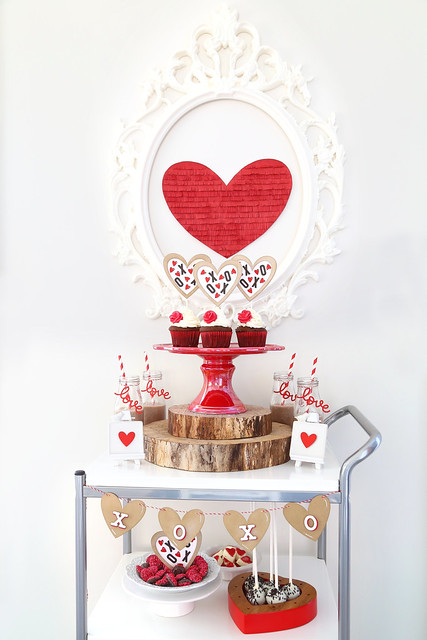
I created some simple Valentine's day decorations using only Lawn Fawn dies.
XOXO, easy valentine's day decor!


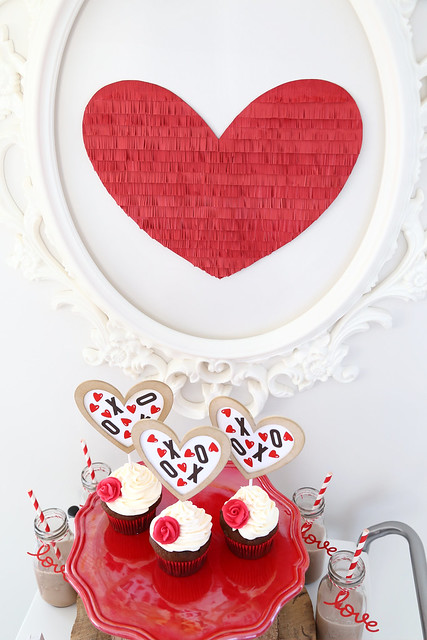
To start, I'll show you the only thing I freehanded. I cut a heart out of a 12x12 sheet of cardstock and then fringed strips of red cardstock to cover the entire front.
XOXO, easy valentine's day decor!


I really like the look of it. I made something like this a few years ago, but much bigger, for my niece's 1st birthday party (click *here* to see!) I'm still kicking myself for not moving that huge heart into the new house!
XOXO, easy valentine's day decor!

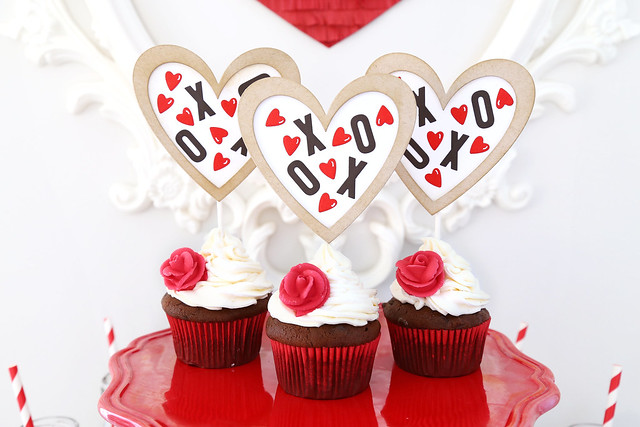
The cupcake toppers were created using Heart Stackables dies, Cole's ABCs dies and little hearts that I added white gel pen accents to. The kraft heart frames are popped up a little, even though it's not visible in these photos.  Wouldn't it be fun to make these into shaker hearts? If I had the fuse tool, so that all the sequins wouldn't fall to the bottom, I would totally have gone that route.
XOXO, easy valentine's day decor!


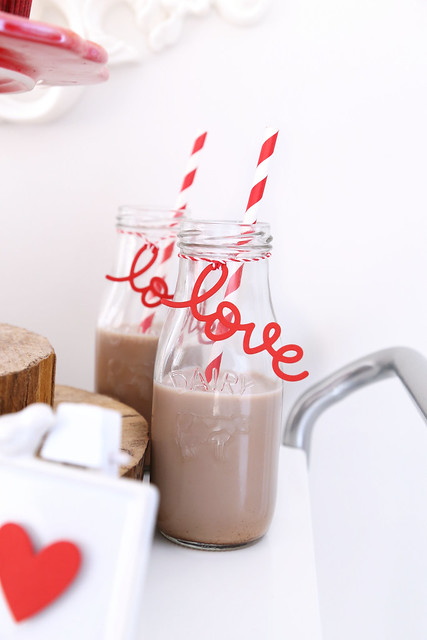
The simplest diy ever, but how cute are these drink bottle tags? I simply cut Scripty Love out of red cardstock and attached it with twine around the bottle-necks.
XOXO, easy valentine's day decor!

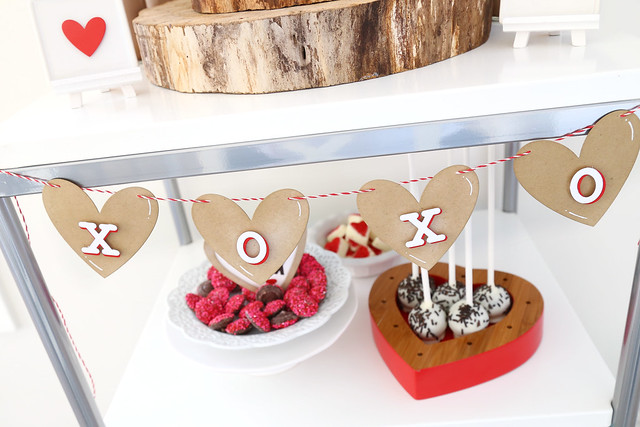
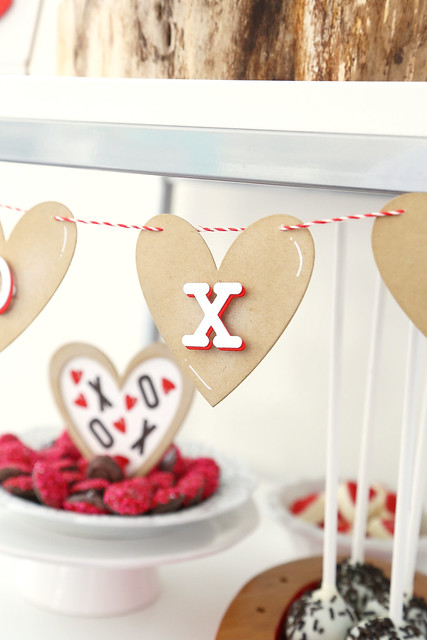
My favorite part has to be this heart banner, with the shadowed letters.  I layered Louie's ABCs letters in red and white.
XOXO, easy valentine's day decor!


A few white gel pen accents to the hearts are a fun touch.

I hope you get inspired to create some simple Valentine's decor for your own home! Thanks for stopping by.
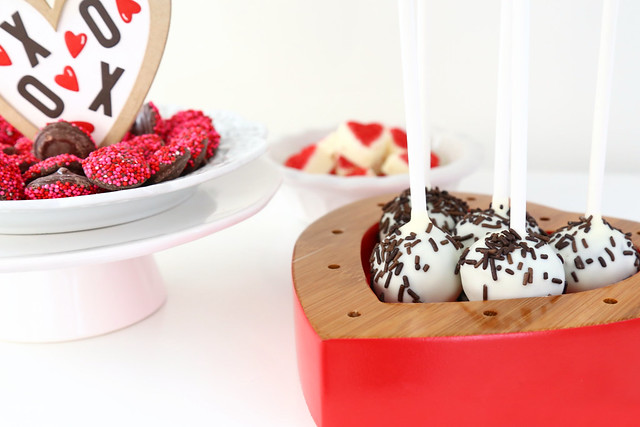
XOXO, easy valentine's day decor!

♥.

Wednesday, January 27, 2016

maia's class valentines

I promised easy valentines all week, and these are the easiest!

maia's class valentines

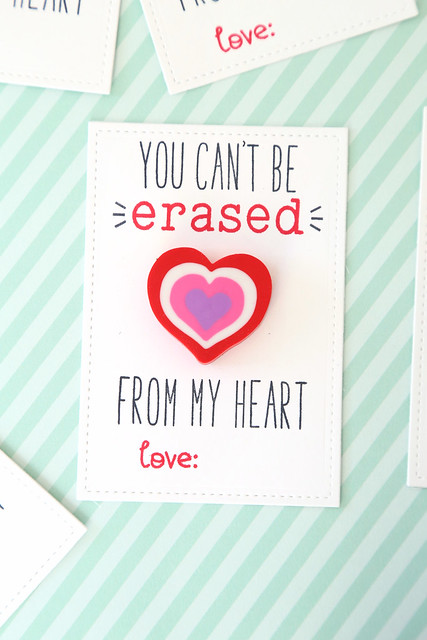
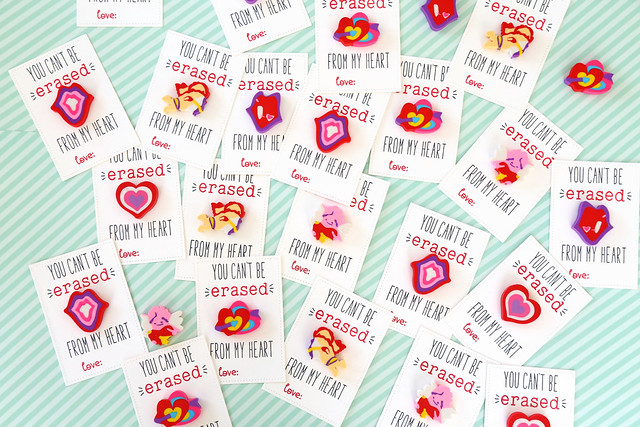
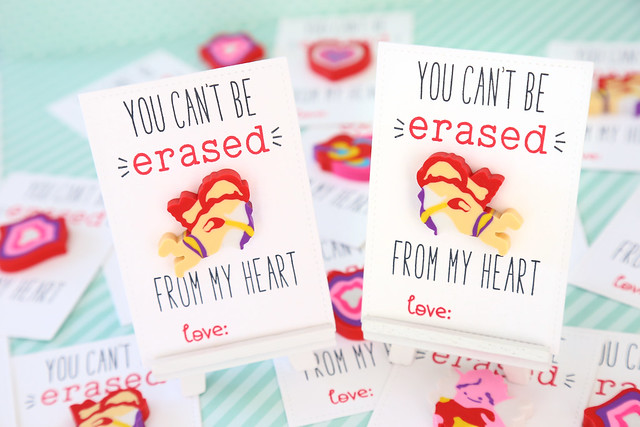
White cardstock, 2 colors of ink, alpha stamps, and packages of cheap valentine erasers (they sell them at Walmart and the Dollar Store. You lucky Americans could probably find them at Target too, nicer ones. UGH. I'm still so sad that Targets packed up and left Canada.)

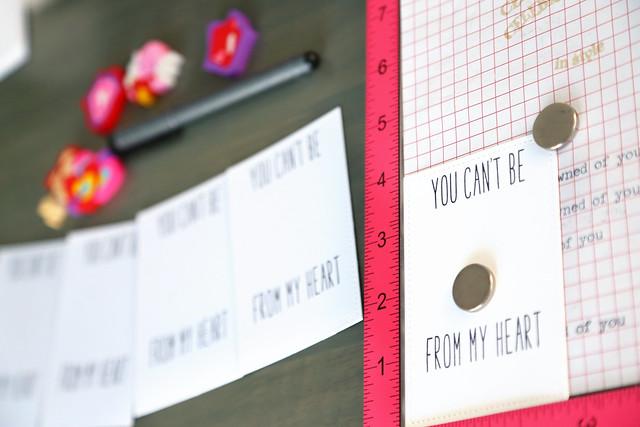
And the MISTI tool.  Did you know Lawn Fawn started carrying it? I never knew I needed it, but it kept everything lined up so perfectly and I could talk on the phone while slapping the acrylic cover over again and again. No concentration required. I love it.

maia's class valentines

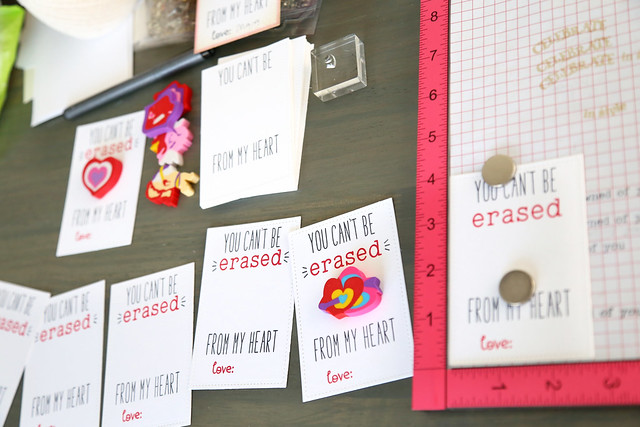
First of all, stamp everything that will be in black using Milo's ABCs.

maia's class valentines

Then, what's in red, using Clark's ABCs. The extra accent framing the word "erased" is from Party Animal.

maia's class valentines

Do it, times 30. Stick the erasers to the cardstock using glue dots.

maia's class valentines

My little cupid just has to write her name.

I hope you like them!

♥.

Tuesday, January 26, 2016

scratch 'n sniff valentines

Hi there!

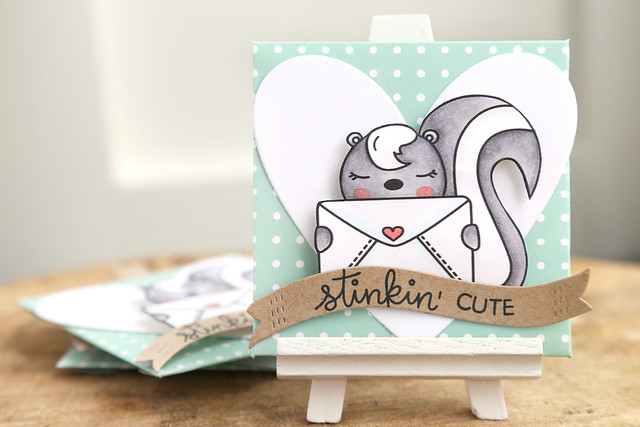
What goes better with a cute skunk image than scratch 'n sniff stickers?

scratch 'n sniff valentines

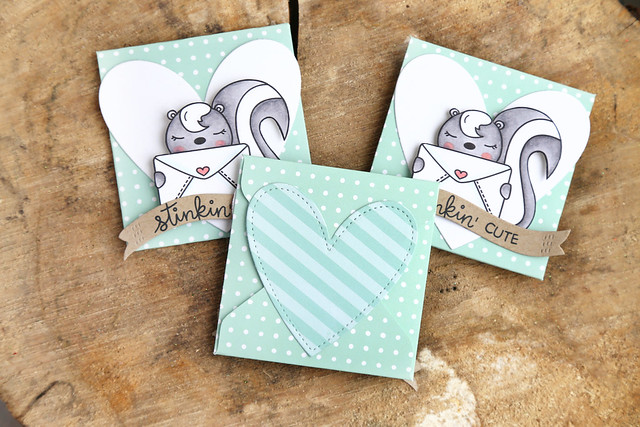
I printed, colored and fussy cut the skunk, stamped a greeting onto a banner die-cut and popped the whole thing onto a handmade envelope (time to break out those envelope punch boards!)

And inside?

scratch 'n sniff valentines

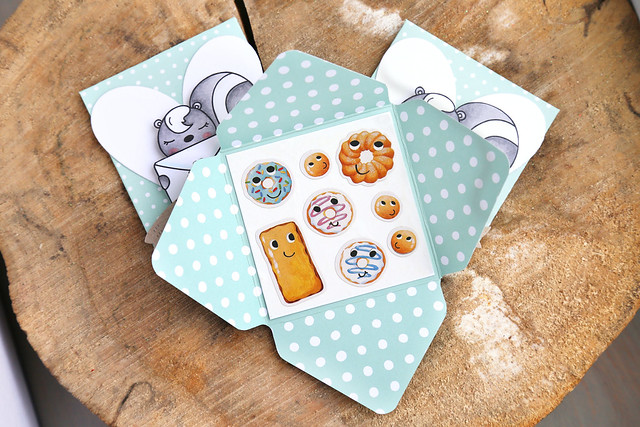
A little set of scratch and sniff donut stickers. I was hoping to find something in a heart design, but it was either this or pizza stickers. The choice was tough...

I do have to rant about how sticker companies sell package and sell their sheets. I have 3 kids. I wanted to divide the scented stickers 3 ways. But they are not laid out in a nice, grid pattern for me to cut. boo! To solve the problem (and listen, it's only my problem because I like things all nicely cut and square. If it doesn't bother you to have wavy cuts around the stickers, then disregard my rant,) I glued a square of wax paper onto a piece of white cardstock and cut an even square. Then, I was able to put the stickers onto the wax paper. The kids will be able to use them as well as if they were opening the package themselves.

scratch 'n sniff valentines

To finish off, I used a 2-way glue pen to create a seal for the back. By waiting until the glue dried before sticking, the glue isn't permanent. They can open and close their envelopes without damaging it.

I hope you like it! Thanks for stopping by!

♥.

Monday, January 25, 2016

peekaboo long-necked giraffe valentines +tutorial

Hi there!

peekaboo long-necked giraffe valentines

I'm making it a blog goal for 2016 that I include photo tutorials with my posts a little more often. I always like seeing step-outs on other blogs, but I never think to have my camera handy while I'm crossing-my-fingers-hoping that my projects turn out. (As an aside, I am not made for making videos. We can talk about it another time, if you like.)

peekaboo long-necked giraffe valentines


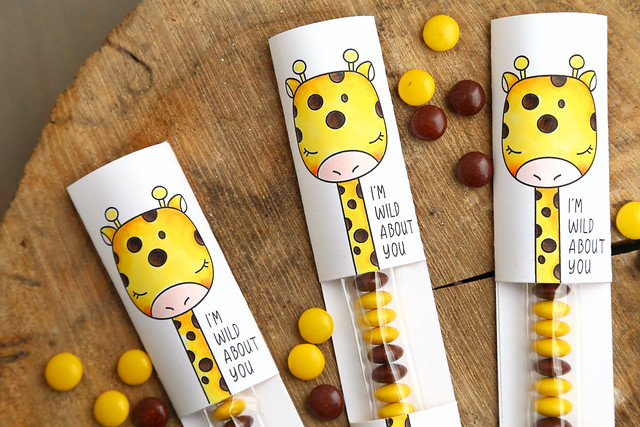
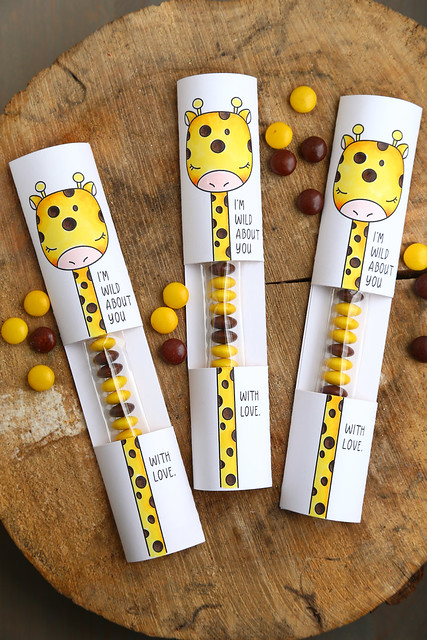
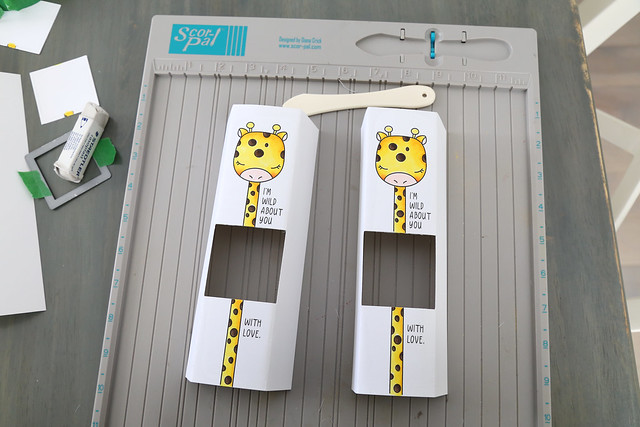
I created a few long-necked giraffe valentines using the giraffe digi stamp from my shop, by just folding white paper and cutting out a window to show the chocolates. Let me show you how.

peekaboo long-necked giraffe valentines

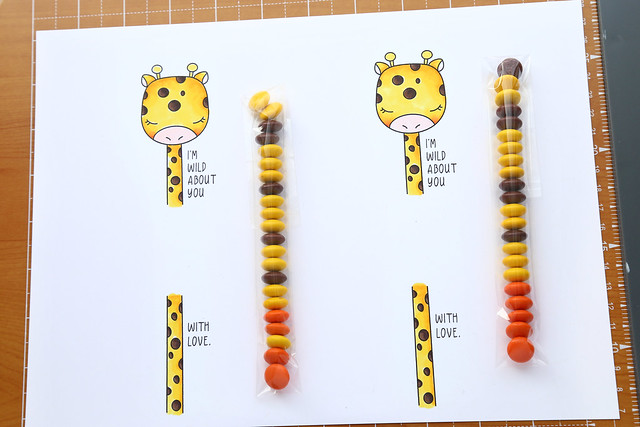
The first step is to format the giraffe.

I used the png to enlarge the giraffe a little bit and stretch him out.  You can't play with the jpegs as much.  I then copy/pasted him directly underneath and erased his second head, leaving a 2 inch gap between the head and the rest of his neck. You can tell that I stretched out the bottom neck to make it even longer (the circles are more like ovals, but it still looks ok.)

Just a note: my digi stamps don't come colored! I printed it out in black and white and used copic markers to color him in. I often get asked which yellow colors I use. Here, I used Y02 as a base color, and Y17, Y18 to add the darker shading.

I filled 1x8 inch treat bags with an M&M mix, but I made sure that the orange ones wouldn't be seen in the window. They aren't the right color!  I've had these treat bags forever, and I can't remember exactly where I purchased them.


peekaboo long-necked giraffe valentines

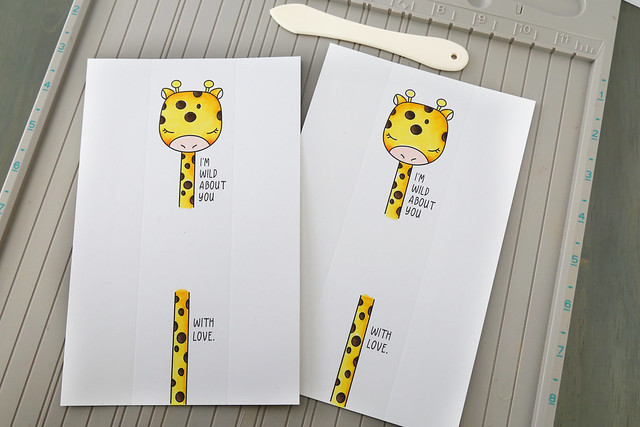
Once everything was formatted, I cut the sheet of card-stock in half and scored on either side of the giraffe. He sits inside a 2-inch wide space. This is important for the next step:

peekaboo long-necked giraffe valentines

I used a steel die to cut out the window for my project. The die was 2x2inches, which is why I wanted 2 inches between the score lines. Also why I left a 2 inch gap between the giraffe's head and the rest of his body. If you're handy with an exacto knife, you don't even have to think about all of this. Just cut your window whatever size you like!

peekaboo long-necked giraffe valentines

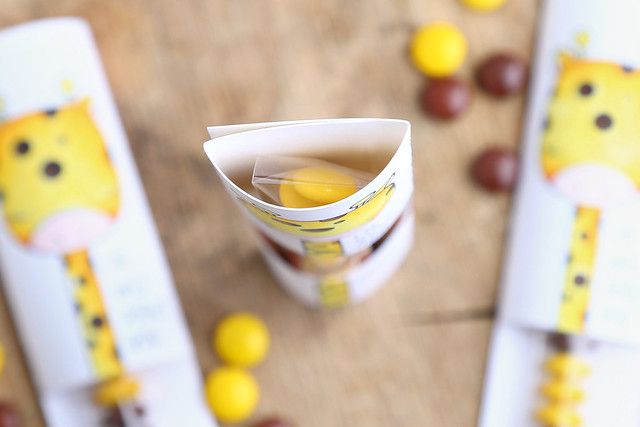
All it takes to assemble at this point, is to fold on the score-lines,

peekaboo long-necked giraffe valentines

tape the candy bag to the inside (so that it lines up with the giraffe's neck and stays put) and fold in the 2 sides. It's seriously that easy!

The most time-consuming part was coloring the giraffes, but that's only because I wanted to make them pretty for you. These would make cute class valentines! In that case, it would be my 5 year old with pencil crayons. ha.

Thanks for stopping by!

♥.

Sunday, February 9, 2014

filled with love {A Delightful Waste of Time blog hop}

Happy Sunday! One thing I love about crafting and blogging is the friends I've picked up along the way.  My buddy and fellow canuck, Meredith, makes the most gorgeous vintage cards, with ribbons and layers that I can only dream of re-creating.

To celebrate a new, love-themed kit in her shop, she's asked a few bloggers to create cards using its items.

I'm not a ribbon kind-of-gal, but I did my best:

filled with love.


I love the time card included in the kit! My first instinct was to have a really cheesy "i'd love to spend all my time with you" sentiment, but I opted for something a little more classy. hee.

The sequins included in my kit  are shades of pink, and perfect for creating a little shaker.  I added teeny-tiny hearts in hot pink and white to fill in the area.

I hope you like what I've created! There's more to see here: MeredithLaura, Laurie, Wida.

Visit Meredith's shop and receive a 10% discount until the end of the month.

♥.

Tuesday, February 4, 2014

sending love {a lawn fawn party}

sending love {a lawn fawn party}


Recently, Kelly Marie asked if I would style a party using lawn fawn products.  With Valentine's day just around the corner, I jumped at the chance.

sending love {a lawn fawn party}

I used you've got mail, flying by, tag you're it dies, and a bit of peppermint twine.

sending love {a lawn fawn party}

I believe that every good party table starts with a fun backdrop.  It could be as simple as a plain wall, if that suits your party vibe, but here I created a backdrop of postcards.  It will double as a photobooth background very soon!  I love the scripted font on the word love!

sending love {a lawn fawn party}

I stamped a LOT of these postcards (like 50), but, done assembly-line-style, it didn't take very long.  And, Sofia helped me to cut them all out.  It was a fun process! (oh, and in case you're asking yourself where the bell went, the one in the stamp image?  I very carefully cut it out.  I now have a plain stamp image that I could fill with whatever I like: a sparkly heart in this case.)

sending love {a lawn fawn party}

These tags could have been used on favor boxes instead of milk bottles.  They are my favorite part of this whole party.

sending love {a lawn fawn party}

sending love {a lawn fawn party}

Cute cupcake toppers are a party must-have, right?  I thought a twiney-heart-trail would be just the thing.  I stiffened the twine using mod podge.  Here is a video I created for lawn fawn, demonstrating the how-to:


I hope you like it all!

♥.


Tuesday, January 14, 2014

doily love {top dog dies guest designer}

I'm guesting with Top Dog Dies today!

doily love (top dog dies guest designer)

I used their doily die and scalloped-top box die to create a lovey-dovey set, perfect for valentine's day.

doily love (top dog dies guest designer)

Black & white & red all over, with a sprinkle of gold glitter.

doily love (top dog dies guest designer)

Check me out on the Top Dog blog!

♥.

Tuesday, January 15, 2013

Have a SUPER valentine's day {CSS group project}

have a SUPER v-day

I couldn't let Valentine's day come and go without using the rag doll super hero set.  And, when I saw *this card* on Joy Taylor's blog, I was inspired to make a black & white version of my favorite rag doll, with the pop of color in the sentiment.

have a SUPER v-day

My little Thomas has 20 kids in his class... I've made 10 of these sweet tags so far :)  They're tall enough to be used as a bookmark, or to be able to adhere a lollipop to the back.

have a SUPER v-day

I started out with a piece of white cardstock, and stamped "super" first.  I created masks for just the "u" and the "p" and stamped my rag doll with all of his superhero accessories (his mask, his cape, and his "s" for superhero!)  I then borrowed "valentine's day" (I cut off the "it's" from the sentiment, from "sweet sentiments: holidays") and typed up "have a" on my computer.

I hope you like it!  A few of the other designers have projects waiting for you as well:


And, there's more me on the CSS app today:

Click on the image to be taken to the app store, where you can download the CSS app for extra, not-seen-anywhere daily inspiration.

Until next time...


Tuesday, July 17, 2012

CSS: holiday in July group post.

Are you ready for a little winter holiday fun?

I'll bet the rest of the design team has wowed you with Christmas projects... but as soon as I had the rag dolls in my hands, I already had a Valentine's Day project in mind... hey! it's totally a winter holiday :)

I used the new Jake rag doll, and the rag doll house: stand to create this sweet Valentine's day lunch for my 5-year-old-Thomas.  

Since it was for Thomas, I had to make his usual "pb&j" sandwich (the kid is obsessed)... but, since it was a special occasion, why not make it heart-shaped and put it in a cute wrapper?  I found a template, and embellished it with a stamped "PB {heart} J" banner.  The letters are from the alpha duo set, and the heart is from the new "wrap a round" set.

And he'd need something to wash down that sandwich, right?


milk - it does the body good ;)  And why not make it look good too, with a striped straw and an adorable favor flag.

So, after he ate his sandwich, and had his little strawberry-and-banana-fruit-kebab (I stuck little chunks through a lollipop stick), I could offer him his special treat:


a "kissing-booth" box, full of hershey's kisses :)  I paper-pieced the stand, printed the "kisses" via my computer, added the 5-cent stamp (the kid gives them away super-cheap - what can I say?  hee!) and the little love speech bubble (from taglines: critters.)

Here's a side-view so you could see how I closed up the party favor 3 die (don't you love how the stand die-cut fits right on the front?)

I scored the side so that I could pinch it closed.  I cut 2 tiny holes at the top and threaded some twine to keep it shut.

I hope you like what I've created!  Click on over to see what the other designers have for you:

Suzanne (guest)