Monday, December 21, 2015

Holiday place-cards and a Merry Christmas!

I can't believe today is the 21st. Can you? It creeps up every year, faster than the last.

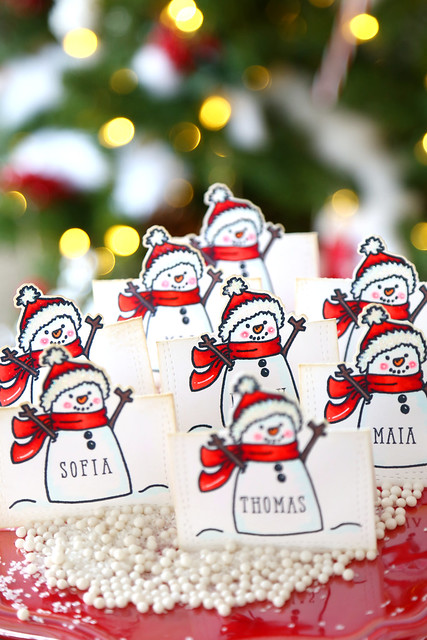
My last project before the holidays is a set of holiday place cards. I made these to decorate the kids' table for Christmas dinner.
christmas place cards

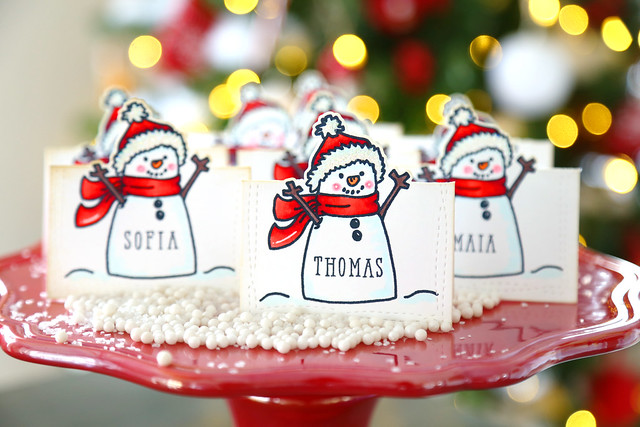
I used the Be Jolly snowman from Avery Elle, its matching die, and the smaller rectangle from the Wonky Stitches die set. I chose the snoman not only because he is adorable, but.... minimal coloring! haha. If you are pressed for time right before Christmas, a snowman is a great image to work with because you leave most of him white!

For the place cards: I first cut all of the rectangles I would need. Then, I stamped the snowman image (it comes with the snowdrifts and everything, so one stamping per place card made quick work of the entire lot!)

Then, I placed the open die over the snowman, and only ran it through the die-cutter to where the centre line would be. Then, when folded, the top of the snowman could pop up. So simple, but very fun!

To stamp all of the names, I used Elle's Alphas. As long as you draw a straight pencil line, they are easy to line up.  I like that they are small enough to use for this sort of project, but not too tiny that I am losing my mind.

christmas place cards

I hope you like them!

And, from my family to yours, have a very merry Christmas!  (photo by the amazing Tanya Zaleski.)


♥.

Sunday, December 20, 2015

SSS blog feature

Hi!

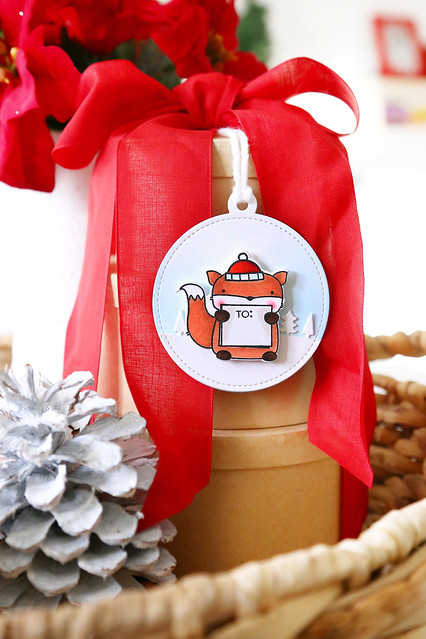
I'm on the SSS blog this morning, with a set of Christmas tags (because if you're still making cards, you're in trouble.)

SSS blog feature


I used images and dies from both Lawn Fawn and Mama Elephant to create my tags.  Visit their blog to see the full set and the project description!

♥.
Friday, December 18, 2015

Advent Calendar Extravaganza


Advent Calendar Extravaganza is -the- festive event of the season! This ‘hop with a twist’ was dreamed up by Taheerah Atchia and features surprise destinations each day! Joining in the fun with Taheerah are over 60 special guests - each serving up some fantastic Christmas inspiration! Just like an Advent Calendar, you’ll never know where you’re going to be visiting next until you ‘open the door’!

And that’s not all! With 25 *amazing* sponsors taking part as well, your crafty wish list is bound to get a boost with a chance to win a prize EVERY SINGLE DAY!!

Join in the fun every day at 
taheerah-atchia.com to see what special surprises wait behind the door!

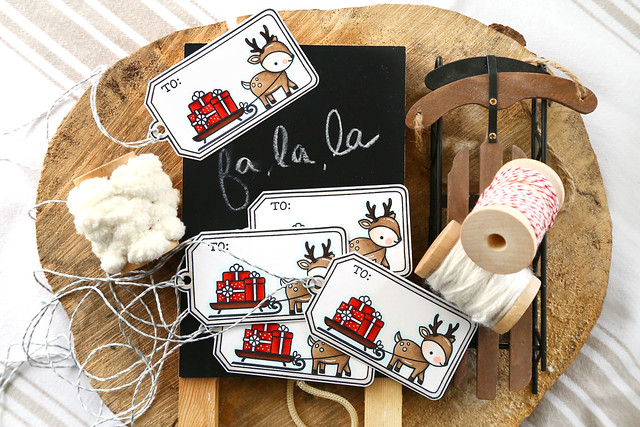
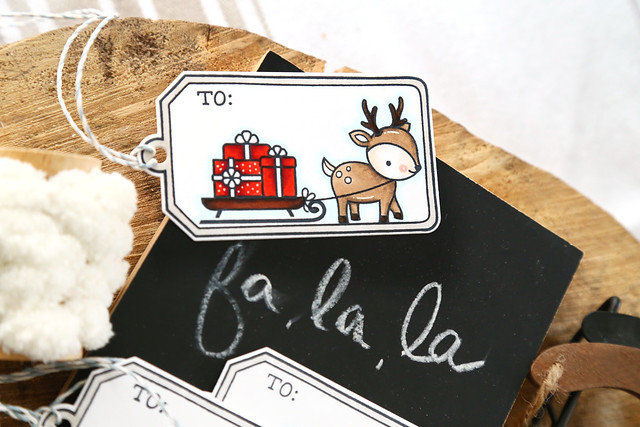
For day 18 of this advent hop, I created a set of tags:

advent calendar extravaganza

Using my brand new MISTI tool made it so easy to stamp all 6 tags quickly, and have them look exactly the same. That was the quick part. It took a little longer to color everything in, but that's what I love. I love using stamps and inks and coloring, and sometimes that is so much more relaxing to me than lugging out the die-cutter (oh, it stays out at your house? pffft. I have to put everything away before every mealtime. ha.)

advent calendar extravaganza

I used Lawn Fawn's Toboggan Together. I really love that reindeer image!

I hope you like my simple (but time-consuming, haha) tags! Since this is Taheerah's party, she's arranged for prizes every day! Today's sponsor is Lawn Fawn - woot!  Leave a comment on this blog post to be entered, and then pop back over to Taheerah's blog and leave a comment on her blog post today to double your chances. You have until December 31st, 7AM EST to leave your comments.

♥.

Thursday, December 17, 2015

Avery Elle designing!

Woo hoo!

I am so pleased to announce that I'll be joining the Avery Elle design team! I have long since admired their adorable designs, and I am so excited that I'll be using them regularly on the blog now!

designing with Avery Elle!


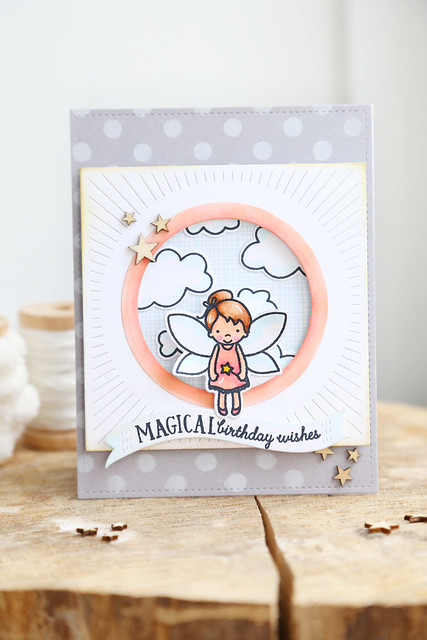
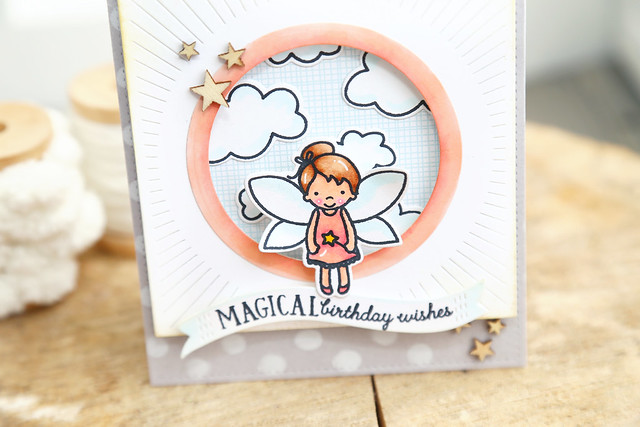
That sunburst die is my absolute fave. I want to use it on every card! It is so perfect for highlighting cute images, like Heather's little fairy.  Pixie Dust is an adorable fairy-themed set, with 3 fairies and lots of accessories, like a little tooth wand! I can't even.
designing with Avery Elle!

I cut a circle into the Burst die, and layed clouds and a subtle patterned paper behind to create a sky.  Then, using 2 sizes of circle dies (also included in the Burst die set,) I created a circle frame, which I colored with copic markers to match the fairy's dress. I love coloring die-cuts with copics, it looks so much less flat than just cutting a colored cardstock.

I stamped the sentiment onto a banner die-cut, and layered everything together.

I hope you like it! Check out the formal announcement on the AE blog this morning - click!

♥.

waffleflower guest post!

Hello there! 

I'm guesting with Waffleflower today!  I love a great aqua and red color combo for Christmas, don't you?

waffleflower guest post

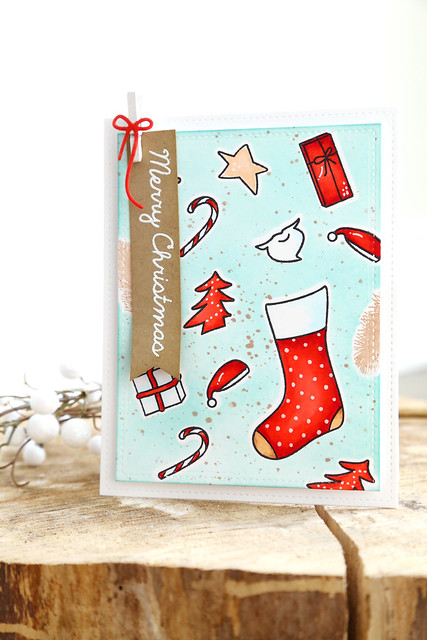
I used a lot of the pieces from the Stocking Stamp Set to create a fun collage card with kind of a patterned paper feel.  I used sticky note paper, and die-cut the images that I would want to use. No stamping yet, just the matching die-cuts to the images I would be using. I then placed them randomly around the card front. Then, I used a sponge and some blue ink to add color to the background. While the masks were still in place, I splattered brown ink over the entire panel. I love peeling back the sticky paper to reveal crisp white, un-inked card stock!

The fun part comes next. I took all of the images and stamped them into the appropriate spaces. I colored all of the images in red, beige or white, even the little Christmas tree. Sticking to a tight color scheme helps to give a polished and stylized look to the card. To finish off the images, I added some highlights with a white gel pen. It adds a little pop!

The sentiment was heat-embossed onto a piece of kraft cardstock, and I added a tiny clothespin and red bow to the top.  

I hope you like what I created! Thanks for having me, Nina!

♥.

Wednesday, December 16, 2015

Cookie Exchange 2015

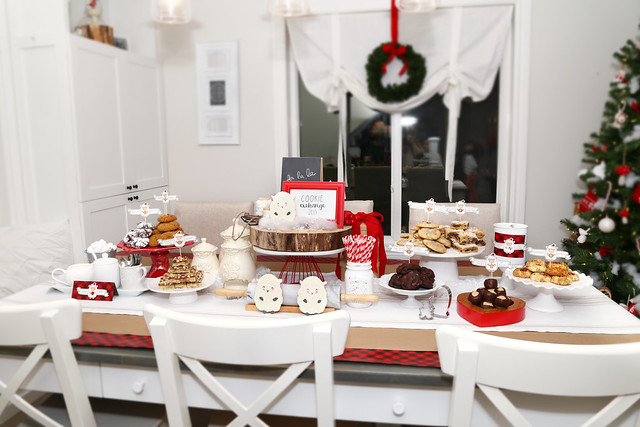
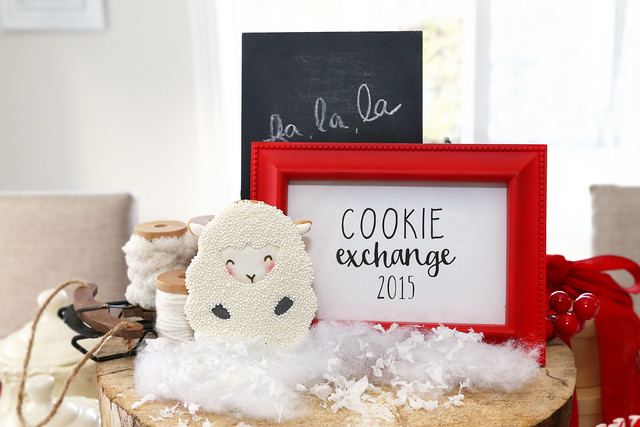
Hey there! Earlier this month, I hosted this year's annual cookie exchange party.  I think this is year 4? 5? that we've been doing it, and every year we jump homes. I moved to a new home this year, so naturally I wanted to show it off!

cookie exchange 2015

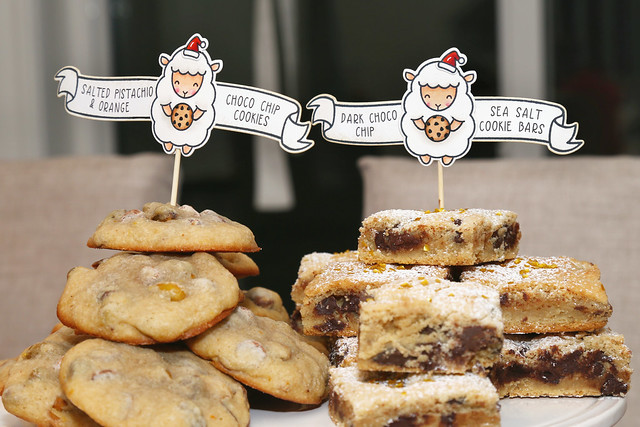
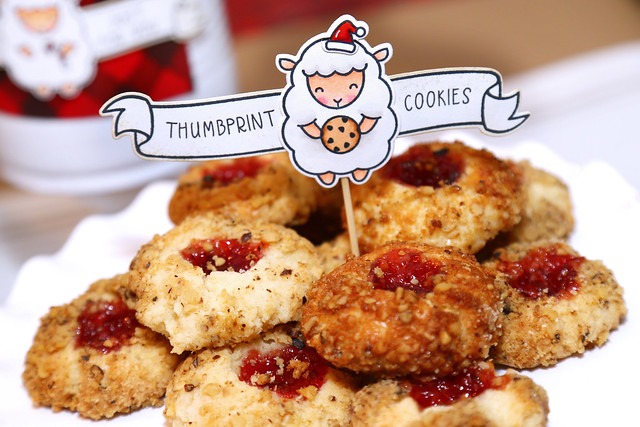
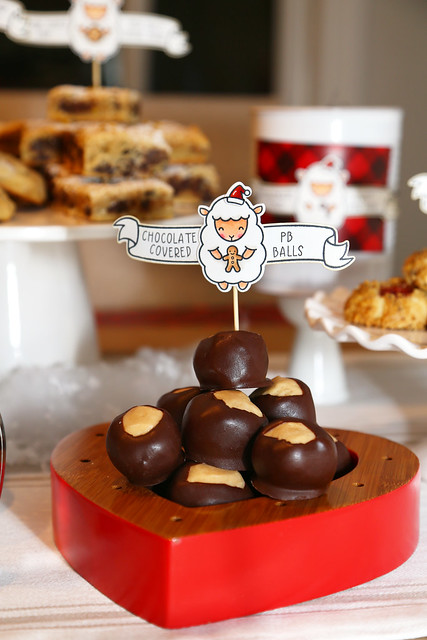
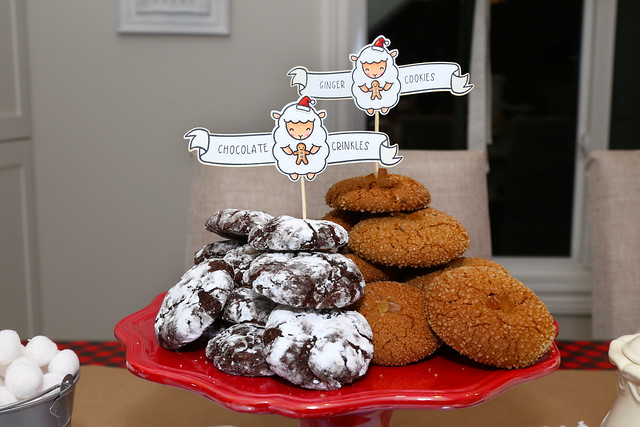
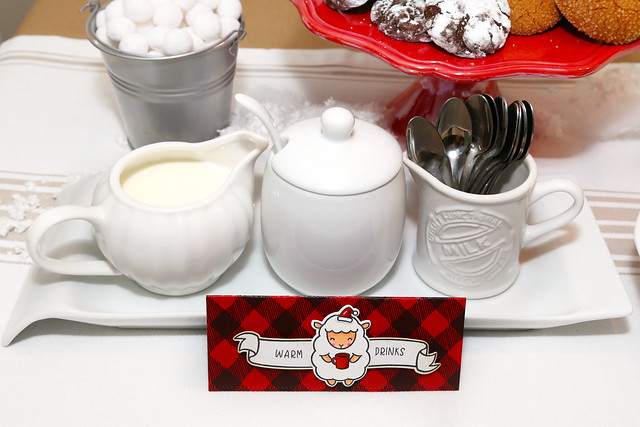
Every year, I try to decorate our spread a little with themed cookie labels. This year, I decided to use Lawn Fawn's Bannerific and Baaah Humbug stamp sets to create all of my decor.

cookie exchange 2015
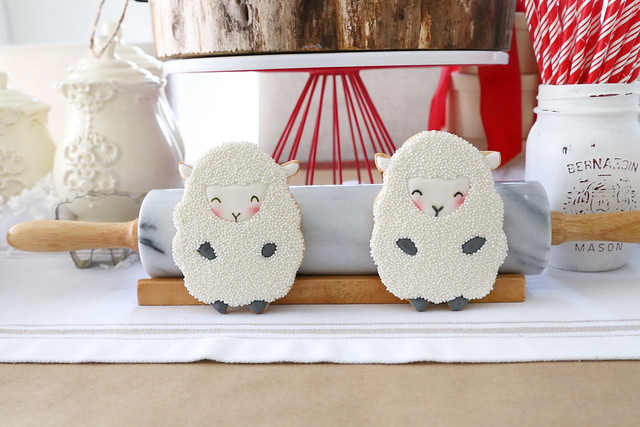
And, because it's a cookie party, the queen of decorated cookies (in my local area, haha!) Marlyn (of Montreal Confections,) whipped up a few matching cookies that I could use as party of the decor. They were the cutest!

cookie exchange 2015

I love Marlyn's cookies, and I love watching her make them! It's like magic, and she makes it look so easy. (click HERE for the how-to video)

cookie exchange 2015

We tried to make our cookies look as pretty as Marlyn's.  The salted pistachio cookies on the left were my fave. Honestly, I have snuck a few out of the freezer to enjoy with my afternoon coffee.

cookie exchange 2015

If you know the Lawn Fawn stamp sets, you know there is no chocolate chip cookie this size anywhere to be found. I improvized by stamping the empty gumball from Sweet Smiles and adding the little chocolate chips from Milk & Cookies. Voila!

cookie exchange 2015

cookie exchange 2015

cookie exchange 2015

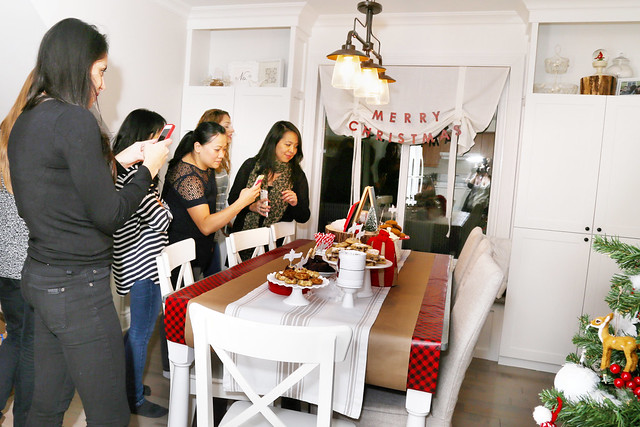
I didn't get around to photographing all of the cookies (or at least, not all of them in focus, haha!) I had some competition when it came to getting the table photographed:

cookie exchange 2015

hee.

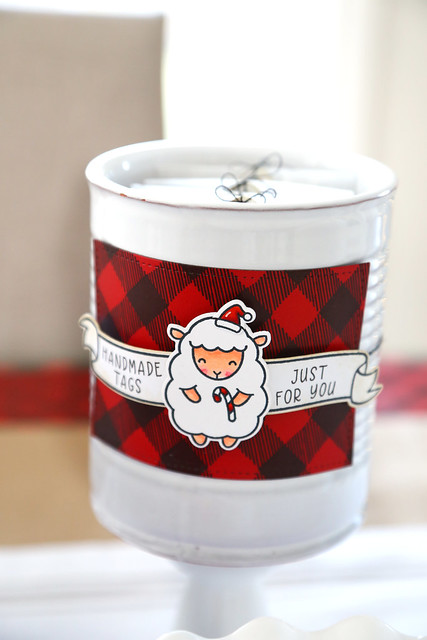
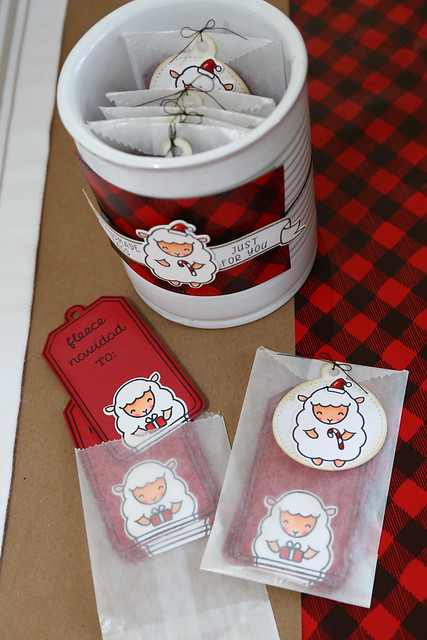
After the party, I offered a little handmade parting gift:

cookie exchange 2015


Each girl got to take home a set of simple tags to use when handing out cookie gifts.

cookie exchange 2015


Fleece navidad! I hope you liked this look into this year's cookie exchange party. If you have a cup of coffee in hand and don't want to get up just yet, you might like to check out our other cookie exchange parties:


♥.

Tuesday, December 15, 2015

*free* baby jesus digi stamp

I'm still a beginner illustrator, so I feel like I should be open to requests. You know? Like, when you're just starting to build your portfolio or resumé for any job, you'll gleefully accept any account.

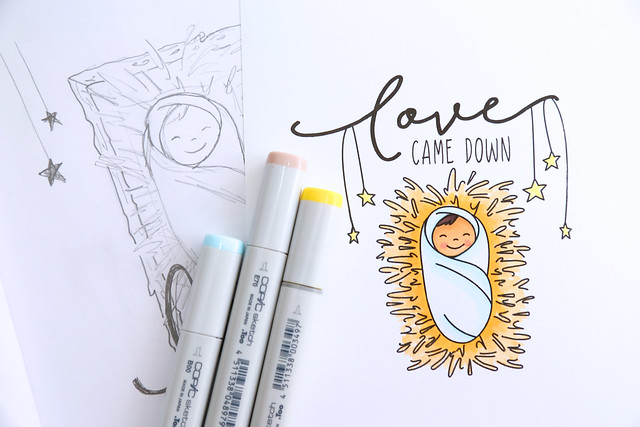
Soooo, when Maia (5 years old) asked me to draw her a baby Jesus that she could color, I made it happen.  Because, the budding portfolio. And also, baby Jesus.

As an aside, we'd just come back from church, she was singing Christmas carols, looking through my stamps and was SHOCKED to realize that Jesus was notably missing from my stash o' Christmas stamps. I mean, we teach her that Jesus is the reason for the season, but then all I have is one angel in a sweeping landscape of Santas and elves. (They are super cute, though.)

baby jesus, free digi stamp

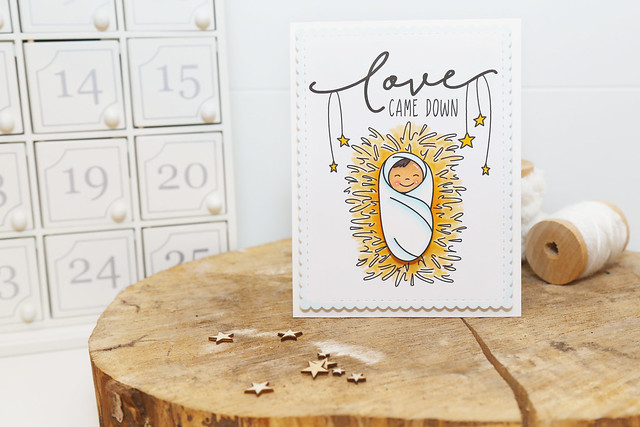
So, later that evening, I sat down to watch Mary Poppins and sketch a swaddled baby Jesus.  Monday morning, I was ready to make an illustrated version. Maia promptly colored herself 5 versions of baby Jesus, to be handed out to teacher and friends at school. I colored one to show off, and made the quickest card:

baby jesus, free digi stamp

Because Jesus' gift of life is free, I'm offering this sweet baby Jesus image as a free digi stamp.  The card you see above is a standard 4.25 x 5.5 inch card, so that will give you an idea of how large the image is (if you do nothing to shrink it down.)  When you click on the link, it will automatically download the zip file to your computer or ask you to save it.  You'll get both a png and jpg format.


I really hope you enjoy printing and coloring the babe! If you'd like to see more of my illustrations, I have a Christmas collection available in my Etsy shop - click! And I am working to put out a Valentine collection, sometime in the early new year.  Thank you for all of your encouragement and support as I hack my way into the world of illustrators.

♥.


Monday, December 14, 2015

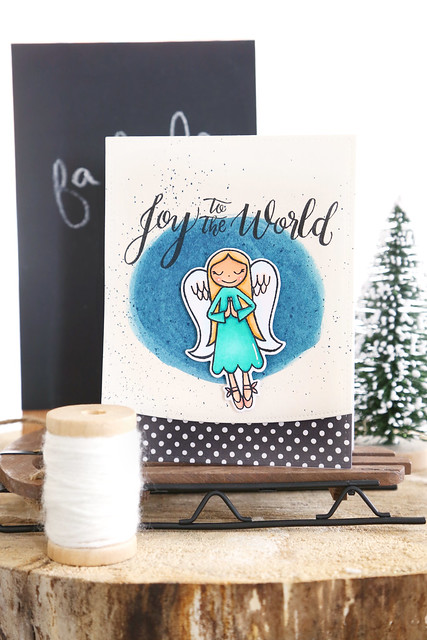
Joy to the World

Hi there!

I'm winding down the Christmas card making, but I was disappointed to realize my stash was all Santas and reindeer and elves. Enter the Neat and Tangled beauty, Little Angel.

joy to the world


She's practically perfect in every way (I just watched Mary Poppins last night, forgive me, but I am crushing on this new N&T illustrator.)

I colored and die-cut her, and propped her up onto a piece of white cardstock that I treated to a quick, freehanded water-colored circle. And some splatter.

Then, I added the sentiment (one of my faves) from Mama Elephant's Season's Greetings. To balance out the crisp, black sentiment, I added some black and white polka dot paper at the bottom.

I hope you like it!

♥.

Wednesday, December 9, 2015

i love you {new lawn fawn}

Hi there! It's the last day of Lawn Fawn's December inspiration week, and the new stuff will be up for sale as of tomorrow!

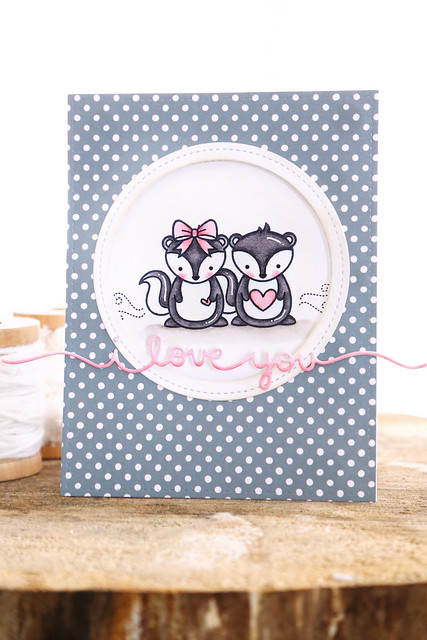
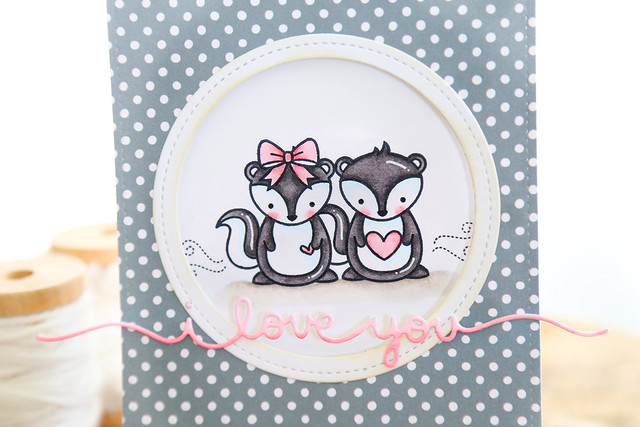
Today, I'm showing off the new I Love You border die:


i love you {new lawn fawn}


I used the Stinkin' Cute skunk image to make a little skunky couple, complete with stink lines coming out of them from either side. But it's ok, because they found love.

i love you {new lawn fawn}

I die-cut the new I Love You border die, and colored it with copic markers. Perfect way to get a bit of an ombré effect going. Laura Bassen does this on her word dies sometimes and I love it so much!

There's more to see on the Lawn Fawn Blog today - click!

♥.

Tuesday, December 8, 2015

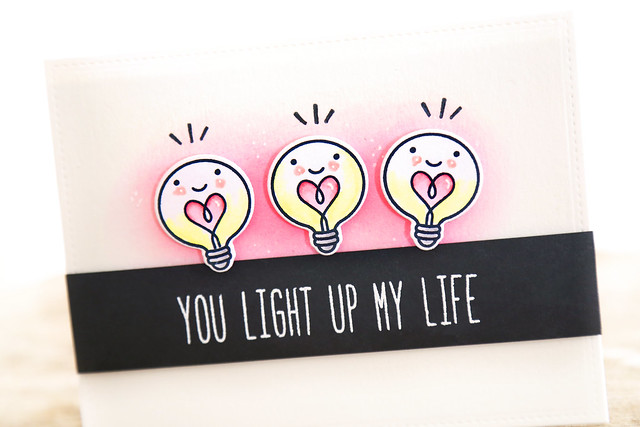
You light up my life {new lawn fawn}

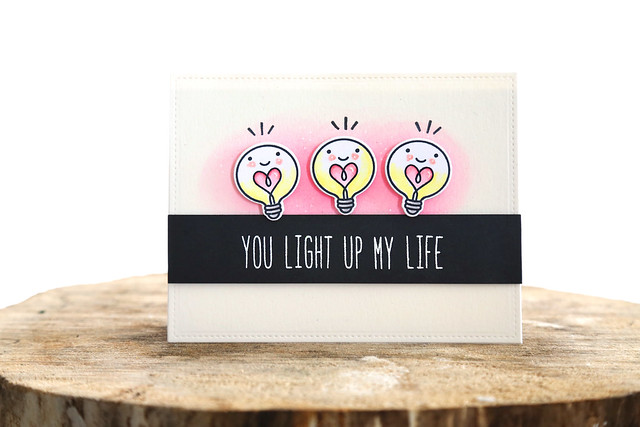
Hi there! It's the second day of Lawn Fawn's December inspiration week, and we're showing off the brand-spanking-new set, You Turn Me On.

you light up my life {new lawn fawn}

You may be wondering why I stamped a custom sentiment, instead of the one included in the set. There's a story.

I was stamping lightbulbs while the kids were around (which means Maia was stamping lightbulbs.)  Then, she picks up the set, turns to me and asks what the sentiment says. Thomas comes running up (he's a bit of a busybody) and tells her: it says you turn me on.

For the next minute, the children are talking about how much they like saying "you turn me on" and I am turning all shades of red. I snatched up the stamp set and announced that I would make a special sentiment for all of us. hahahaha.

Call me a prude, but something about a 5 year old saying: "you turn me on" is a bit out of my comfort zone. Even if they are paired with adorable lightbulbs.

you light up my life {new lawn fawn}

I made my custom sentiment with Milo's ABCs, and heat-embossed it onto a strip of black cardstock. Behind the lightbulbs, I did a little sponged hot-pink background and flicked on some white paint before adhering the lightbulbs.

I hope you like it! There's more to see on the Lawn Fawn blog today - click!

♥.

Monday, December 7, 2015

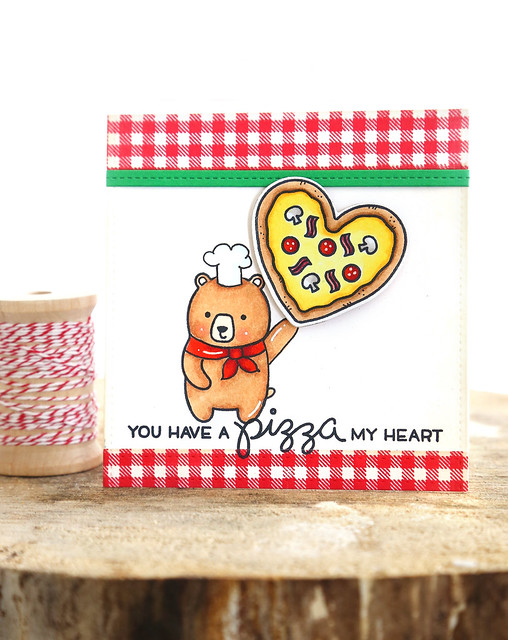
a pizza my heart {new lawn fawn}

We interrupt your holiday baking, gift-wrapping, michael-bublé-christmas-crooning to bring you a mini Lawn Fawn Valentine's inspiration week. Lawn Fawn is doing a mini new release, with all of the products for sale at the end of the week.

Today, we're showing off the adorable Pizza My Heart set. As in, you've got a pizza my heart. As in, you've got a piece of my heart. (honestly, I had to go over and over this with my kids. It took a while to see the lightbulb flash over their heads.)

a pizza my heart {new lawn fawn}


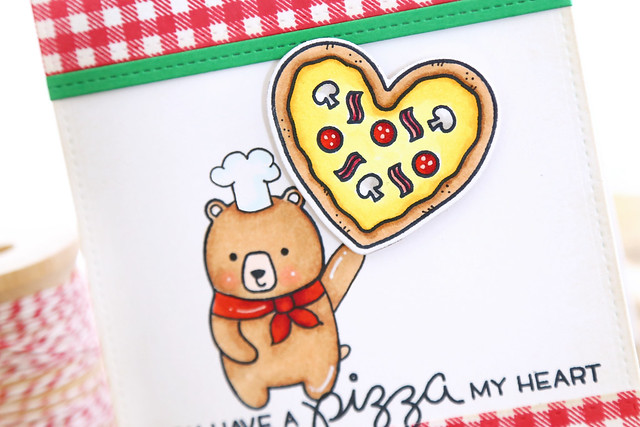
I gave the Party Animal bear a little chef's hat and scarf, and an outstretched arm to hold up the heart-shaped pizza. I love that the pizza comes with no toppings, and you get to add them in! So cute!

a pizza my heart {new lawn fawn}

My kids were all wrinkling their noses when I stamped the mushrooms. Honestly, there is not a vegetable these kids are excited about these days.

To frame out the scene, I had to add gingham! Nothing says pizza from an authentic italian pizzeria like a red-scarf-wearing bear and red-and-white gingham. Except maybe a little nod to the motherland with that green stripe. All the colors of Italy represent!

Visit the Lawn Fawn blog to see what the rest of the design team has cooked up - click!

♥.

Wednesday, November 25, 2015

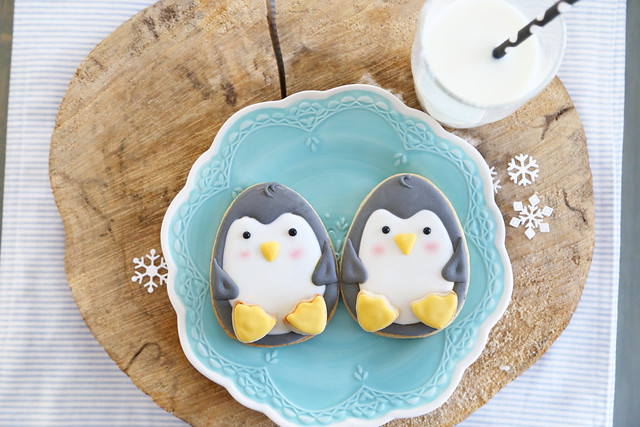
Christmas morning penguin cookies!

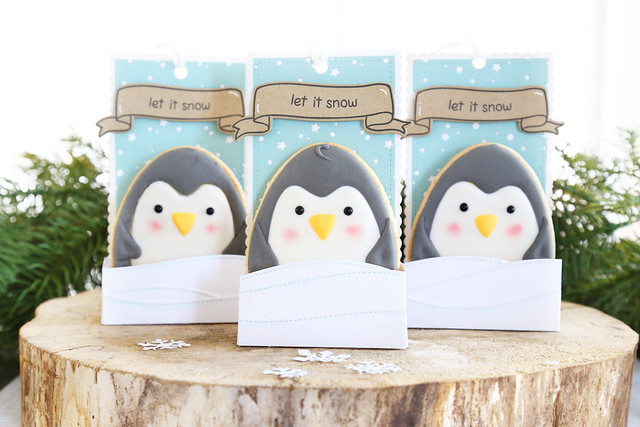
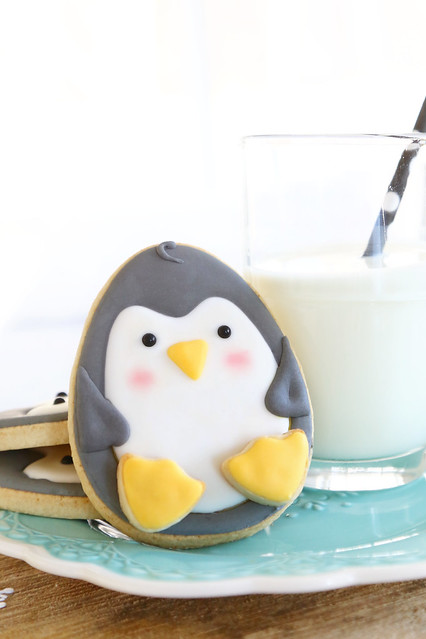
I am so excited to be working on a project with Marlyn again, the amazing cookie decorator also known as Montreal Confections. She decorated these adorable cookies, to look like the penguins from Lawn Fawn's Toboggan Together.

christmas morning penguin cookies

We came up with the idea of making a larger cookie, and creating a paper holder for it, so that it can be discovered on Christmas morning, hung on the Christmas tree. My kids would go nuts for this!

christmas morning penguin cookies

Marlyn made a video showing step-by-step how to decorate this cute penguins - click! and I made the paper holders to go along with, using Lawn Fawn products.

christmas morning penguin cookies

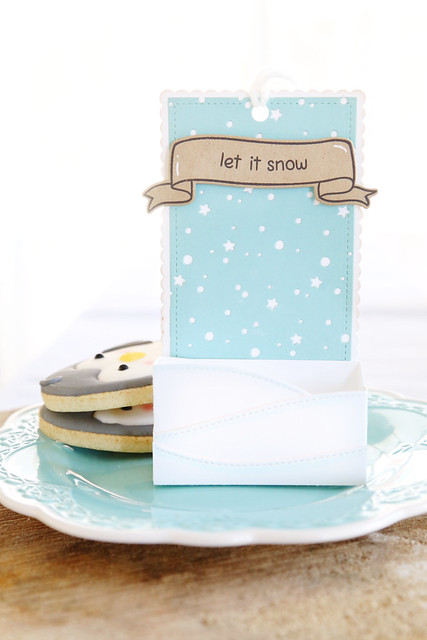
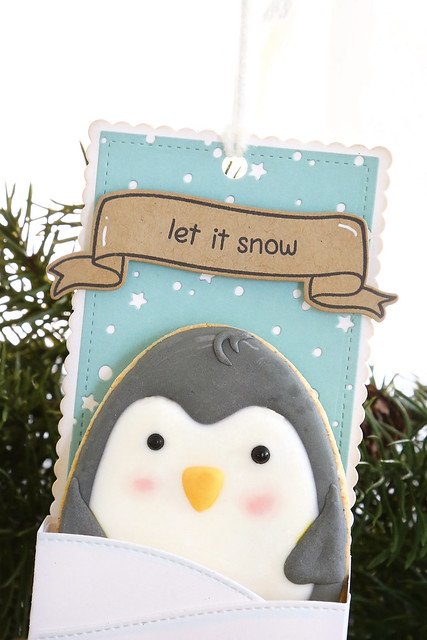
I didn't want to hide too much of the cookie, but I wanted to create a little something that would securely hold the cookie and look festive and cute! The fun part about this diy project, is that you could use whatever colors you want, to match your tree. I went with cool colors here, but the snowy backdrop would look adorable in other colors. I recently made a card where I cut it out of kraft paper (click!)

The first thing I did was to create the backing. I used the partial die-cut technique, careful to match up the scallops when I ran the die through again to make it thinner. I then cut a rectangle with the snowy backdrop die using the same technique. It makes everything look festive. The sentiment is from Critters of the Arctic and I stamped it into a Bannerific banner.

christmas morning penguin cookies

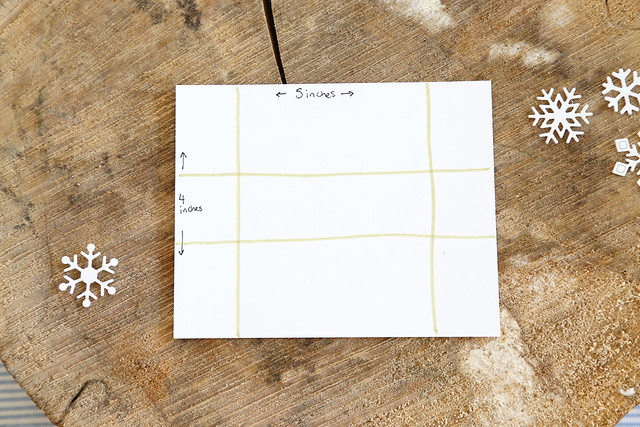
To hold the cookie, I created a quick box. I started with a sheet of cardstock measuring 4 inches by 5 inches. I then scored at 1" on the short sides and 1.5" on the long side.

christmas morning penguin cookies

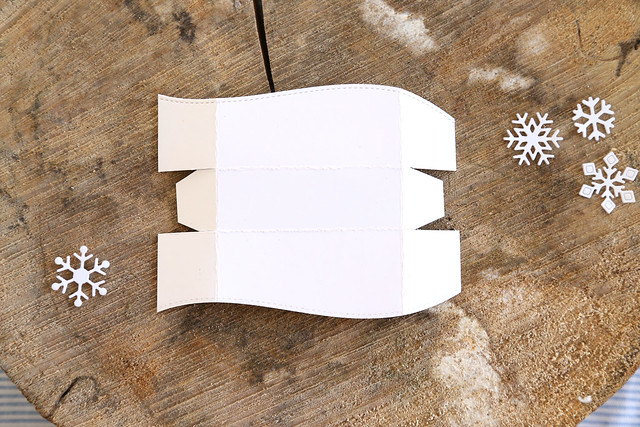
This next step is completely optional, but it adds such a special quality to the box! I used a snowdrift die on the top and bottom of the box, and cut the flaps as shown in the photo. You may need to trim down the middle flap, as shown, but it really depends on the angle of your snowdrifts. Once the box is assembled, you can adhere it to the long rectangular backing, and add additional snowdrifts to dress up the front if you so desire. I like 3 snowdrifts myself.

christmas morning penguin cookies


Once everything is assembled, pop your rosy-cheeked penguin cookie inside, punch a hole at the top and string him onto your tree. Isn't he cute? I love that the paper parts can be made from now, and the cookies can even be made and frozen so that the only thing you're doing on Christmas Eve is the cookie decorating. What a fun surprise for the kids to wake up to!

christmas morning penguin cookies


Thank you so much for your adorable cookies, Marlyn! nom, nom, nom. Don't forget to check out her YouTube video showing how to decorate these cutie penguins - click!

♥.

Monday, November 23, 2015

lunar animals {mama elephant designer spotlight}

Hi there, I'm here with what will be my last post as part of the Mama Elephant design team. sniff!

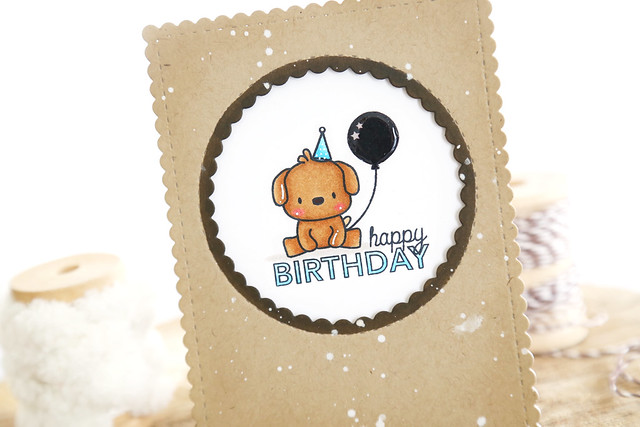
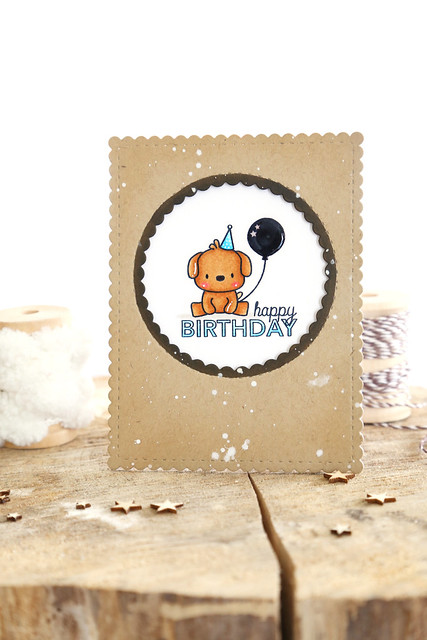
I crafted a more boyish birthday card, using the adorable dog from Lunar Animals:

lunar animals {mama elephant}

I created a window for my focal scene using the new die set, All Prettied Up. I love the scallop frame! By not snipping the circle away from the larger rectangular die, I could cut out the circle and have it be perfectly centered.

lunar animals {mama elephant}

The dog is so cute. I stamped the little party hat (also included in the set) onto his head, and used the balloon from Carnival Toppers to make sure he's party-ready. The sentiment is from the exclusive set that Mama Elephant created for Simon Say Stamp, called Skater Kids. It's still available in the Simon Says shop - click!

I used a copic marker to color in the scallops of the circle frame, to make sure it stood out. I then flicked some white paint over the card-front before adhering everything together. Simple, but cute! And perfect for a little boy's birthday.

I hope you like it, and a huge thanks to Kryssi and Angela for the time I spent on their design team. Keep on making all the cute things!

♥.

Friday, November 20, 2015

snowglobe gift tags {lawn fawny holiday week}

Hi there! I'm rounding out the week with another Lawn Fawny holiday day week post.

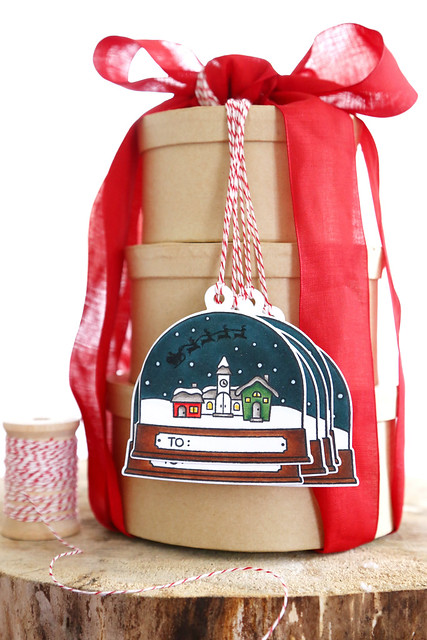
I'm super excited to show off my snowglobe gift tags:

snowglobe gift tags {lawn fawny holiday week}


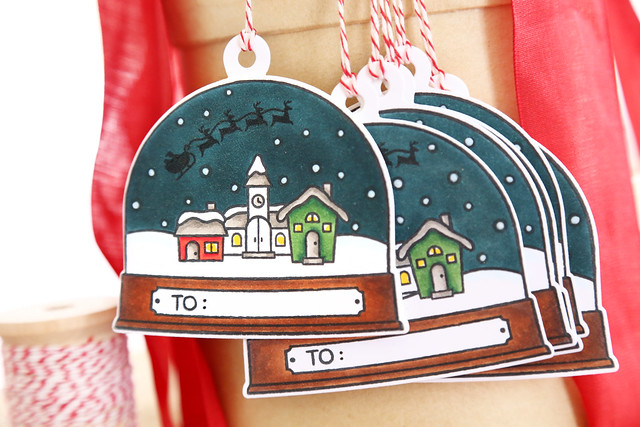
I grabbed the tag top part of the largest stitched circle tag dies and used the partial die-cut technique to then cut out the snowglobe bottom. It wasn't too hard at all, and once it was done, I made it look as seamless as I could with my scissors.

If you try this at home, I suggest you only stamp the snowglobe outline, do you fancy die-cutting and then stamp the rest. I did go through a few tries before I got it right.

snowglobe gift tags {lawn fawny holiday week}

Inside, I stamped a snowy scene, and used copic markers to bring it to life. Instead of stamping "merry christmas" or "let it snow" I wanted to make these into tags, so I took a craft knife to one of the labels. I surgically removed "let it snow" from the label outline, and found a "to" that could fit the space from another set. I drew in the colon points by hand.

I hope you like them!  There's more to see on the lawn fawn blog this morning - click!

♥.

Thursday, November 19, 2015

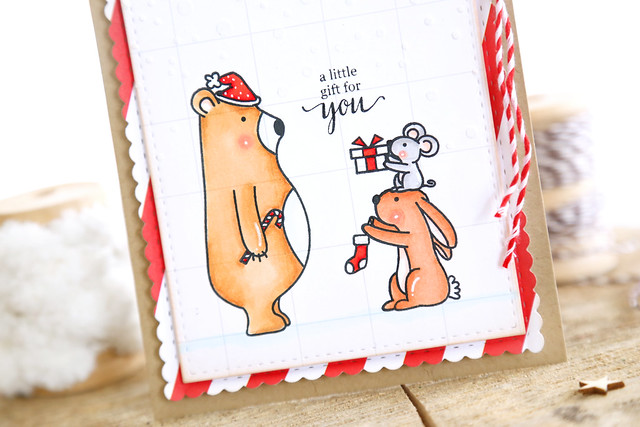
A gift for you {mama elephant stamp highlight}

It's the last day of Mama Elephant stamp highlights, and I told you I was gonna use my illustrations to round out my time with this wonderful company.

a gift for you {mama elephant stamp highlight}


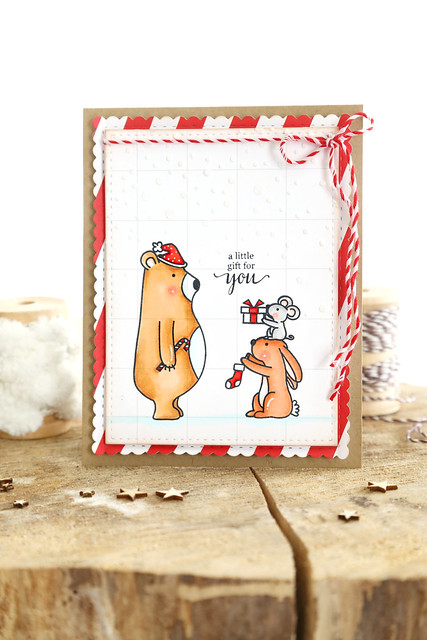
I created a little woodland scene using my animals from Woodland Gifts. The bear looks a teeny bit less stunned, with a candy cane stuffed under his arm and a winter hat on his noggin'.

The bunny and mouse have a little something for him, (the stocking from here and the present from here) which pairs so perfectly with the sentiment from Mini Messages.

a gift for you {mama elephant stamp highlight}

I stamped them all onto grid cardstock (it was by Papertrey Ink, but I don't see it in their store anymore) and added texture above them by way of a snowy stencil and white embossing paste. It's subtle, but I love it in real life.

I hope you like it! I have one last ME card to show off on Monday, and you can check out their blog this morning for more Mini Messages inspiration.

♥.

Wednesday, November 18, 2015

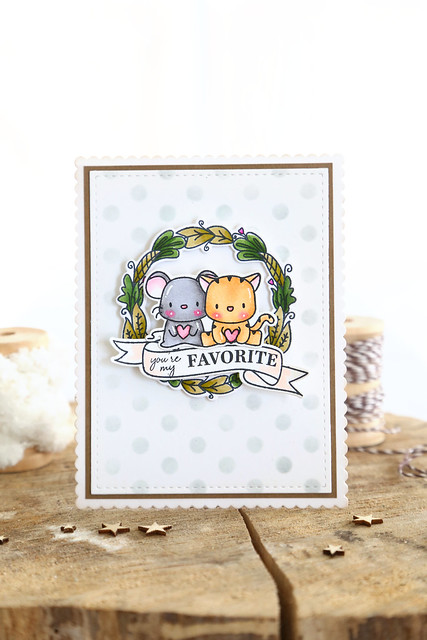
i like you {mama elephant stamp highlight}

Hey there! Today, the Mama Elephant design team is showing off the new set, I Like You.

It's full of fun sentiments for Valentine's day, and other lovey occasions.

i like you {mama elephant stamp highlight}


I won't lie. Since I'm leaving the ME team, I decide to on-purpose-use some of the images I illustrated for them on today's and tomorrow's cards. It makes me sound like a brat, but I'm all for full disclosure.

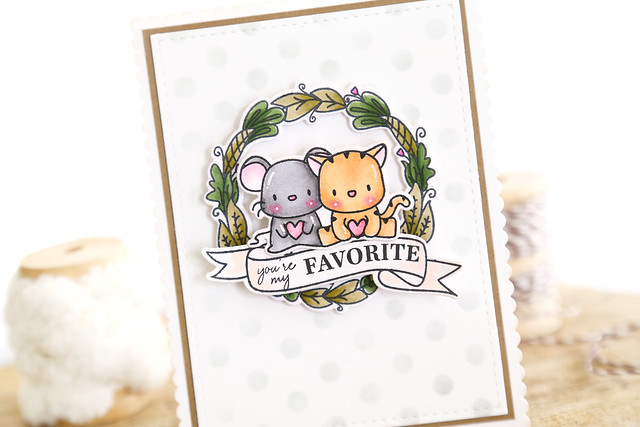
The wreath and banner from Charmed worked perfectly to show off the images from Lunar Animals. The cat and the mouse aren't chasing each other anymore! It's love, I think. Or like, at least. I did some creative inking on the sentiment from I Like You to have it all fit into my banner.

i like you {mama elephant stamp highlight}

I used a polka dot stencil for the background, in a soft grey that matched the little mouse. He's my absolute fave. I'm not over the mouse trend that seems to have taken over the stamp world. Not when the mice are that cute!

(But at the same time, flashback to the time I was 12 and my mom stepped out to get the morning newspaper and stepped on something....not as cute. In the words of my 2 year old niece: ew! misgusting!)

And with that, I leave you. Check out the Mama Elephant blog for more inspiration today - click!

♥.

Tuesday, November 17, 2015

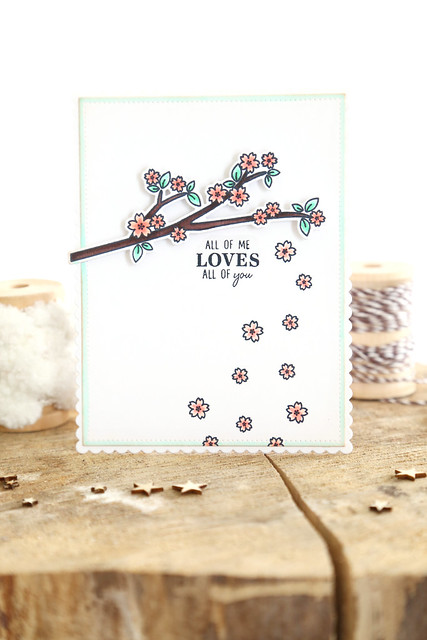
lunar extras {mama elephant stamp highlight}

hi there!

It's Mama Elephant's stamp highlight week, and today we're showing off the new set, Lunar Extras.

Perfect for making cards to celebrate the chinese new year, or...

lunar extras {mama elephant stamp highlight}


combine it with a sweet sentiment from I Like You for a fuss-free love note.  I stamped, colored, and cut out the cherry blossom branch, and popped it up using foam squares. I stamped the sentiment underneath, and the falling flowers to create movement on the card. To frame out the images, I used a soft blue marker around the edges of the rectangular mat, and adhered everything to a scallop rectangle card-base.

Are you humming John Legend yet?

I hope you like it!

♥.


Monday, November 16, 2015

lawn fawny holiday week!

Welcome to the first day of lawn fawn's holiday inspiration week!


I'm bookending this whole thing, with a lawn fawny christmas post today, and again on Friday.

lawn fawny holiday week!

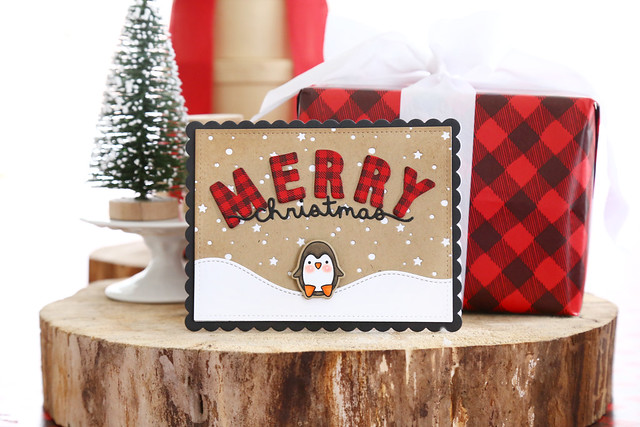
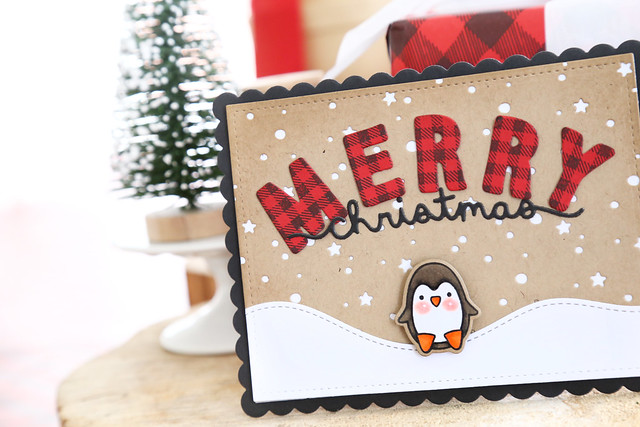
I'm back with my red and black plaid again! I hope you're not sick of it. This is my whole Christmas color scheme: kraft, red and black plaid, black and white. with a tiny green tree thrown in. ha.

I stamped Gingham Backdrops in black ink on red cardstock, then used Quinn's Capital ABCs to cut out the merry letters.

The penguin is my favorite part. He sits on a kraft background, but there is no white outline to break up the look! I stamped, colored and cut him out of kraft cardstock, and then solved the problem of his belly by cutting the face out of white cardstock.

lawn fawny holiday week!

I hope you like it! Check out the Lawn Fawn blog all week for more holiday card inspiration - click!

♥.