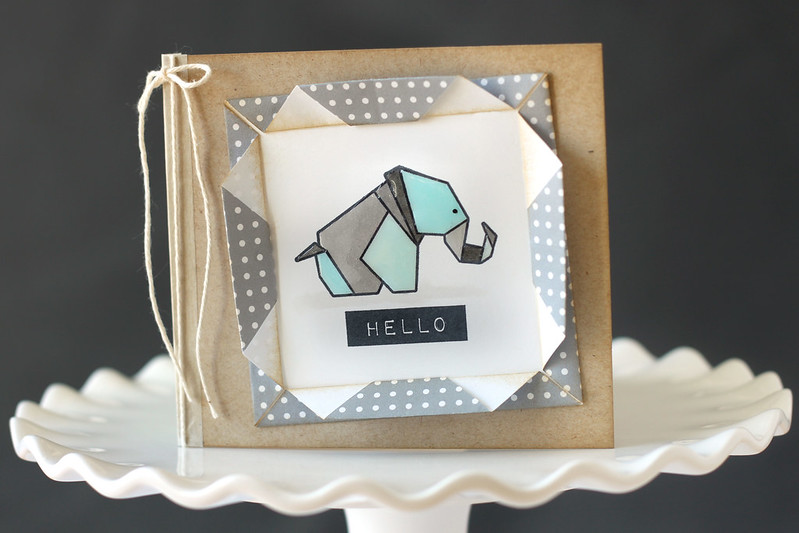
There's a brand new company making a buzz: altenew. My crafty buddies, Jen Rzasa and Tasnim Ahmed, are the beauties and brains of this new stamp shop. The official opening is April 7th, but I have a card to share with you today!
Isn't their company name so cool? I thought trendy, swanky hotel when Jen leaked the name to me. But back to the card:
I used two new sets: ori kami and label love. I stamped the elephant, colored it in with different blues and greys and stamped the label beneath it. I framed out the images with a paper frame... something I'll call "freehand origami" - hee. I just folded the polka dot paper until it was the right size for my elephant panel.
Isn't he cute? All glossy and ready for his big debut. I hope he makes you excited to see more of Altenew!
♥.
Monday, March 31, 2014
Thursday, March 27, 2014
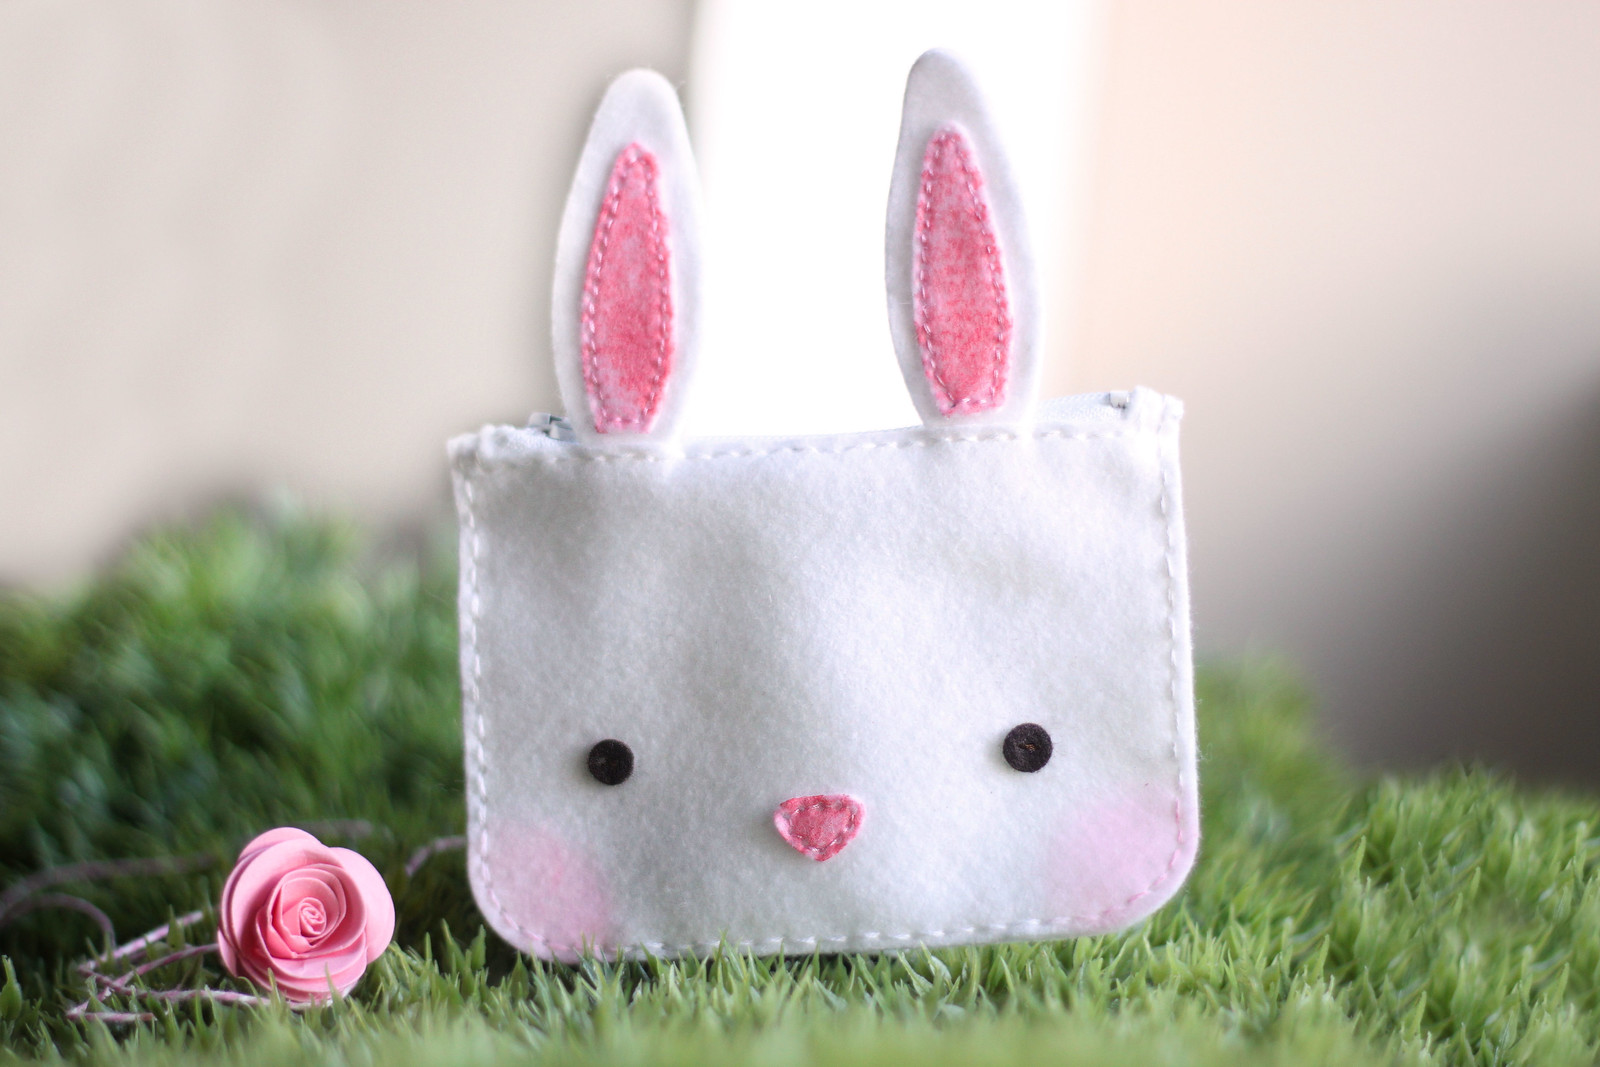
bunny coin purse
I was so excited to get my Papertrey Ink order yesterday, and I have only easter bunnies on the brain. They made a pretty sweet pairing:
I used the new coin purse dies, the ears and nose from the bunny bag dies, and the little button eyes from the bitty button stacks dies.
I was so impatient to tackle the coin purse that I didn't have time to go out and buy pink felt - I just used a copic marker to color the felt for the ears and bitty nose. I kind of like how mottled and "sponged on" the color looks!
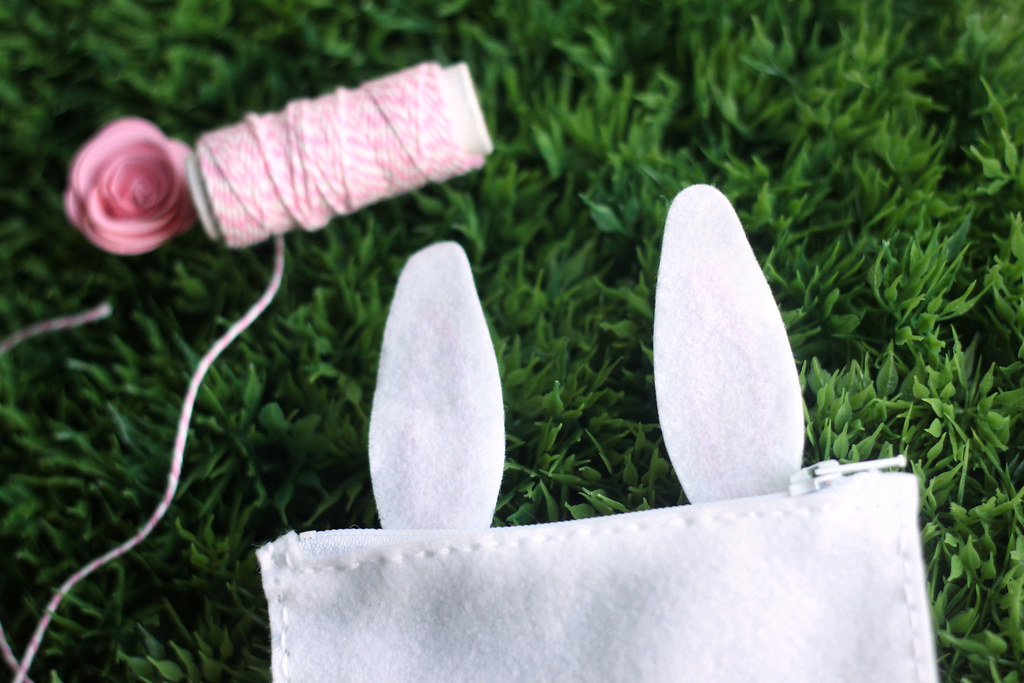
I first sewed up the face: the little eyes and nose. Next up, the ears - a layer of the "pink felt" onto the larger white ear shape. And then, because I didn't want all the stitching to show in the back, I used fabric glue to adhere another ear shape to the back.
When I was sewing up the zipper, I just tucked the ears between the front fabric and the zipper and sewed it with the rest. No sweat.
I watched Erin's video (but I'm MUCH slower with the hand-stitching. there was a lot of pausing and re-playing. ha) and it made inserting the zipper a no-brainer. Seriously, nothing to it!
The final touch involved a dauber and some pink ink for a subtle bunny blush.
I really love the dies! I'm still figuring out how many shims to put into my die-cutter so that it cuts all of the holes cleanly. With this project, that was my biggest ick. But once the holes were all poked out, and I dust-bustered all of the mess (haha) it was very enjoyable to have all of the kidlets watching over my shoulder as it came together. Now they all want different critters, and Sofia would like to tackle her own!
I hope you like it!
♥.
Tuesday, March 25, 2014
smile! {mama elephant designer spotlight}
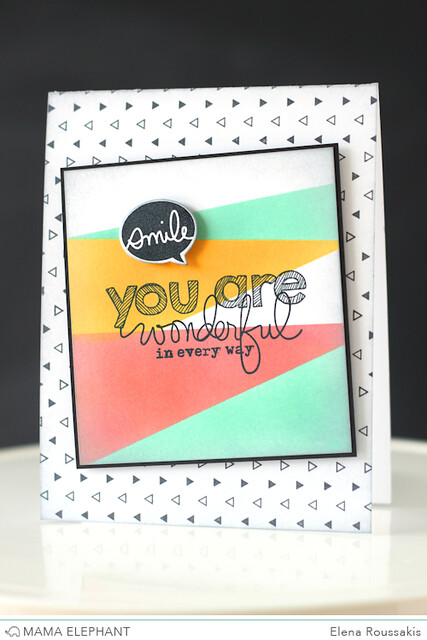
Hey there! I'm on the Mama Elephant blog this morning, with this card:
I started out by creating my card base, simply stamping the triangle pattern from on point borders to cover the entire area. I sponged around the edges in a dark grey ink and set it aside (I can't help it, everything looks unfinished to me without sponged edges. Is there a support group for that?)
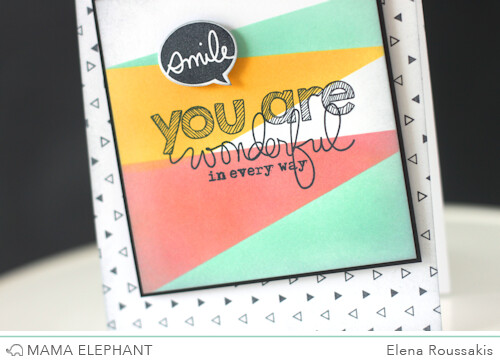
Then, I set about creating my focal panel. I used post-it strips to create a random geometric pattern, and sponged on different colors, really working them in to make sure that I got saturated color. I wanted the colors to really pop in contrast to the black and white card base.
Then, using sketchy letters, I spelled out "you are" to compliment the wonderful script font of the everyday greeting sentiment. I overlapped them a little, so that they looked like one cohesive unit.
I didn't want the whole card to be flat, so I cut out a "smile" speech bubble and popped it up over the sentiments. In passing, the speech bubble die from just hatched matches the hello speech bubble from everyday greetings, but not this smile one (which is facing the opposite direction.)
I hope you like it! Thanks for stopping by!
♥.
Thursday, March 20, 2014
she's fierce {mama elephant stamp highlight}
Welcome back to the last day of Mama Elephant stamp highlights! We're showing off the new set, everyday greetings. It really is a great, all occasion set, with fantastic fonts.
I paired the sentiment (perfect for a new baby, isn't it?) with the little birdie from just hatched. The little speech bubble from everyday greetings is my fave.
Flanking the sentiment and birdie, I did a watercolor treatment over some clear-embossing. The on point triangle border stamp then got die-cut with the cloud border.
I stamped the sentiment so that it overlapped on either side of the cloud border.
I hope you like it! Check out more inspiration on the ME blog today.
♥.
True Stamp Winner!
Goodness, I'm running behind lately. For no good reason. My body is in winter blah mode (it snowed again last night, grrr) and my mind is jumping ahead to party season (3 kids, 3 birthday weekends in a row in just a month!) and my blogging has been full of 2 and 3 a day posts.
But without further ado, the winner of the True Stamp spot is:
Congrats, Jen! I've already emailed you, and you should be getting all of the information very soon.
Thank you to everyone who commented and signed up for the amazing class!
I'll be back in a few hours with the last Mama Elephant stamp highlight post.
The winners from lawn fawn's march inspiration week have been announced! Are you one?
♥.
Wednesday, March 19, 2014
hoot. {mama elephant stamp highlight}
Hi there! I'm back again today with Mama Elephant, highlighting their new on point borders set.
It's a hoot:
For the record, I knew that Laura would stamp these in her gorgeous, signature rainbow colors. It almost made me go a different route. ha. I chose a more subdued rainbow palette, and got busy with the square border.
After stamping the border to fill the tag, I die-cut an owl shape into (what I eyeballed to be) the center of the tag. I stamped the coordinating owl image onto another white tag, and popped the rainbow tag onto foam squares over-top.
I love his little blushy cheeks, don't you?
Check out the ME blog for more inspiration today!
♥.
ahoy! {lawn fawn inspiration week}
It's the last day of lawn fawn's March inspiration week. Have you enjoyed it this month? Today, we're showcasing the 4x3 set, float my boat with its matching dies.
I have to admit that I love this card. I started out by clear-embossing the starry background, and then rubbing blue distress inks over the entire panel. It created the perfect backdrop for my boat, the wavy panel, and my striped ahoy. I keep using those Christmas papers! Red and white stripes are good for so many occasions.
For a finishing touch, I added a wood veneer anchor (I think it's by studio calico,) held in place by some red and white twine.
I hope you like it! There's more to see on the lawn fawn blog today.
ETA: I'm linking this card up to my friend Taheerah's weekly Cure for the Monday Blues challenge. What a great inspiration photo!
♥.
Tuesday, March 18, 2014
go on and celebrate {mama elephant stamp highlight}
Did the giant hand-lettering in the new Mama Elephant "make a wish" set knock your socks off when you saw it? It did that for me when I got it in the mail. I adore this set.
My photos are hit-or-miss these days, aren't they? bah. We're still getting snowy days in Montreal, but at least it's still somewhat light out at 6pm. Fingers crossed that coming up with a picture that matches the real life card gets a bit easier.... soon.
That being said, you'll have to squint to see some of the details in this card. I stamped the big greeting twice: once in blush pink ink, and then shadowed over-top with a gold embossing. The balloon and bunny were stamped in memento desert sand ink, and colored with the no-line coloring technique. There was some bleeding (the balloon doesn't look perfectly circular) but I actually like that. It looks hand-painted, and slightly vintage this way.
I dotted the eyes back in with a copic multiliner pen, and used liquid appliqué for the pom pom on the party hat and his little bunny tail. I still love that stuff, I can't help it.
Do you see how the bottom half of the sentiment overlaps the bunny? It wouldn't have worked out if I stamped the bunny with a darker ink.
I hope you like it! Check out the ME blog for even more "make a wish" inspiration.
♥.
just because {lawn fawn inspiration week}
It's time for another day of lawn fawn inspiration!
The possibilities for creativity are endless with #awesome. This set can be paired with any other lawn fawn set. I made it work with our friendship grows:
I masked a few sunflowers into the vase, colored it all (adding an enormous amount of wink of stella to the flower centers,) and die-cut it into the instagram picture and frame.
Milo's ABCs is always my favorite for creating custom sentiments.
I hope you like it! There's more to see on the lawn fawn blog today.
♥.
Monday, March 17, 2014
just hatched {mama elephant stamp highlight}
I'm back again, for my 3rd post of the day! Scroll down to see the first two.
The Mama Elephant team is highlighting "just hatched." It's my favorite set of the new release. You know how I like my cute images, and these are just adorable.
I stamped onto patterned paper, and masked different elements to come up with my focal image.
A white marker helped me to bring some brightness back to the egg, and a light blue marker outline helps it to stand out as one image.
I hope you like it! There's more to see on the ME blog.
♥.
hey there, gnomie.
this is my second post today! check out my lawn fawn inspiration week post *here*
It's time for another lawnscaping challenge! Show us your best CAS (clean-and-simple) style:
I was inspired by the gnome in the inspiration photo and these buttons that I found at my local scrapbook store (I think they've been around for awhile, but they're new to me!):
I love that the button fits pretty well on the lawn fawn gnome's face!
I popped the gnome behind some aqua grass and onto a polka dot notecard.
I layered a red hello onto a few layers of white die-cuts. It's as chunky as the little button I put on his face.
I hope you like it! Play along, and you can win a prize from Lawn Fawn!
♥.
let's polka {lawn fawn inspiration week}
Welcome back to another day of lawn fawn inspiration! Today, we're showing off lawn fawn's new let's polka collection. It's so bright and happy and perfect for spring.
I made a trio of little Easter treat bags.
The 12x12 papers are perfect for projects like this!
With a simple tag attached to each bag, they are all ready to go!
I hope you like them! Visit the lawn fawn blog for more inspiration.
I'm saving my words, I think - there are still 2 more blog posts to come today. See you back here in a few hours!
♥.
Sunday, March 16, 2014
celebrate! {lawn fawn inspiration week}
Welcome back to another day of lawn fawn's inspiration week! Today, we're showing off birthday tags.
I used some of our polka paper as a belly-band on a gift box - I love the pop of color I got from that yellow print! The tag was so much fun to make. I actually showed my son all of the critter stamps and asked him to choose which one should become party-ready. He went straight for the dino. I kept the colors pretty primary (save the light mint on the banner and cupcake) and masked off every element except the party hat. It was the perfect add-on after the project was already completed. I stamped the greeting inside the dinosaur's body for a different look. You see that on a lot of print-work.
Did you notice that the dinosaur's tail is cut out as part of the tag? I channeled my inner JJ Bolton and shifted the tag around in my die-cutter so that I cut everything except where the tail sits. I used a dinosaur die-cut to trace and then fussy-cut the area around the tail. I think JJ would have die-cut that spot, but I was too chicken that I'd mess it all up at the very end.
Check out the lawn fawn blog for more amazing birthday tags!
♥.
Saturday, March 15, 2014
Mama Elephant March Stampede!
The new Mama Elephant collection is available right now! Visit the store to see all of the amazing stamps and dies that are part of their March release.
Today is stampede day!
I used quite a few images from the new set, just hatched. The images are so adorable! A lot of creative masking have the critters sitting inside their eggshells, with the broken tops lying beside them. They've popped up to say hello.
All of the images were then masked and I sponged over a sunburst stencil to create the background. I used the same soft brown ink, but more saturated on the rays than the rest. I then sprayed the top half of the card with a gold mist. It has a subtle sparkle in real life.
I hope you like it! As always, there is a giveaway! To celebrate the new release, Mama Elephant is giving away one of each of the new stamp sets. The winners will be chosen at random from among the stampeding blogs. The winners will be announced on the ME blog, on the last day of the stamp highlights. You have up to 3 chances to qualify for a win. Just leave a separate comment for each:
Here is your full stampede list:
Mama Elephant ♥ Donna ♥ Laura ♥ Emily ♥ JJ ♥ Geralyn ♥ Elena ♥ Nichol ♥ Jenn
Today is stampede day!
All of the images were then masked and I sponged over a sunburst stencil to create the background. I used the same soft brown ink, but more saturated on the rays than the rest. I then sprayed the top half of the card with a gold mist. It has a subtle sparkle in real life.
I hope you like it! As always, there is a giveaway! To celebrate the new release, Mama Elephant is giving away one of each of the new stamp sets. The winners will be chosen at random from among the stampeding blogs. The winners will be announced on the ME blog, on the last day of the stamp highlights. You have up to 3 chances to qualify for a win. Just leave a separate comment for each:
♥ leave a comment on this post
♥ like/share Mama Elephant on facebook
♥ follow/tweet Mama Elephant on twitter
Here is your full stampede list:
Mama Elephant ♥ Donna ♥ Laura ♥ Emily ♥ JJ ♥ Geralyn ♥ Elena ♥ Nichol ♥ Jenn
Friday, March 14, 2014
happy camper {lawn fawn inspiration week}
It's the start of lawn fawn's March inspiration week! Today, we're showing off happy trails and starry backdrops.
I made a pretty simple card, but it makes me smile.
I pieced together "be" and "a" from different words in the "on the mend" set. I made sure that they were the same font and size.
The smiley face is so cute! I had my choice of facial expressions from *this set.*
I hope you like it! There's much more to see on the lawn fawn blog today.
♥.
Wednesday, March 12, 2014
rag doll dies, easter bunny edition.
My friend Deb (of Sprouting Jube Jube) had so much success selling handmade elves for Christmas (click! to see) that we thought a special handmade easter bunny would be a great follow-up. My kids adored the elf (the little one even cried when we put him away), and I'm hoping this bunny will be something special that they appreciate for years to come.
Using the rag doll dies from Clear and Simple Stamps, Deb sewed a hairless girl doll. That sounds weird, but I'm hoping you get it. The genius is in the design of the floppy ears (they really are floppy. I stuck a straight-pin behind each ear to stand them up for the photo-shoot, but something about a child dragging around a floppy-eared stuffed bunny just warms the heart. I felt like I needed to clarify that point, hee hee.)
The sweet little face came together using some of the pieces from *this* CSS die set. I love that pink bunny nose.
And painted-on blushy cheeks. eeep. they add so much character.
If you'd like to order a sweet handmade bunny keepsake from Deb, click over to her facebook page *here* and send her a private message. She will be making a boy's version in the next few days too!
♥.
Tuesday, March 11, 2014
sushi party with lawn fawn
I styled a little sushi party using lawn fawn's let's roll stamp set. A celebration can come together with just a few treats, and some carefully crafted paper accents. Let me show you what I did.
I didn't want to bake a full cake, but I did have a round box lying around... wrapped in white felt and black paper it looks like a giant sushi! The cupcakes were meant to look sushi-ish also: shredded coconut looks like sushi rice, and I used leftover candies for the toppers.
The chopstick holding a sushi was the image I used throughout the party, to keep things simple and pulled together.
candy sushi are the way to any kid's heart:
For a favor, I sewed a set of felt sushi and packaged them up in a clear container:
They took me a morning to whip up, but Maia hasn't stopped playing with them. If your hand-stitching is faster than mine, this would make the cutest party favor. The clear box costed 1$ at Target, and I already had the felt lying around. Wrap a bit of patterned paper around a set of chopsticks and you're all set.
If you liked this sushi party, check *this one* out.
If you'd like to know how to make the candy sushi, there are step-by-step photos on the lawn fawn blog today.
I'll be styling a mini party a month with lawn fawn! Last month, it was Valentine's day. This month, sushi. Next month, I'm hoping for an Easter theme. After that, I'm hoping for suggestions! Are there any lawn fawn sets that would spark a theme you'd like to see in party form? Let me know!
♥.
Monday, March 10, 2014
True Stamp promo code and big giveaway!
I'm thrilled to be able to promote True Stamp 2014:
True Stamp is an innovative, one-day event which brings together top-notch stamping sponsors and instructions in a LIVE, online environment. Attendees will get the best in paper crafting instruction, right in the comfort of their own homes, on their own computers! With sponsors such as Technique Tuesday, Lawn Fawn, Simon Says Stamp, Raisin Boat, Paper Smooches, and Mama Elephant, you are promised a full day of inspiration, creativity and fun! Over 250 stampers have already registered for this incredible, fantastic and inspiring event.
Oh, and it's all recorded, so if you want to watch your favorite classes again and again... you can! It's all included in the one low registration fee.
The details:
Date: True Stamp is scheduled for Saturday, April 5th. Mark it on your calendar - a whole day of stamping!
Cost: All SIX classes and full replays of the event are included in the one low registration fee of $97. But my blog readers can save 48$ by entering the code LOVE at checkout. The discount code is valid until March 17, 2014.
Bonus: Would you like to win your spot? I have one to GIVEAWAY! All you have to do is leave me a blog comment below, and I'll randomly choose a lucky winner by March 17th.
For more, including class descriptions, click on over to the True Stamp information page.
I would be so excited to sit in on this class, offered by Kryssi and Nichol (Mama Elephant):
Or this one, put on by Kelly Marie and Chari:
Don't they look amazing?
♥.
Friday, March 7, 2014
you've got mail {timeless twine week}
It's Friday, and the last day of lawn fawn's timeless twine week!
I used their natural twine to create a flat postcard-style card:
I used lawn fawn's large journaling card along with you've got mail and wish you were here. I also stamped the lined image from schoolhouse backdrops behind the map.
If you've been tuning in all week, the map image has been popular! I always think I'm being original, but I guess great minds think alike. hee.
The postcard is double-sided: I stamped the airmail border on a second journaling card die and adhered it to the back to hide the copic marker bleeding.
Happy weekend, all!
♥.
Subscribe to:
Posts (Atom)