Monday, October 10, 2011

100, and still got it!

Hi all!  Hope you had a great weekend!  We missed out on some Thanksgiving fun, playing nursemaid to our eldest who had a very upset tummy all weekend.  Fingers crossed that she's better and we can still have some turkey with my family this evening!

I was asked to make a few cards for a grandpa turning 100.  If that isn't a milestone worth celebrating, what is?  I'm  sharing the first card today, and see you back here for the next one tomorrow :)

I was told that grandpa has a great sense of humor and loves to play cards, so here's what I came up with:


I used the "A" from PTI's fresh alphabet, and the small heart from a paper smooches set.  The heart in the middle was die-cut from PTI's heart print dies.  I create a computer-generated sentiment, and cut it out using PTI's photo-finisher dies.


Thanks for looking!

Friday, October 7, 2011

Crafty touches for a bridal shower

I volunteered my tools to help create crafty touches for this gorgeous yellow-and-gray bridal shower.  We used PTI's double-ended banner dies for the cupcake flags, and the 2.5 circle die collection for the banner.  The die-cut letters are SU, and the stamped background is by Marketstreet stamps.  Enjoy!


Thursday, October 6, 2011

thanksgiving napking rings/place-cards...

Canadian thanksgiving is this weekend!  I know you Americans wait about a month longer (but if you want to pig out this weekend, feel free to tell yourselves "the canadians are doing it!")

I've been collecting toilet-paper-rolls for such an occasion as this:  my sister asked me (ok, no, I decided) to make napkin rings that could double for place-cards.

Soooo, thanksgiving is usually held at my mom's.  The food is plentiful, and so delicious, but there is no emphasis placed on seasonal decor.  My sister made place-cards for my mom's 60th birthday party, and I think we were the only ones oohing and aahing over them.  I'm pretty sure my dad said "nice," as he was moving it off his plate and over to the nearest counter.  Ha!  We'll see how these makeshift napkin rings go over :)


It was so easy, my son helped me out (and he's 4!)  We chopped toilet paper rolls in half, and then cut strips of patterned paper in the same width as the roll.  Place one end of half of the double-sided tape (that was placed down the middle of the roll) and wrap it around until you can rest the paper on the tape that is still exposed.  My son did the wrapping, and to keep it super easy, I had him gently rip the paper when he was done.  We left that seam exposed (although on a few of them, too much seam was exposed and I redid them. Such is crafting with kids...)


The longest part of creating the tag was stamping each person's name (with lawn fawn's "sally's abcs".)  But once that was done, I stamped PTI's "background basics: gingham" across the bottom in a burnt orange color, and stamped lawn fawn's "turkey day" stamp off to the side.  He got a quick coloring, and the tag was stapled onto the ring.  I like the look of the staple, but if you didn't, you could always just glue it on...  The tag shape and leaves in the back are both SU punches.


Here are some of them, all assembled.


And, just for fun, on a plate.  With a wine glass, that I didn't take out just for this photo-shoot, and then decide some juice would really hit the spot... My husband came home and asked why there was 1 good wine glass on the drying rack...


To end off, I also created these super-quick notecards that we can all share things we've been thankful for this year.  Kelly-Marie created some on the lawn fawn blog yesterday, and I thought it was a really wonderful idea.  I down-sized some index cards, stamped "so thankful" in the same alphabet set as my place-holders, and the same turkey and gingham too.  No fuss, no muss, but I think they'll be fun to share after a hefty thanksgiving dinner.

Who's about ready to get their turkey on?  *waving hands wildly in the air*

Wednesday, October 5, 2011

lawnscaping challenge: dimension

Hi all!

I hope I can safely say that the "loopy" feeling is calming into something much more normal.  Yay for chicken soup, and echinacea!  (Although, I was babysitting my niece and nephew yesterday afternoon, and she's only 11 months and was quite snotty.  And fully kissing my 17 month old on the lips.  And wiping runny nose gunk into my ear - don't even ask me how she managed that one, haha!  So we might be in for another round of something... 'tis the season!)

The current lawnscaping challenge is to add dimension to your project using layers, foam tape, or whatever else you can dream up:


Here's my take on the challenge:


You can't really tell by looking straight on, but that ornament-looking die-cut is l-a-y-e-r-e-d.  I'll show you a different view:


See?  layered.  I cut 5 PTI "tag sale 4" shapes from an old granola box that I conveniently had lying around (and now there's a mound of granola bars on the shelf of my pantry...) and stuck them all together to create a very thick chipboard piece.  I always thought this tag looked more like an ornament, so I ran with it and made a Christmas card :)


I paper-pieced the tree from lawn fawn's "critters in the forest" and the prezzies and bear (with gift-bow, I might add) from the "pa ra pa pum pum" set.  I added foam squares to one of the presents, and to the bear, to give even more dimension to the project.

The sentiment is from PTI's "merry little christmas" set, and I curved it to fit the contour of my tag shape.  Don't you love that you can do that with clear stamps?  I also stamped a PTI sheet music image into the background, but it's very faint in the pictures.

The patterned paper is SU, which I stitched around and adhered to an SU "cherry cobbler" mat, before adhering it all to a very vanilla card base.

Thanks for looking!

Tuesday, October 4, 2011

MIM - washi tape

I l-o-v-e learning new techniques!  And I especially love when the technique is simple and fun, and something I would have never thought of on my own.

I made my own washi tape!  Click over to Nichole's blog if you're curious - and make your own washi tape!  It's addictively fun.


I used PTI's grid lines cardstock and held my doily in place with the homemade washi tape.  Thanks to a silhouette-owning-crafty-friend, I had a few speech bubbles on hand.  It was stamped with a "think big favorites" sentiment, and framed out with "in bloom" images.  I also added a faux-stitched border all around and mounted it with foam squares.

I'm also sending a shout-out to my PTI princess friends with this card!  Our current challenge was to use red on our card.  I made a red gingham washi tape strip, and stamped out the florals in the same deep red.

Thanks for looking!

Monday, October 3, 2011

CAS-ual friday - feeling loopy!

I'm playing along with the current challenge over at Cas-ual Fridays this morning!  The challenge is "feeling loopy" - which is how I felt the whole time I was making this card.  Seriously, you know when you can feel your body fighting something off?  That kind of loopy.

For a different kind of loopy, here's my card, complete with a loop of twine:


I stamped my vanilla card base with different images from the PTI "harvest berries set" in old olive ink (SU).  I then stamped the envelope pattern background stamp (hero arts) over the whole thing in dusty durango ink (I stamped off on scrap paper first - and I'm pretty sure it's the first time I've ever used this color!)


My tag was cut with PTI's tag sale 1 die, and stamped with the hero arts houndstooth background stamp.  I stamped the sentiment (also from harvest berries) and 2 little acorns from the fall tag its set (also PTI).  Because the card base and the tag both have busy patterns, I added a brown lattice die-cut layer to break it up a bit.


I like the delicate twine loop :)


Thanks for looking!

Saturday, October 1, 2011

happy world card-making day!


In celebration, I made - wait for it - a card!  hee hee!

My sister, a few friends, and I are headed out for a beginner's sewing course (where I will hopefully learn how to create my own bobbins, among other things!) but I couldn't let this day go by without getting a little inky.  So, the owners of the cute shop where we'll be learning to sew just scored themselves a cute little thank you card - way to spread the love, right?


Is it too cheesy to bring a card with stitching on it to a sewing class?  It seemed like a good idea at 5am... lol.

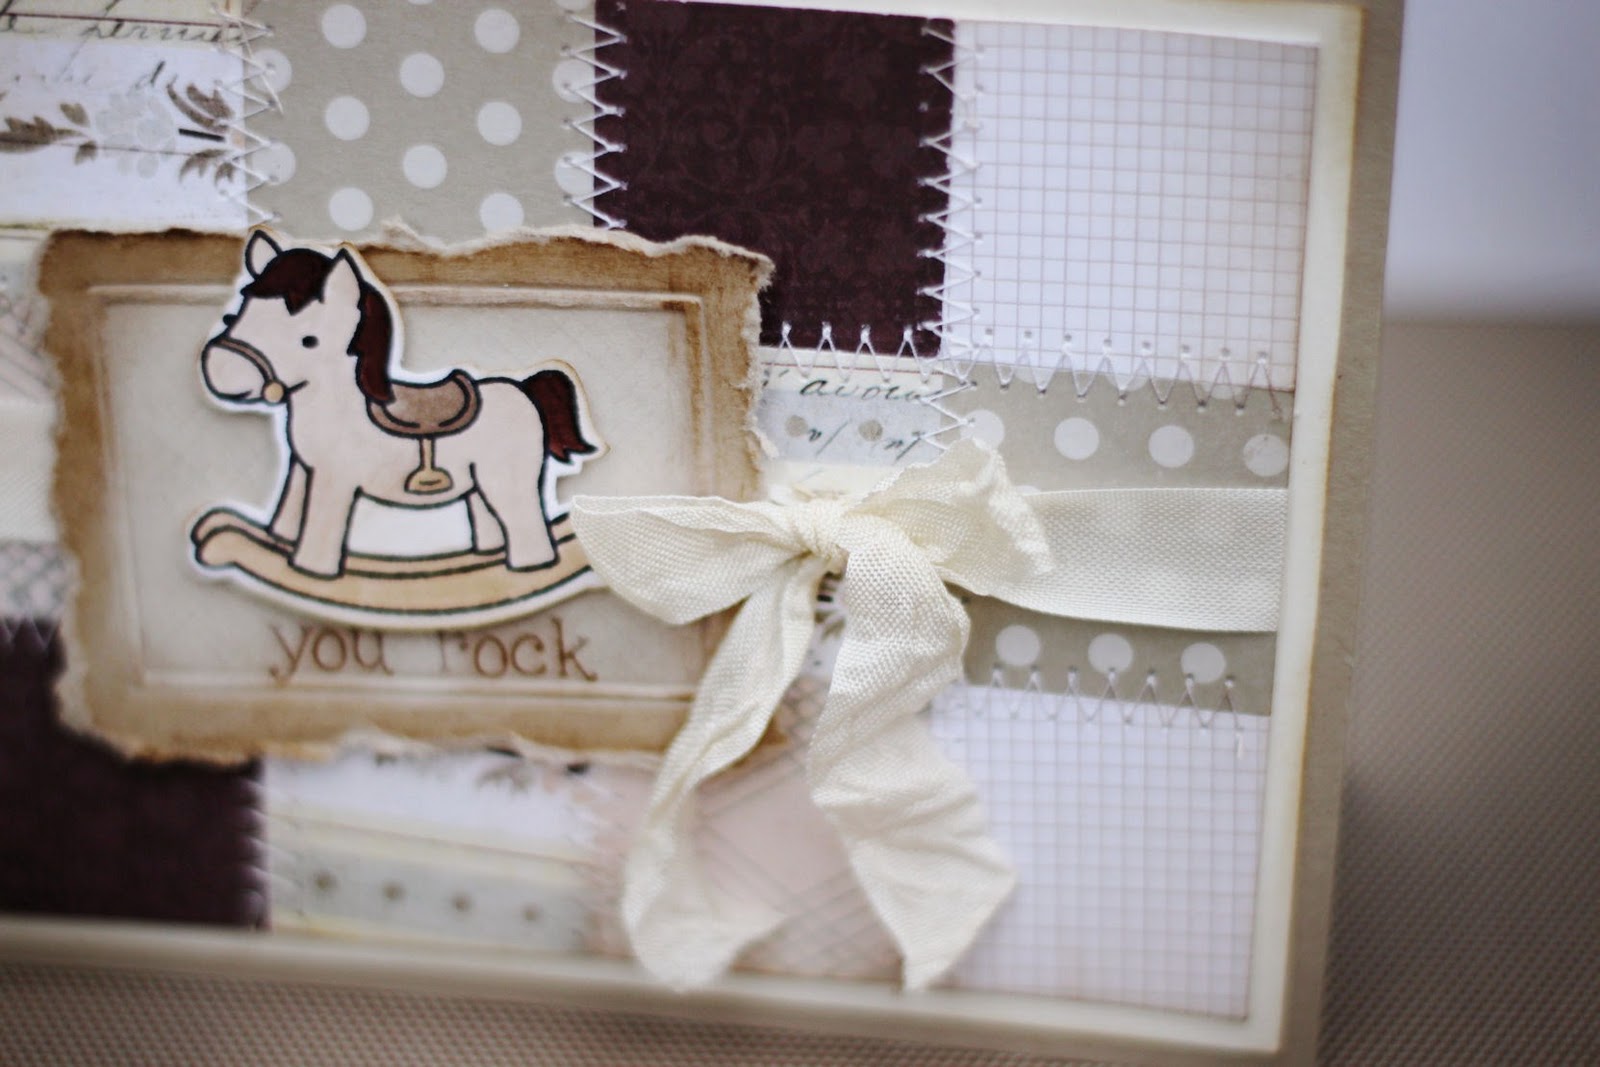
I used lawn fawn's "pa-ra-pa-pum-pum" set - isn't that rocking horse adorable?  I don't think I could ever look at a lawn fawn image and not smile...  I colored and cut him out, and mounted him on foam squares to an SU frame (it's a new embossing folder that comes with 2 little frames).  Before adhering the rocking horse, I tore around the frame rather than cut it out for some textural interest.  I also sponged around the frame in brown, and inside the frame in cream ink so that the embossing would stand out better.  I stamped the hero arts envelope pattern background stamp over the whole frame and added the sentiment.

The patterned paper mat was so easy to create!  A square punch made quick work of some scraps I had lying around, and I stitched it all together super quickly.  It helps that I started keeping my sewing machine where I could see it - I always tend to use the tools that aren't tucked away, you know what I mean?


Are you creating a card for world card-making day?  I'm linking this one to the lawn fawn blog, but there are contests and prizes up for grabs other places too, so get get creative!