Wednesday, August 28, 2013

School days!

I can hardly believe that the kids will start school tomorrow morning.  I'm writing up this post now, because I won't have the chance to be near a computer for the next few days....

Tomorrow marks the first day of school for Thomas, a missed first day of preschool for Maia, and a double-knee surgery for Sofia.

In passing, we've already started to receive get well cards and packages for Sofia.  We haven't shared them with her yet, but you've made my heart swell, and I know that you will brighten her day when she opens them...

For now, I thought I'd share the back to school photos I took of the kids last week.  This is my third year posting these back to school photos of the kids on the blog.  It's unreal, when I go back, to look at how much they've grown (click and click to see what I mean.)


Sofia will rejoin her peers in 3rd grade sometime in November if everything goes well with her rehabilitation.  Until then, a tutor will come in a few hours a week and I will take on the role of homeschooling mama.  This will be a very different back-to-school time for all of us!


My Thomas is growing up so fast!  Something happens between kindergarten and 1st grade to make them look so much older: he lost his chubbier cheeks, and demanded cooler hair-cuts.  (the verdict is still out on that one, but I do the best I can!)  He is minus a front tooth, and looking forward to learning how to read this year so that he "can do it myself because you don't want to read my star wars books, like, 100 times, but I want to." Sorry, buddy.  ha.


I'm still having trouble getting Maia to cooperate with the camera, but I can't get enough of those yummy cheeks.  She wouldn't give back the giant pencil and scribbled on my "complete works of Shakespeare." harrumph.  Maia will be starting back at preschool with a new teacher, and without any of her friends from last year.  For a kid who shies away from change, this is a big deal.  When we talked about it, she resolved to "tell Marlene that I'm nervous, and she will hug me."  I think she'll be just fine.

The backdrop for our little photo-shoot was simply a doodled frame on our chalk-wall, and some bookprint apples, with the color sponged on.  The book pages are so thin that I was able to cut 4 apples out in one pass.... yay!

♥.


Tuesday, August 27, 2013

so foxy.

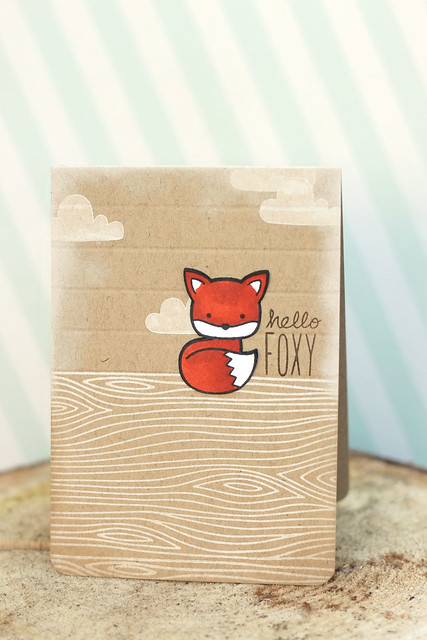
Another day of the lawn fawn inspiration week!  Are you loving it so far?  Today, we're featuring woodgrain backdrops and the stitched leaves die.  And here is my offering:


so foxy.


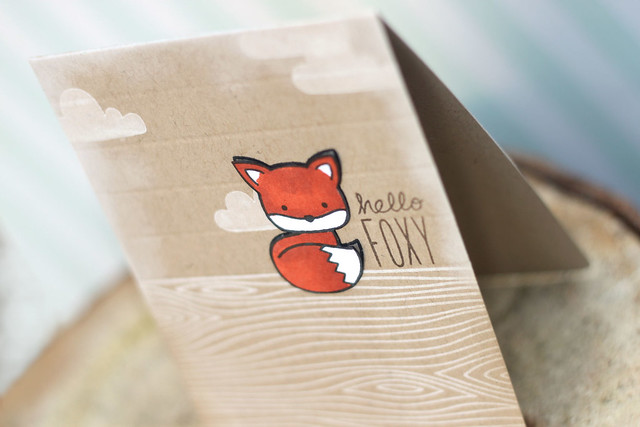
I love the look of the white woodgrain on kraft card-stock!  And that fox is, well.... so foxy.  I stamped him first onto the card base and then again on a separate sheet.  After coloring and cutting him out, I glued everything but his tips onto the card-base.  I love how paper can be played with for a cute little extra something.

so foxy.

♥.

Monday, August 26, 2013

from a little acorn {into the woods, lawn fawn inspiration}

Welcome back to another day of lawn fawn inspiration!  Today, we're showing off my very favorite stamp set of the entire release, "into the woods."  How could it not be the favorite?  The critters are adorable!!

I wanted to do something completely different with the set, and here's what I came up with:

from a tiny acorn...

I combined the new "peace, joy, love" set with the smiley acorn from "into the woods" for a baby card.  I think the card is pretty easy in terms of the execution, so I won't chatter about it too much.  The sentiment is so perfect for a new munchkin, especially new little Emery in California, who is hopefully drooling all over his card in delight right now.

from a tiny acorn...

A popped-up acorn and a wavy banner make this card simple, but still special.

Thanks for popping by!

Be sure to check out the lawn fawn blog for even more "into the woods" inspiration!

Saturday, August 24, 2013

be thankful {into the woods paper collection}

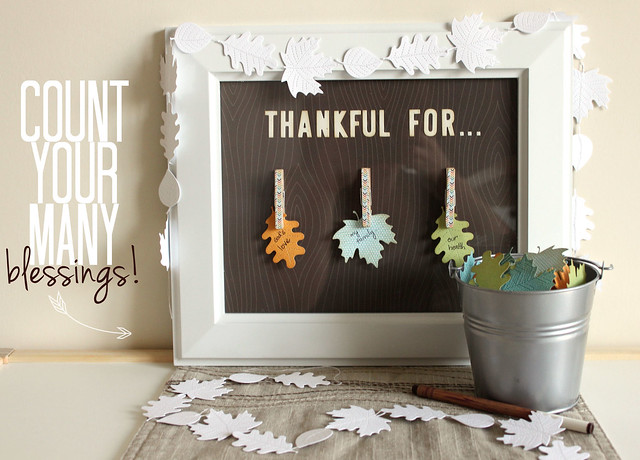
It's lawn fawn inspiration week!  The design team is showcasing one of the new paper collections: "into the woods."  The new lawn fawn patterned papers are my favorite ones to date!  Here's what I made for you today:

be thankful.

There's a children's song that goes "because a thankful heart is a happy heart, I'm glad for what I have, that's an easy way to start."

I love that.  So, this is how our family will be working on being more grateful...

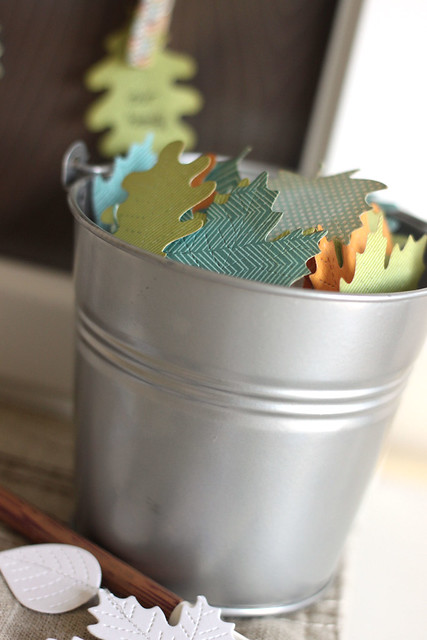
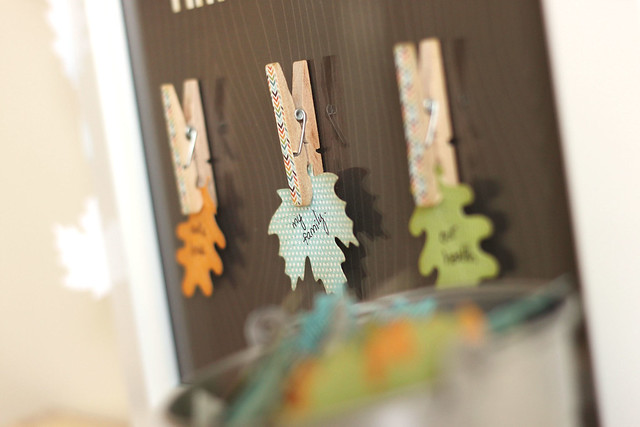
From the bucket full of die-cut leaves, we'll take one and write down something we're thankful for.

be thankful.


And then clip it up.  I started us off with very sweeping statements, but I will try to get the kids to be more specific as time goes on.  By thanksgiving, we should have a whole bucketful of thankfulness to look back on and be grateful for...

be thankful.

Some project details:

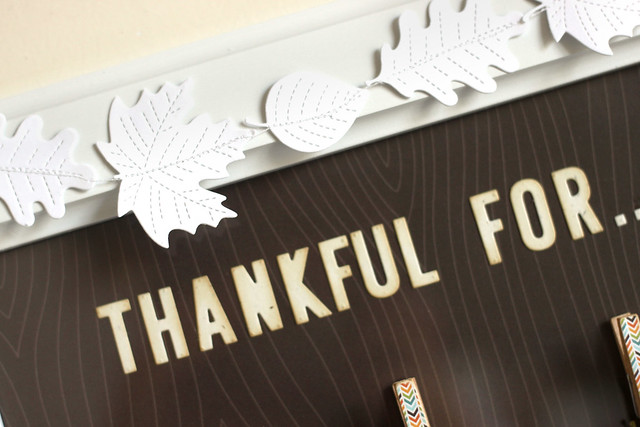
I cut down a woodgrain pattern to fit inside the 8x10 picture frame.  The letters were adhered onto the woodgrain paper, and fitted into the frame.

The mini clothespins were covered with another paper from the same collection.  I sanded the edges all around to give a cleaner look.  They were adhered to the outside of the frame.

The only time-consuming thing about this project was die-cutting all of the leaves.  But they were so pretty, with their stitched detailing, that I die-cut a bunch of them in white and sewed them into a garland.  It turned out to be my favorite part of all:

be thankful.

I hope you like it ♥.

Be sure to check out the lawn fawn blog for more "into the woods" inspiration!

Friday, August 23, 2013

it's a bird, it's a plane, it's... my hero.

*originally posted on July 26, 2013, I'm re-posting for those of you coming from the lawn fawn blog. enjoy!*

super owl! my hero...


You may have seen this card on the lawn fawn blog already, but I wanted to share it here too.

super owl! my hero...

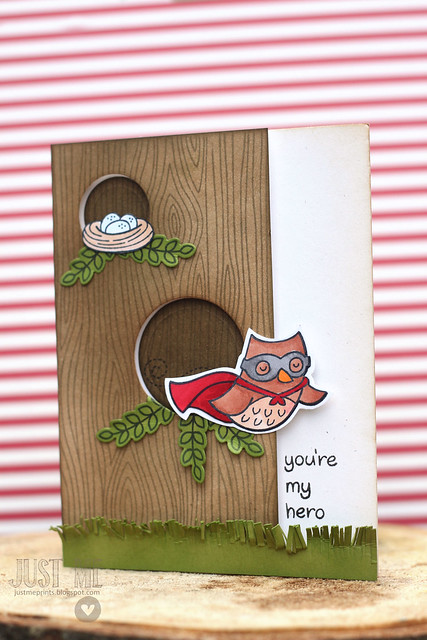
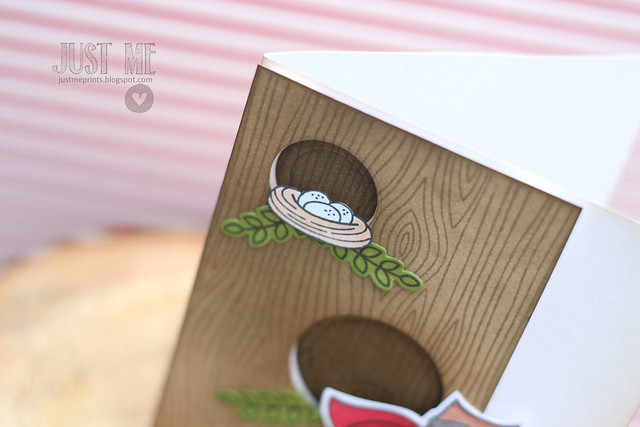
I used the upcoming sets, woodgrain backdrops and critters in costume, as well as blissful botanicals and home sweet home.

super owl! my hero...

I love that the costumed critters aren't just for halloween!

super owl! my hero...

Here he comes to save the day!

Thursday, August 22, 2013

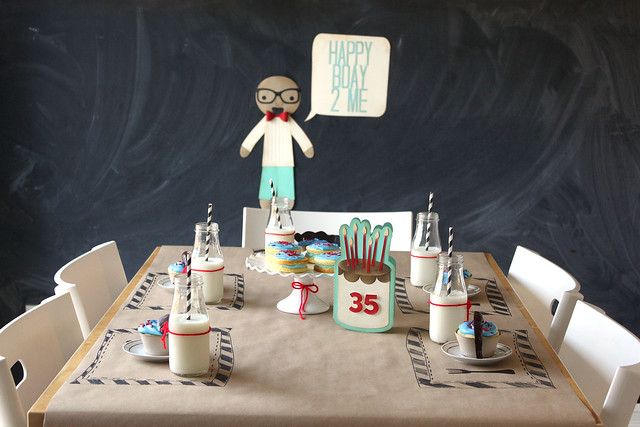
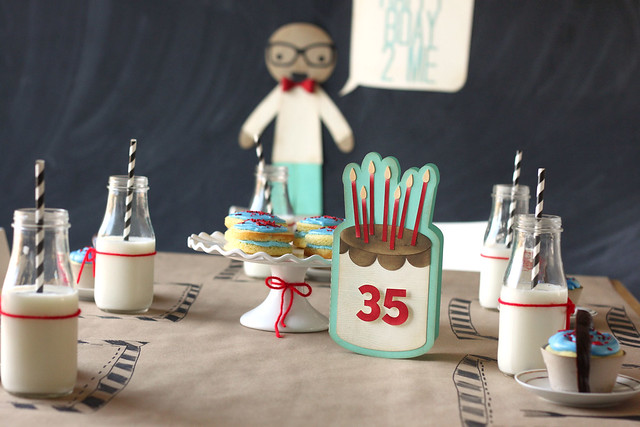
Happy 35th! {a teeny celebration}

35! a tiny celebration.

A grown man doesn't need a big party... all my husband asked for was a nice bottle of scotch and a book.  But the kids and I did something fun for him anyways...

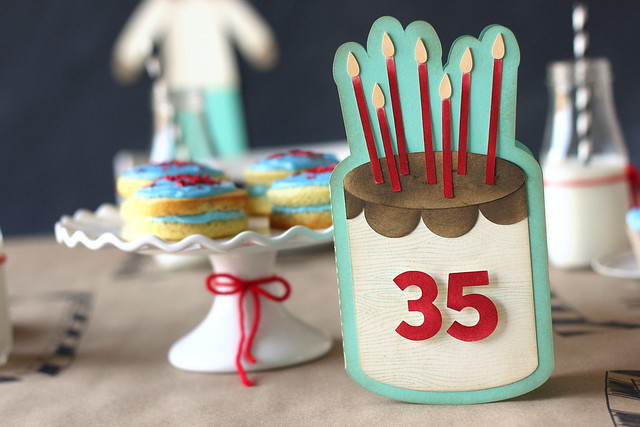
It all started with this card, from my friend Laurie's blog.  I never know what to buy from the silhouette store until someone makes something cute and shows me. hee.  Click *here* for the cake card file.

35! a tiny celebration.

I made him this card, and cut it out the same way that Laurie did: apart from the aqua card base, everything else was cut from the same sheet of cream cardstock.  She colored all of her candles with copics, but I sponged my color on.  I like the variation in color I can get that way... The only stamping I did was to add an aqua woodgrain to the cake base.

35! a tiny celebration.

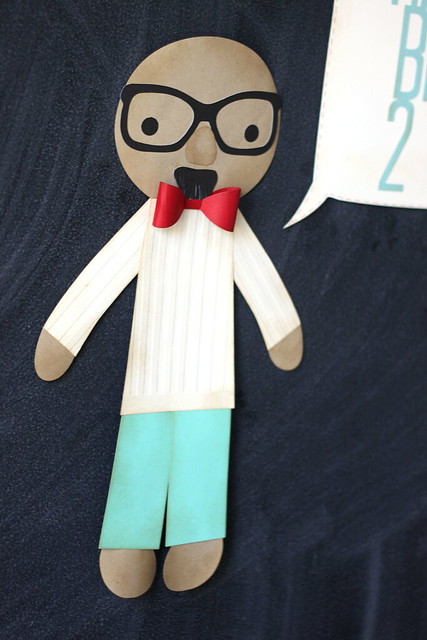
From this card, I set out to create a few treats and also.... flat Amar:

35! a tiny celebration.


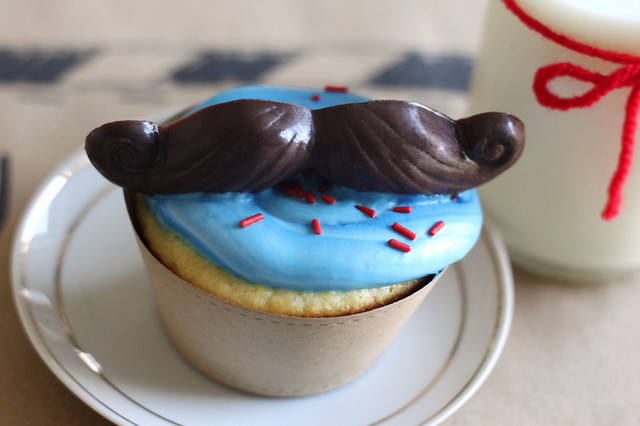
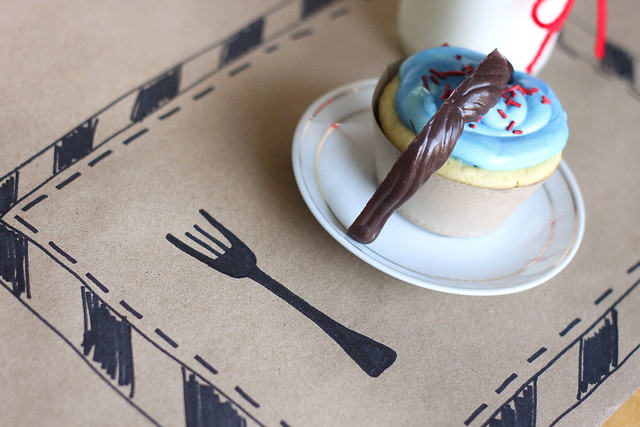
The kids were in fits of giggles.  Maia clasped her hands to her mouth and shrieked: it's daddy!  I think it's pretty much the best use of my CSS rag doll dies... evah.  I did use the silhouette to cut those glasses.  And what could go better with flat hubby than a few mustache-topped cucpakes?  (ps, the kids helped with the icing, which makes the sloppiness completely acceptable.)

35! a tiny celebration.

Since cupcakes were our only treat, I decided to dress up the table a tiny bit.

35! a tiny celebration.

A hand-drawn fork, next to a handlebar mustache.  naturally.

35! a tiny celebration.

I used packing paper and did some quick placemat doodles with a black sharpie.

35! a tiny celebration.

I hope you like our tiny celebration!  Amar was delighted when he came home to see all of this (and, I'd like to think his favorite part was the flat version of himself.)

Happy birthday to the best partner and man I know!


♥.

Wednesday, August 21, 2013

newton's antics {newton's nook guest designing}

Hi friends!

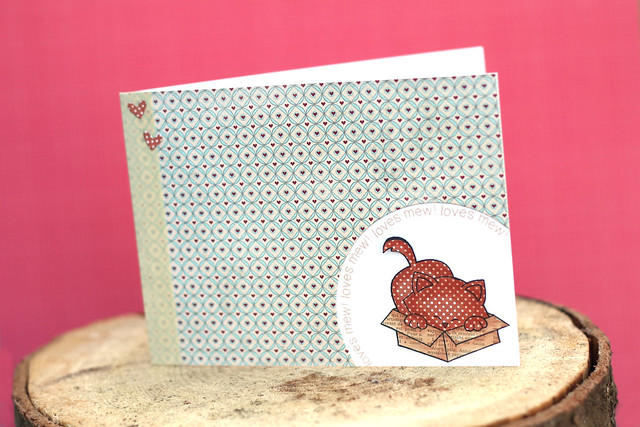
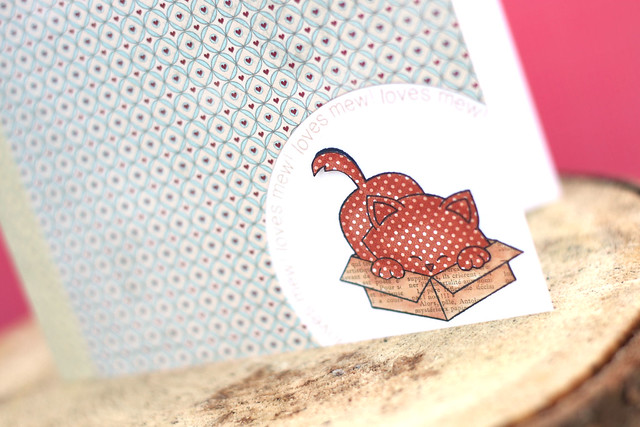
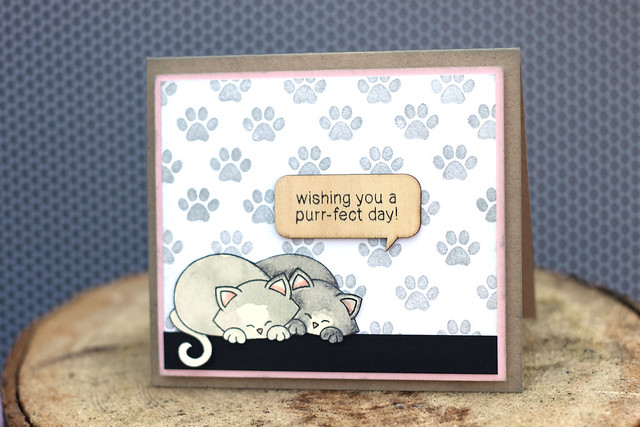
I'm being featured over at the Newton's Nook blog today, with a few kitty cards.  Newton's Antics is definitely my favorite Newton's Nook release!

newton's antics

I started with a paper-pieced kitty, and a curved sentiment.  Some copic marker shading adds dimension to the patterned paper:

newton's antics

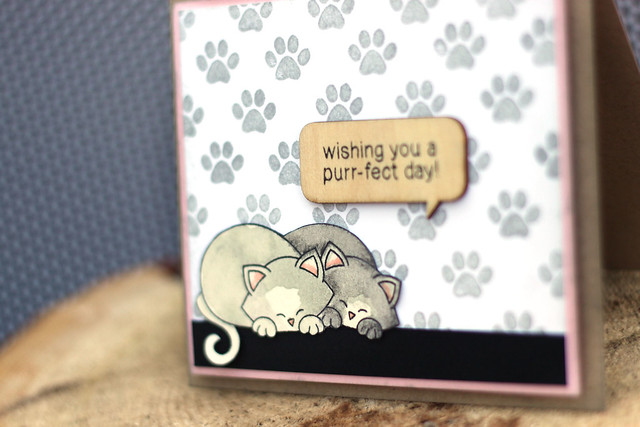
And then, watercolored kitties, sitting on a black ledge, having made quite the mess on the wall behind them...

newton's antics

purr-fect.

newton's antics

♥.
Tuesday, August 20, 2013

yee-haw! it's a cowboy party, y'all!

yee-haw! my nephew's 5.

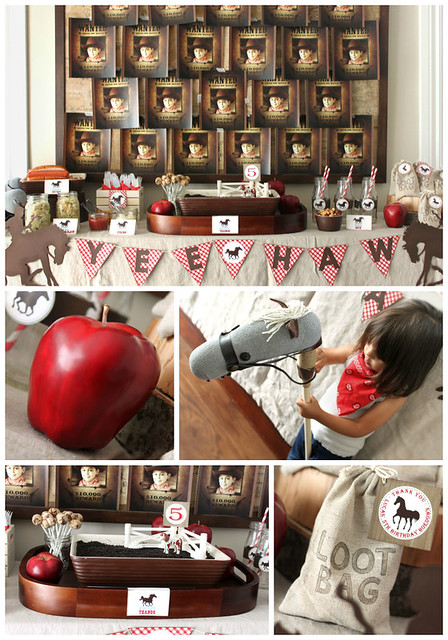
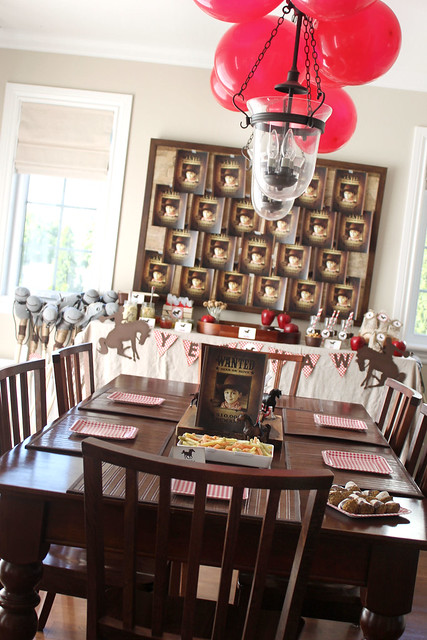
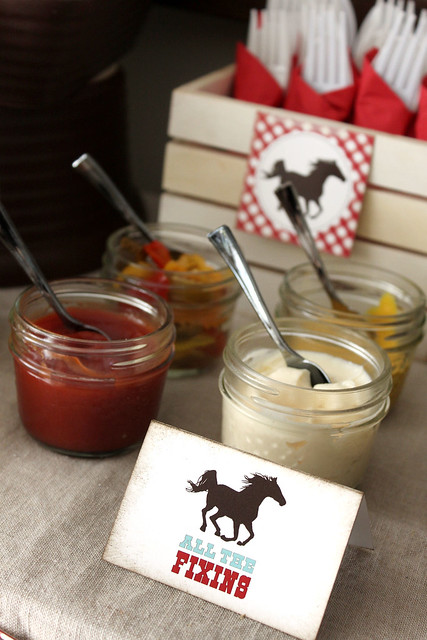
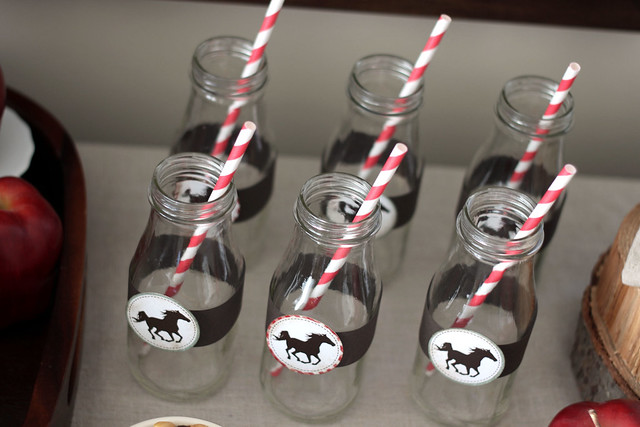
If you follow me on instagram (mom2sofia) you would have seen a few advance pictures of my nephew's 5th birthday party.  It was all cowboys and grub and horses-on-sticks.  My sister designed the printables (they will be up in her shop by the end of the week,) and I styled her table.

yee-haw! my nephew is 5.

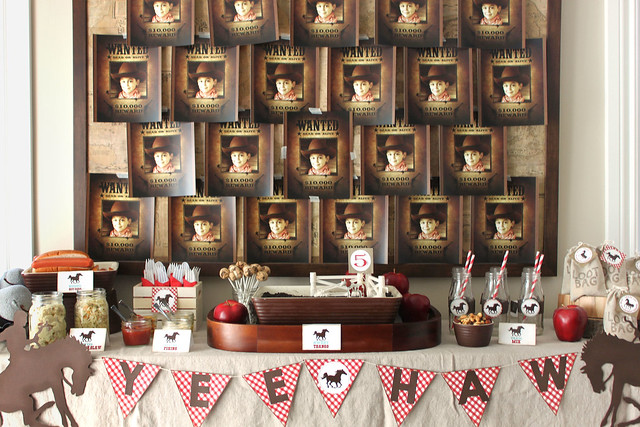
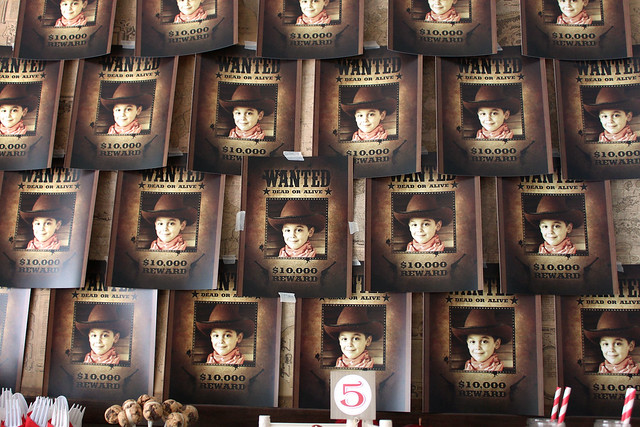
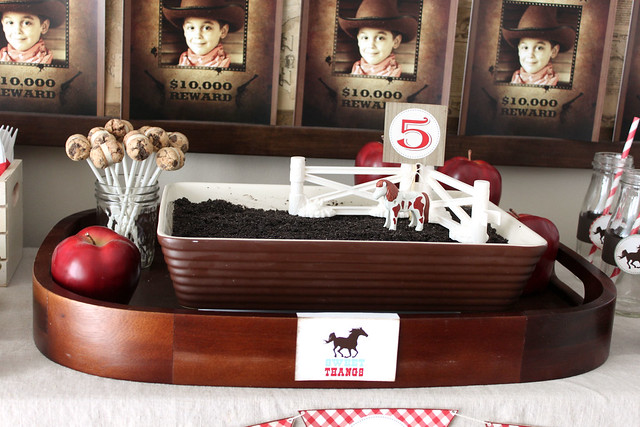
The easiest way to create huge impact was to print very little of the banners and food labels, and instead to print an obscene amount of those wanted posters.  My sister printed 3 of them at first.  What she was hoping to accomplish with that, I couldn't understand.  I told her to print another twenty.

yee-haw! my nephew is 5.

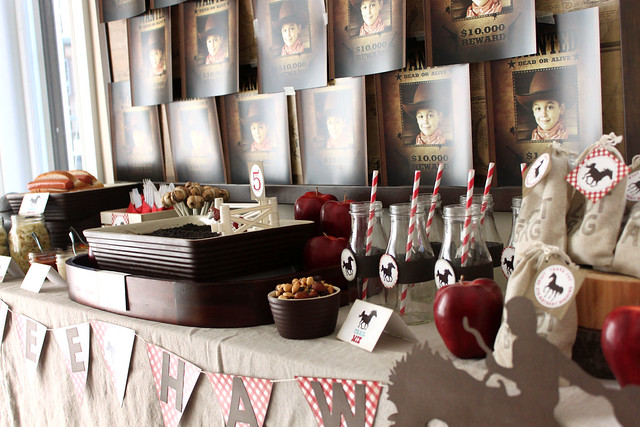
Instant backdrop.  We stuck them up with washi tape, right over her vintage framed map.

yee-haw! my nephew is 5.

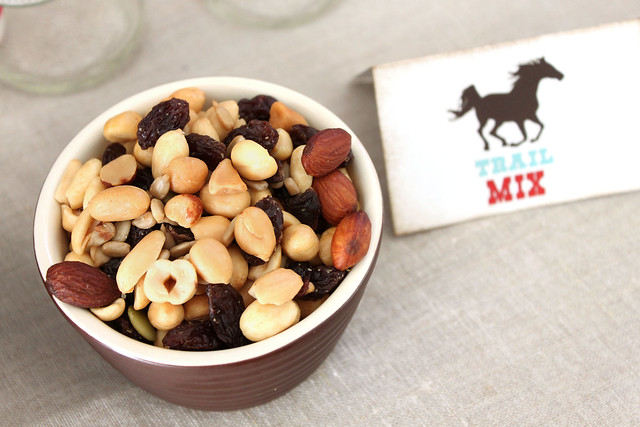
We kept the food simple: hot dogs (rodeo dogs), taters 'n slaw (potato and coleslaw salads), and a few others...

yee-haw! my nephew is 5.

yee-haw! my nephew is 5.


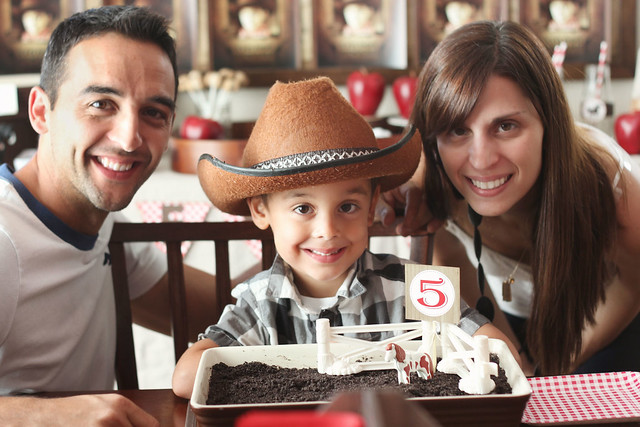
...and a few "sweet thangs." The birthday boy nixed a cake in favor of dirt pudding - we stuck a few toys on top and called it cowboy appropriate.

yee-haw! my nephew is 5.

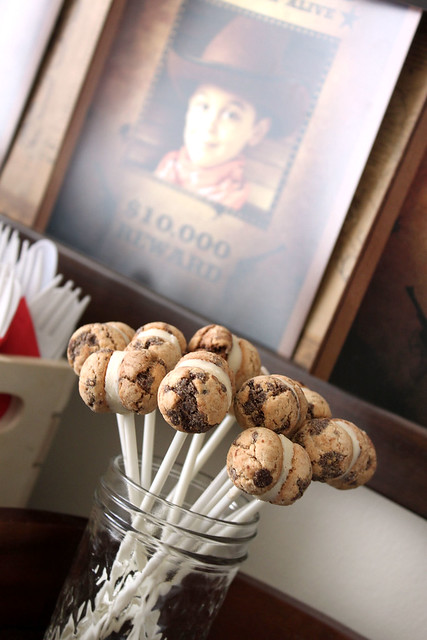
Tiny cookies, leftover icing, and lollipop sticks.  Who knew they'd make the perfect rustic treat?

yee-haw! my nephew is 5.

yee-haw! my nephew is 5.

yee-haw! my nephew is 5.

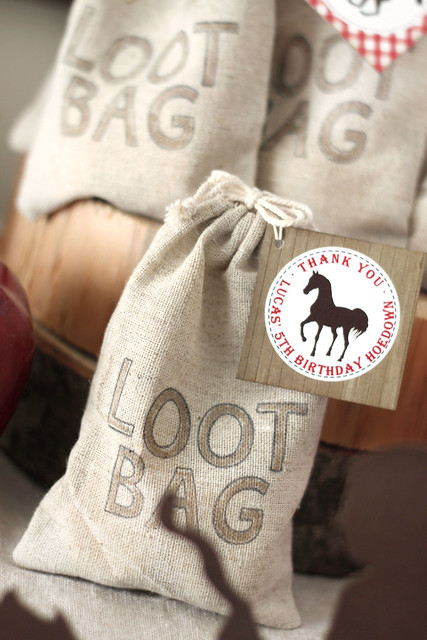
The cowboys on either side of the banner were cut using the silhouette cameo, and I also contributed these bags full of coin:

yee-haw! my nephew is 5.

I used lawn fawn alphas to stamp the words onto muslin bags.  Stamping on plain bags is a great way to personalize them!

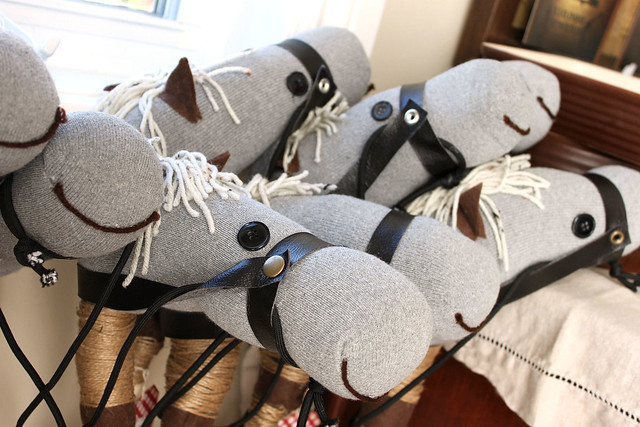
Along with their bags of loot, the birthday guests each took home one of these:

yee-haw! my nephew is 5.

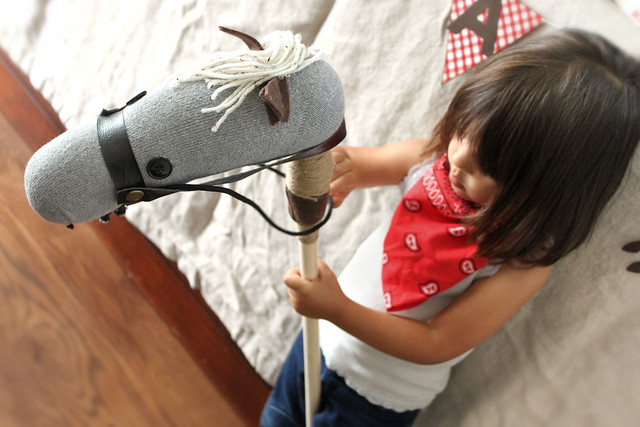
Aren't they cute, with their yarn-y smiles?  And, speaking of cute.... my cowgirl niece:

yee-haw! my nephew is 5.

We had a great time planning and styling this party!  I hope you liked it, and happy birthday to the sweet boy who made me an auntie for the first time.

yee-haw! my nephew is 5.

♥.
Monday, August 19, 2013

it's noel, dearie.
not quite, I know.  we're heading into another mini heatwave this week, and it feels weird to post Christmas tags, but that's how the crafty bug hit this weekend!

it's noel, dearie.

Our lawnscaping challenge is distressing - use distress inks or markers for your project.

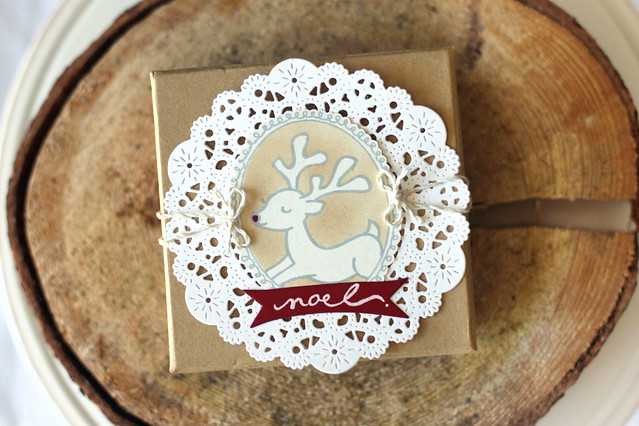
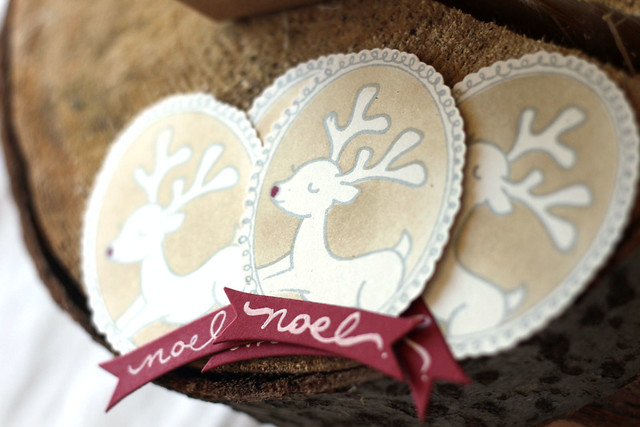
I created a little set of reindeer tags, using lawn fawn's critters in the snow.

it's noel, dearie.

They came together very quickly, since the reindeer isn't colored at all.  Here are the steps:

  1. stamp the frame
  2. mask the outside of the frame, and stamp the reindeer inside
  3. mask the reindeer and rub antique linen distress ink to fill the frame
  4. remove the masks and smile
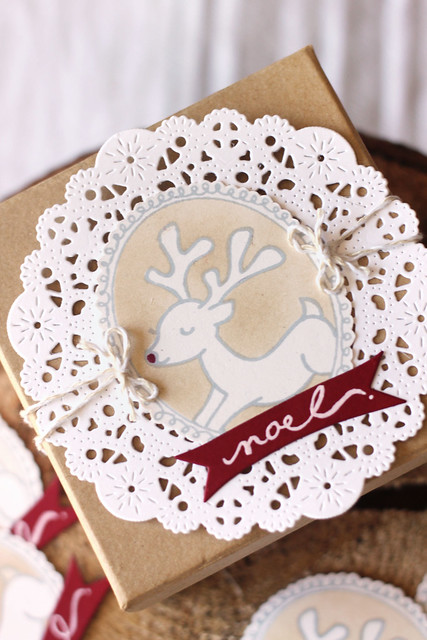
  5. hand cut the frame, add the red to rudolph's nose and handwrite "noel" onto a die-cut banner.
it's noel, dearie.

They're a bit vintage, and a whole lot of sweet.

Add a doily and some twine to make it an extra special christmas package.

it's noel, dearie.


I hope you enter our lawnscaping challenge!  You could win a prize from our sponsor, lawn fawn!


I'm also entering these tags into the following challenges:


moxie fab world: holiday gift tag challenge

festive friday: FFC15


Thanks for stopping by ♥.

Friday, August 16, 2013

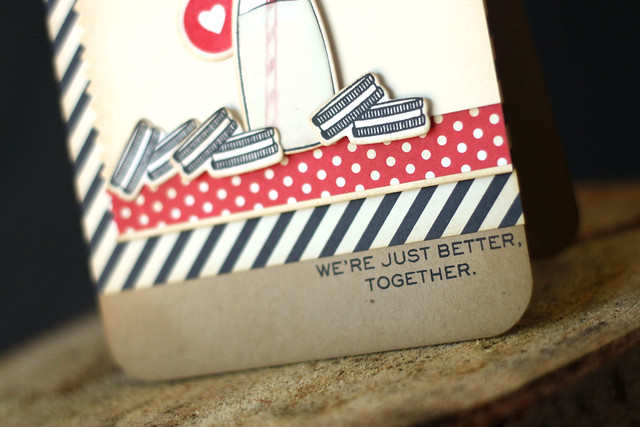
we're better together.

a just for fun card, to celebrate the end of a long week.

we're better together.


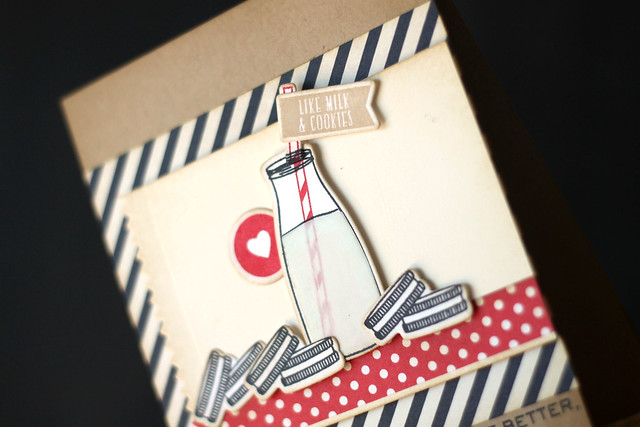
I'm still trying to make my way through my small pile of uninked stamps... I just love these wplus9 images!  If you own this set (milk & cookies), how do you attach the straw?  It doesn't take much to confuse me (sigh) but I tried the following:


  1. I die-cut the straw and laid it on top of the jar, but something about it looked unnatural and weird to me...
  2. I stamped the straw into the milk bottle, but since the milk bottle was already die cut, I didn't have the top half sticking out.
I settled on this:

we're better together.

odd? or acceptable?  I stamped the straw into the milk bottle and then stamped it again onto its own die-cut.  Then, I lined it up (although the camera angle makes it look a little off, grrr....) and cut off the bottom excess.  I'm not sure how I feel about that.

But, I do love me some milky vellum.  I stamped the milk bottle onto vellum, and trimmed it just inside the black outline.  I used a white paint marker to color the back of the vellum.  (bonus: having colored the vellum, I could use glue to adhere it without it showing through!)

we're better together.

Happy weekend!

♥.